Ever tried to capture what's on your Mac screen? It seems simple enough, right? Just click a button and voila – instant recording. But if you've ever actually attempted it, you know it's not always that straightforward.
Maybe you need to record a presentation with your voiceover or capture a bug to show your IT department. Perhaps you're trying to save a crucial moment from your favorite game. Whatever the reason, when you Google "how to screen record on Mac," you're hit with a barrage of options, methods, and tools. It's overwhelming, to say the least.
Here's the thing: Apple has built-in tools for screen recording, but they're not always obvious or intuitive. And sometimes, they're just not enough for what you need to do. So to make sure you're good, we're going to walk you through everything – from the basic built-in options to advanced third-party solutions. By the time you're done reading, you'll be able to capture anything on your Mac screen, with or without audio, exactly the way you need it.
How to Screen Record on Mac: Quicktime Version
Let’s start with the basics. Follow these simple steps to record your screen.
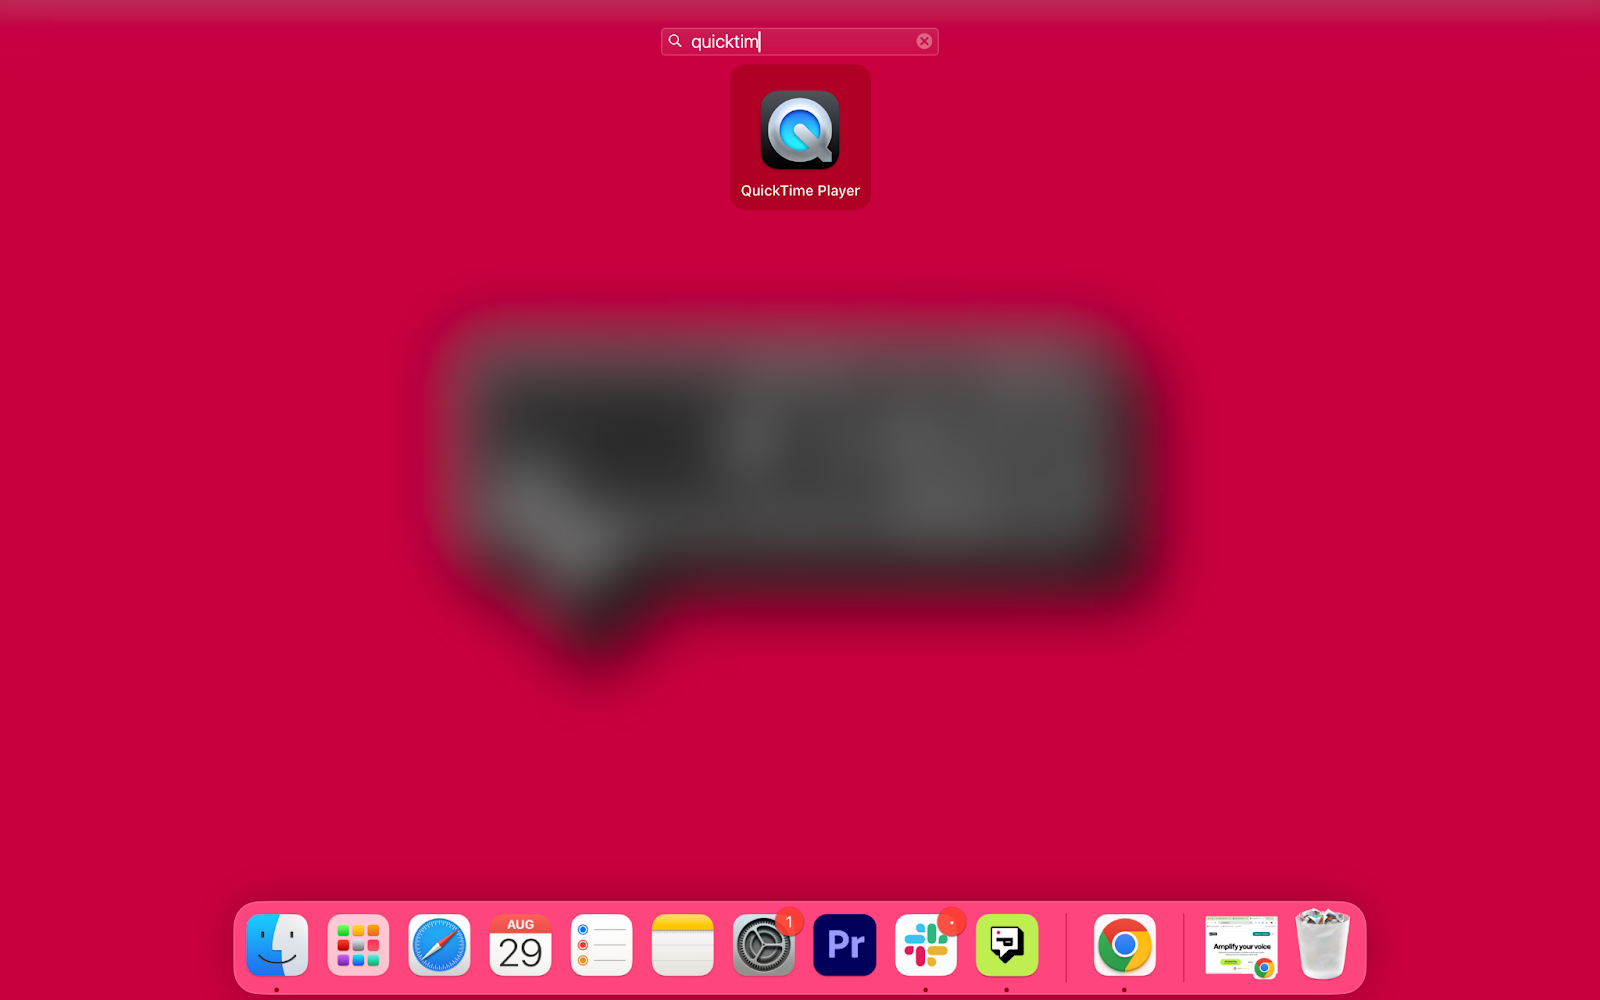
1) Find and open QuickTime
Search for QuickTime in your Launchpad and open it. The easiest way to screen record on MacBook is with Quicktime, the video recording software that automatically comes with your Mac.
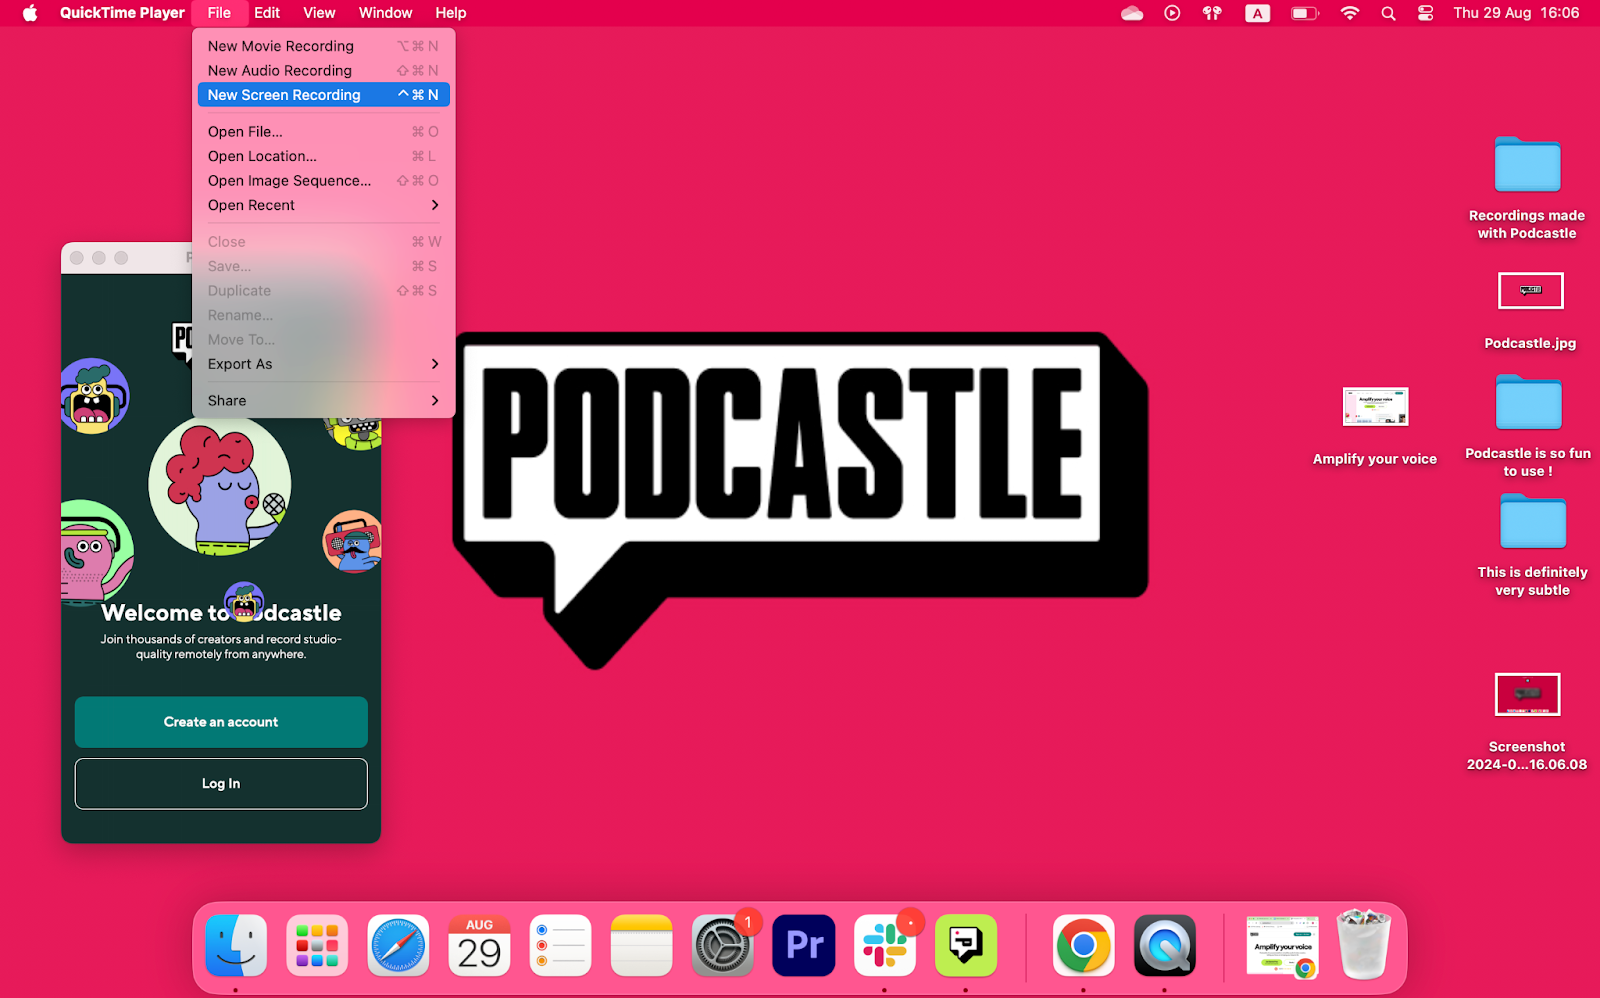
2) Start a recording
On your Mac, choose File > New Screen Recording or simply go with the ^ Command N shortcut. This will open the QuickTime recording options.
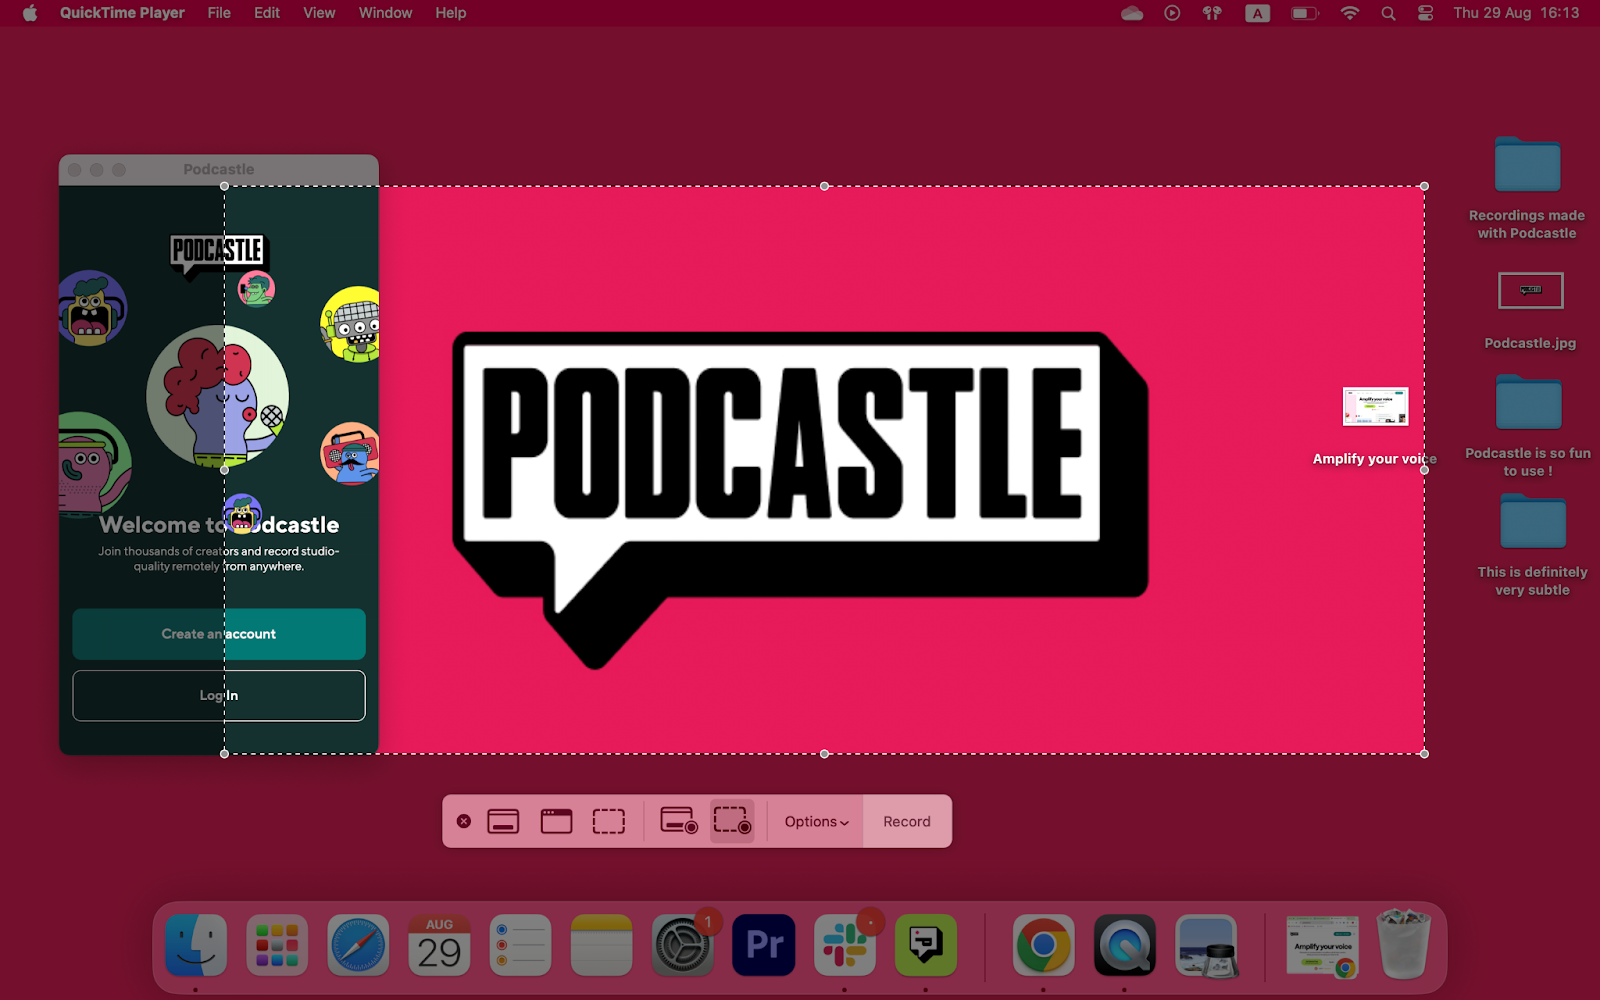
3) Choose your recording options
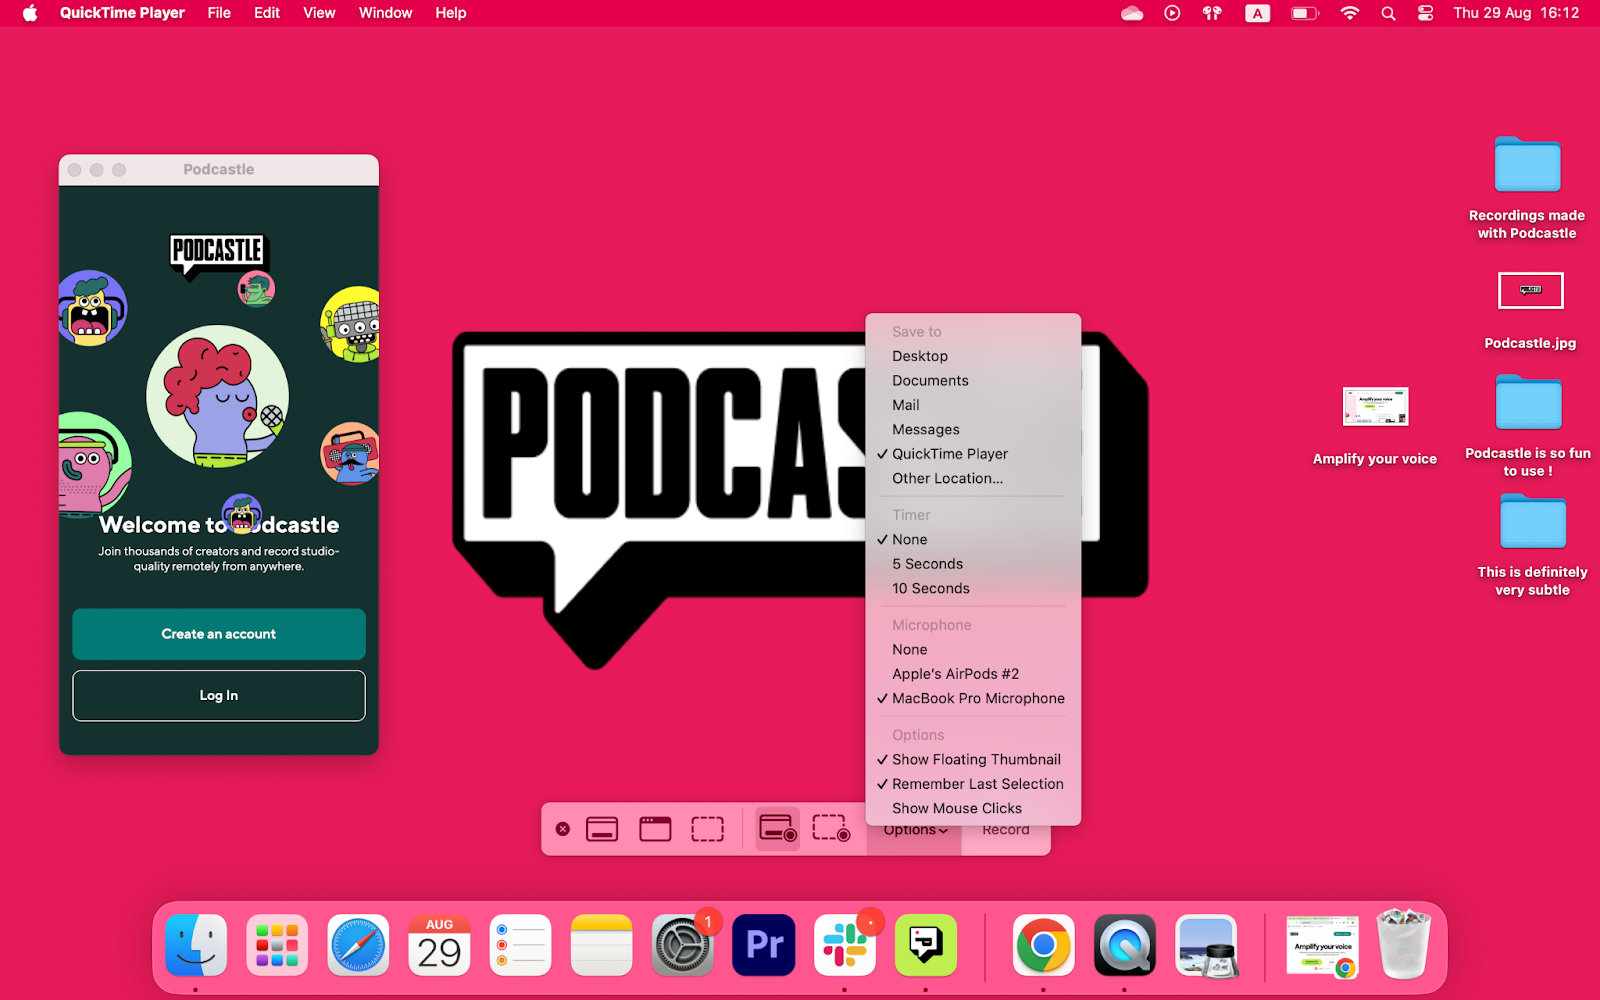
QuickTime allows you to configure your screen recording options. Choose whether you want to record just a part of your screen, just one window, or your entire screen, and press record.
4) Stop your recording and locate it
How to end screen record on Mac? Just click on the Stop icon on your screen, and you’re done! But where do screen recordings go on mac? QuickTime, by default saves your recordings on the desktop, but you can configure those settings by choosing a different folder in the Options before you start recording. Otherwise, it will be stored right on your desktop.
Bonus Tip: How to screen record with audio on Mac?
By the way, if you want to screen record Mac with audio, all you need to do is configure the settings in the Options menu before you start the recording. To record Mac screen and audio, choose the MacBook microphone or external mic if available from your Microphone options, and your recording will be saved with audio.
As you can see, macbook screen recording is pretty easy. But what if you just want a simple screenshot and don’t need an entire video for that? We have you covered there, too!
How to take a screenshot on Mac?
To take a screenshot on a Mac, use the following shortcuts:
1) Capture Your Entire Screen

Want to grab everything on your screen? Just press Shift + Command + 3. If you see a little thumbnail pop up in the corner, click it to edit, or just let it save directly to your desktop.
2) Select a Portion of the Screen

Need a specific area? Hit Shift + Command + 4. Your cursor will turn into a crosshair—simply click and drag to highlight what you want. If you change your mind, press the Esc key to cancel. Release your mouse to take the shot!
3) Screenshot a Window or Menu

To capture a whole window or menu, open it up first, then press Shift + Command + 4 + Space bar. Your cursor will turn into a camera icon. Click on the window to snap it! Hold the Option key while clicking if you want to skip the window’s shadow. Just like before, edit the thumbnail if it pops up or let it save to your desktop.
How to Screen Record on Mac Without QuickTime?
If you’re looking for an online tool to screen capture your Mac, Podcastle is the simplest option out there. Aside from being an easy screen recorder, Podcastle is able to enhance your audio and video quality with AI features that remove background noise and upscale video resolution, so if you also want to include webcam footage in your Mac video screen capture, then this is definitely the way to go.
Here is how to screen record with Podcastle in three simple steps:
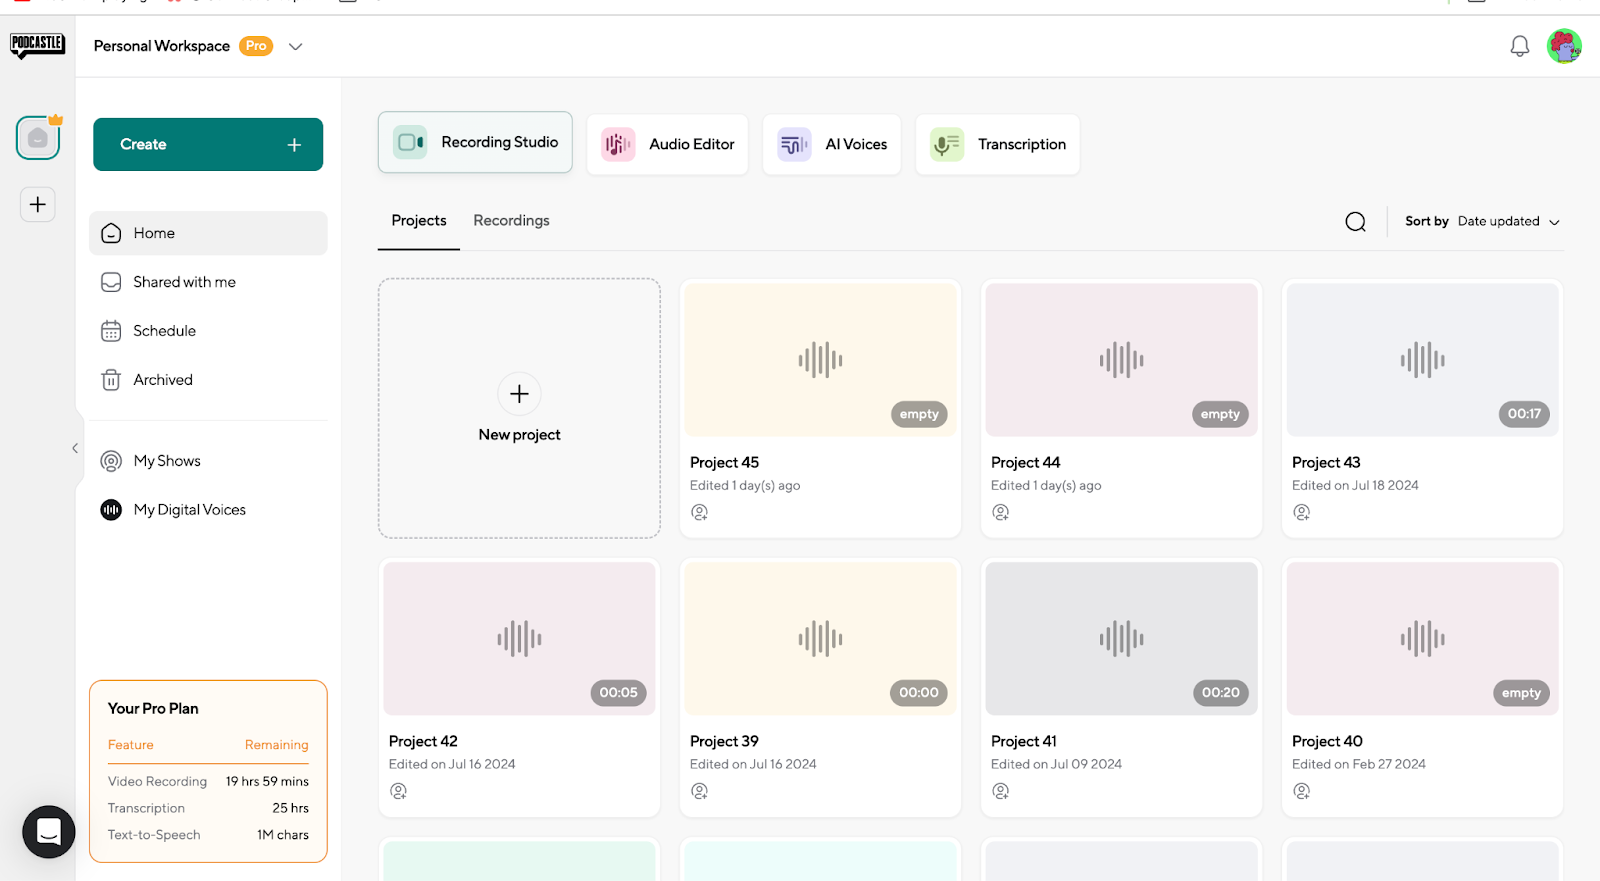
1) Start a new project
Once logged in to Podcastle, go straight to the Recording Studio to start your screen recording.
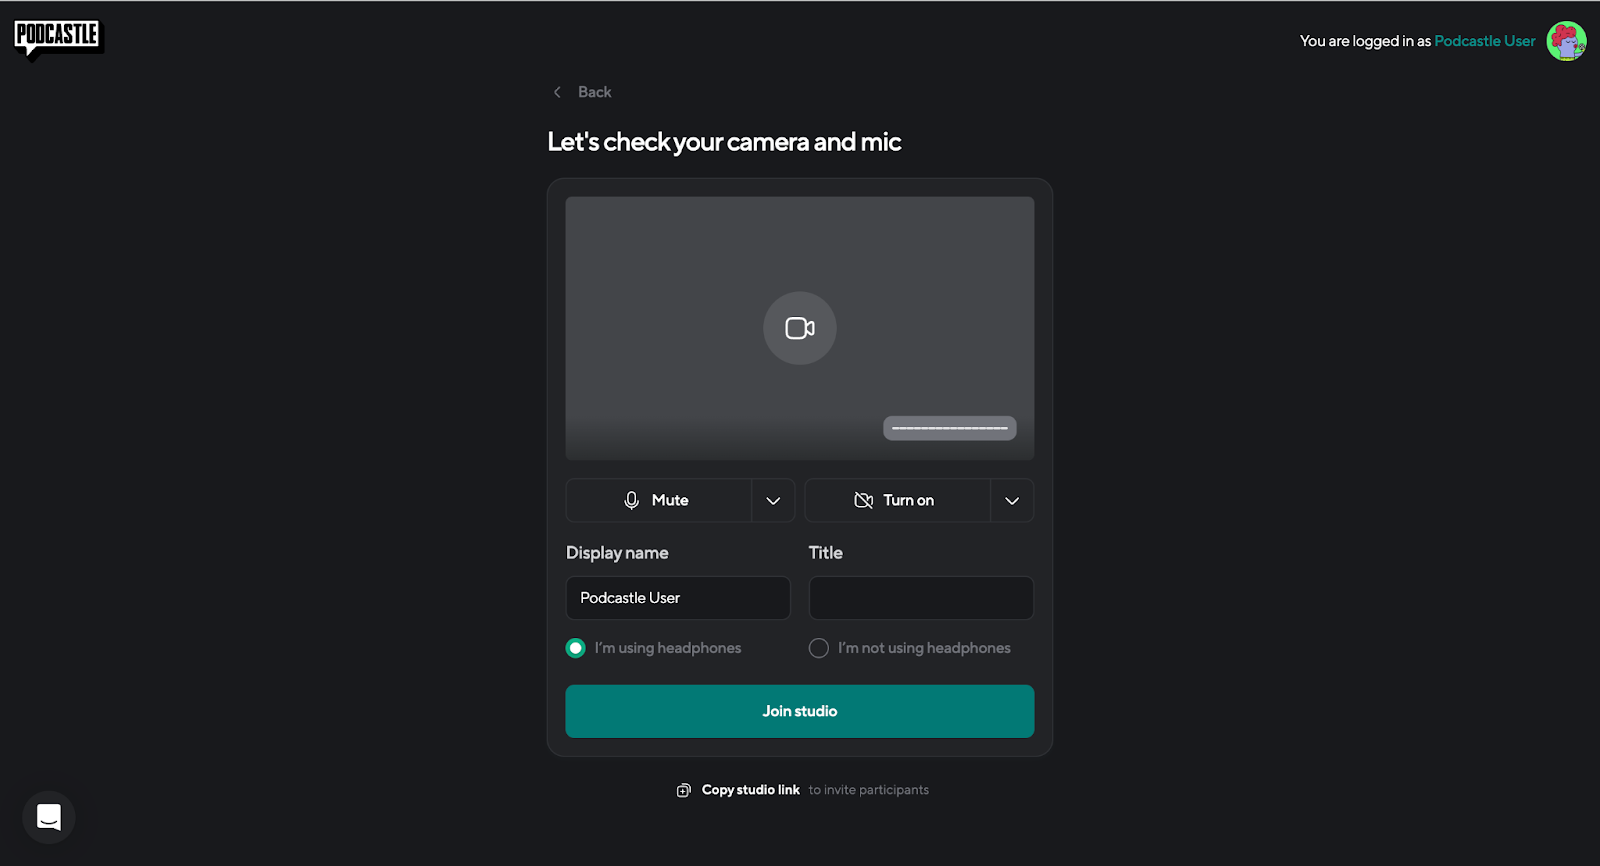
From here, choose the video recording option and configure your settings. Give a title to your recording, toggle one of the headphone options, and invite guests if you have any.
2) Choose the screen share option in your recording
When you’re forwarded to your recording studio, click on the Screen share option on your lower panel. Choose how you want your Mac video screen capture to look (entire screen, one window, etc.), and that’s it. You’re set for your recording! If you want your final video to include your webcam recording, keep your video settings on and hit Record.

3) Edit and export
Once your Mac video recording is done, you can start editing it online with Podcastle’s video editor. It’s all very simple and easy.
Enhance your video quality
First, you can improve the quality of your webcam video recording by applying Podcastle’s video enhancer.
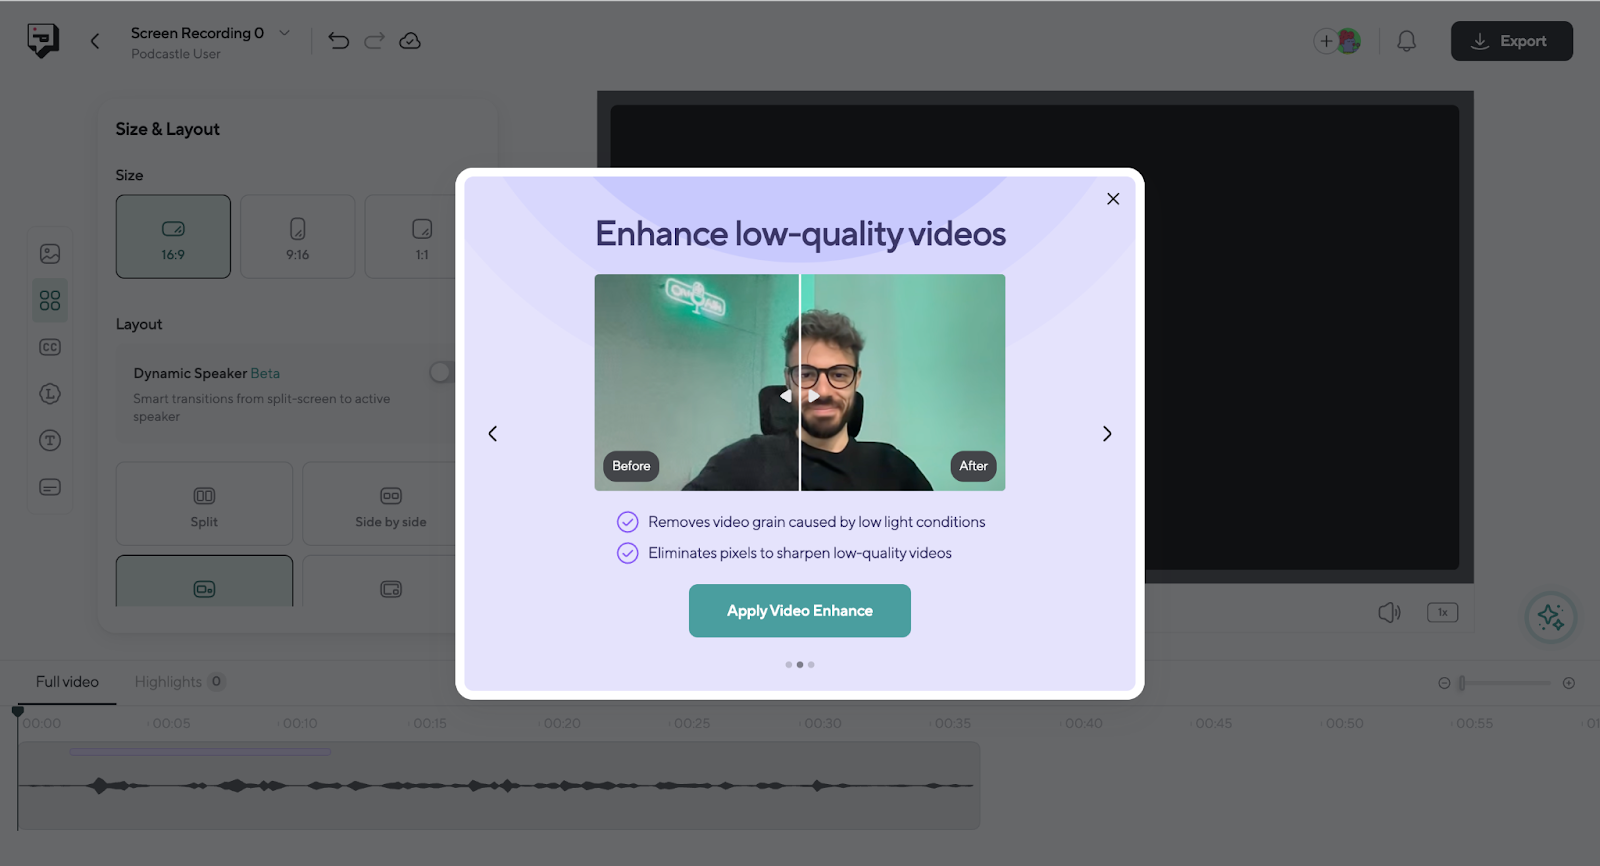
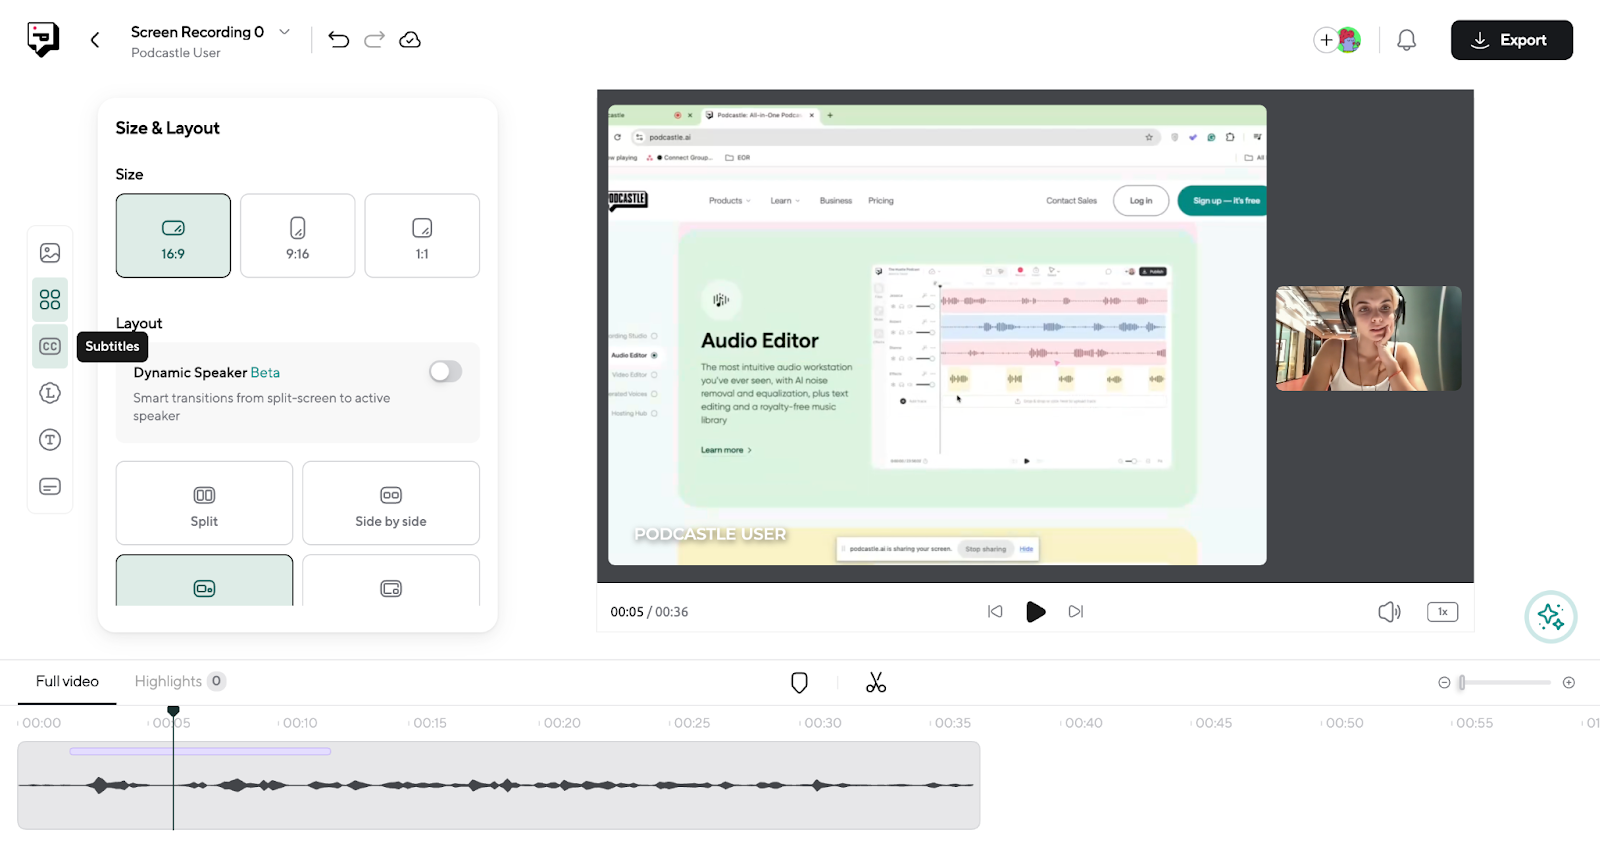
Change your video size and layout
Then, you can choose which layout and size you want your final video to have. We went with the default option, but you can also opt for the 9:16 size or 1:1, both of which are great for social media content. Also, you can choose where you want your webcam video to be displayed on the screen by playing around with the layout settings.
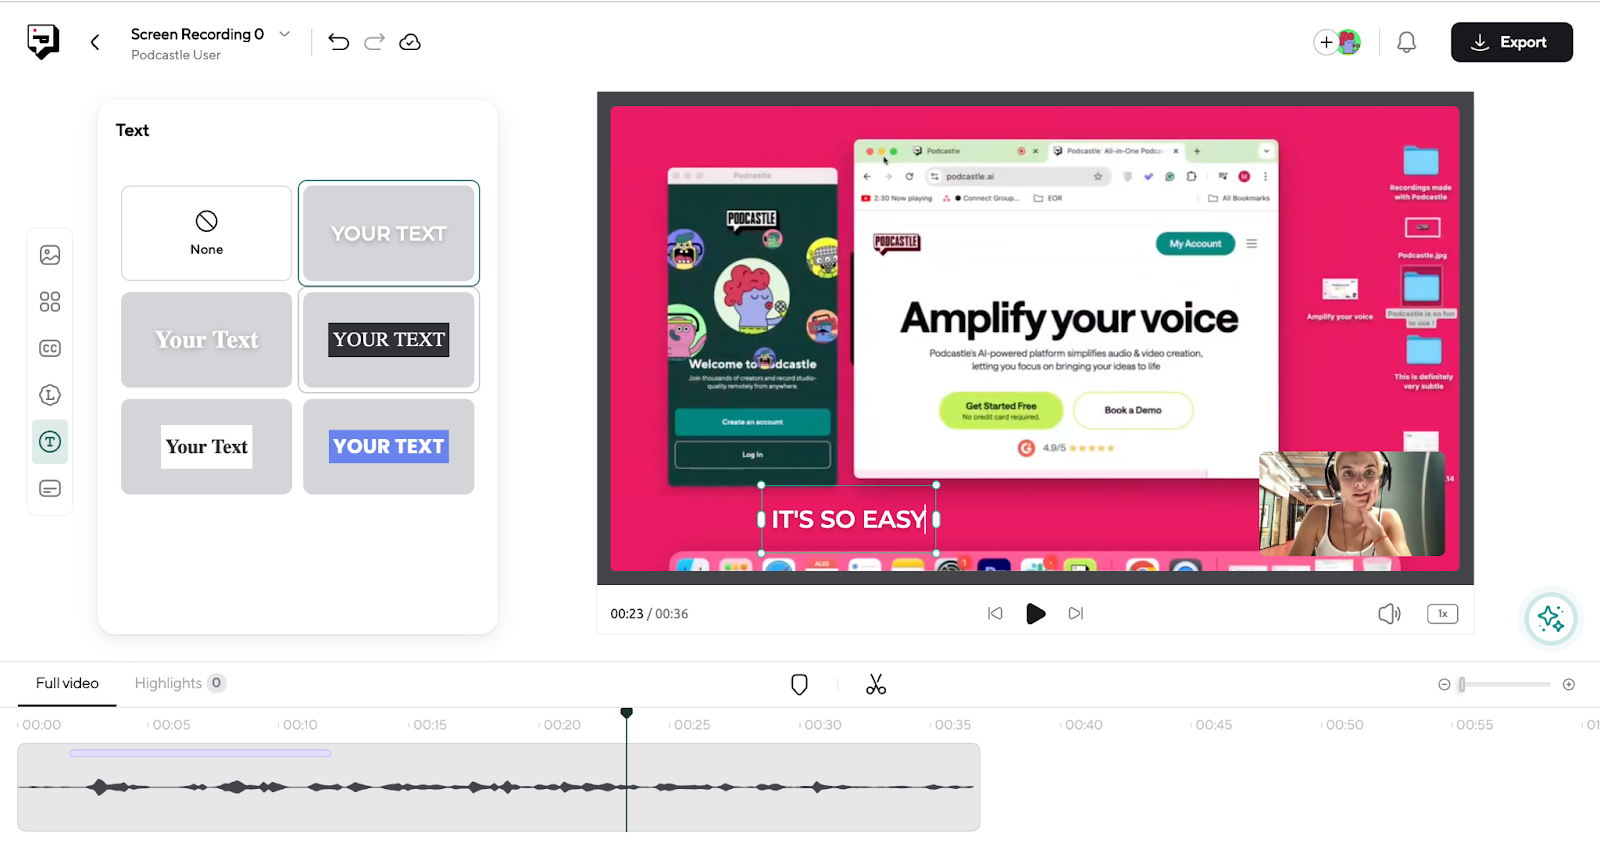
Add text, subtitles, and more
Podcastle also allows you to add branding elements by adding your logo, automatically transcribe and add captions to your video, add text, split and cut your video, and more. So, edit it to perfection and export the final file to share it with the world.
That’s pretty much it; we hope you have everything you need to screen record on Mac without having to Google it again. Happy recording!