There's no better way to show something on a device than via screen recordings (except for screen share calls). Most of the time, emails and voice recordings won't do - you need to show it. Recording tutorials, showing the solution to a problem or walking someone through a process are all excellent use cases for screen recordings.
However, one thing that can often be lacking in screen recordings is quality audio. Whether you're recording yourself or a narration, it's not always easy to get the audio just right. In this article you'll learn how to add audio to screen recordings on Apple devices.
How to Record Your Screen With Audio on iOS
To record your screen on an iPhone or iPad, you'll need to use the built-in screen recording in the Control Center of your device. This tool is made by Apple and is completely free to use. This tool is available only with versions of iOS 11 or later. Here's how to record your screen with audio on an iOS device:
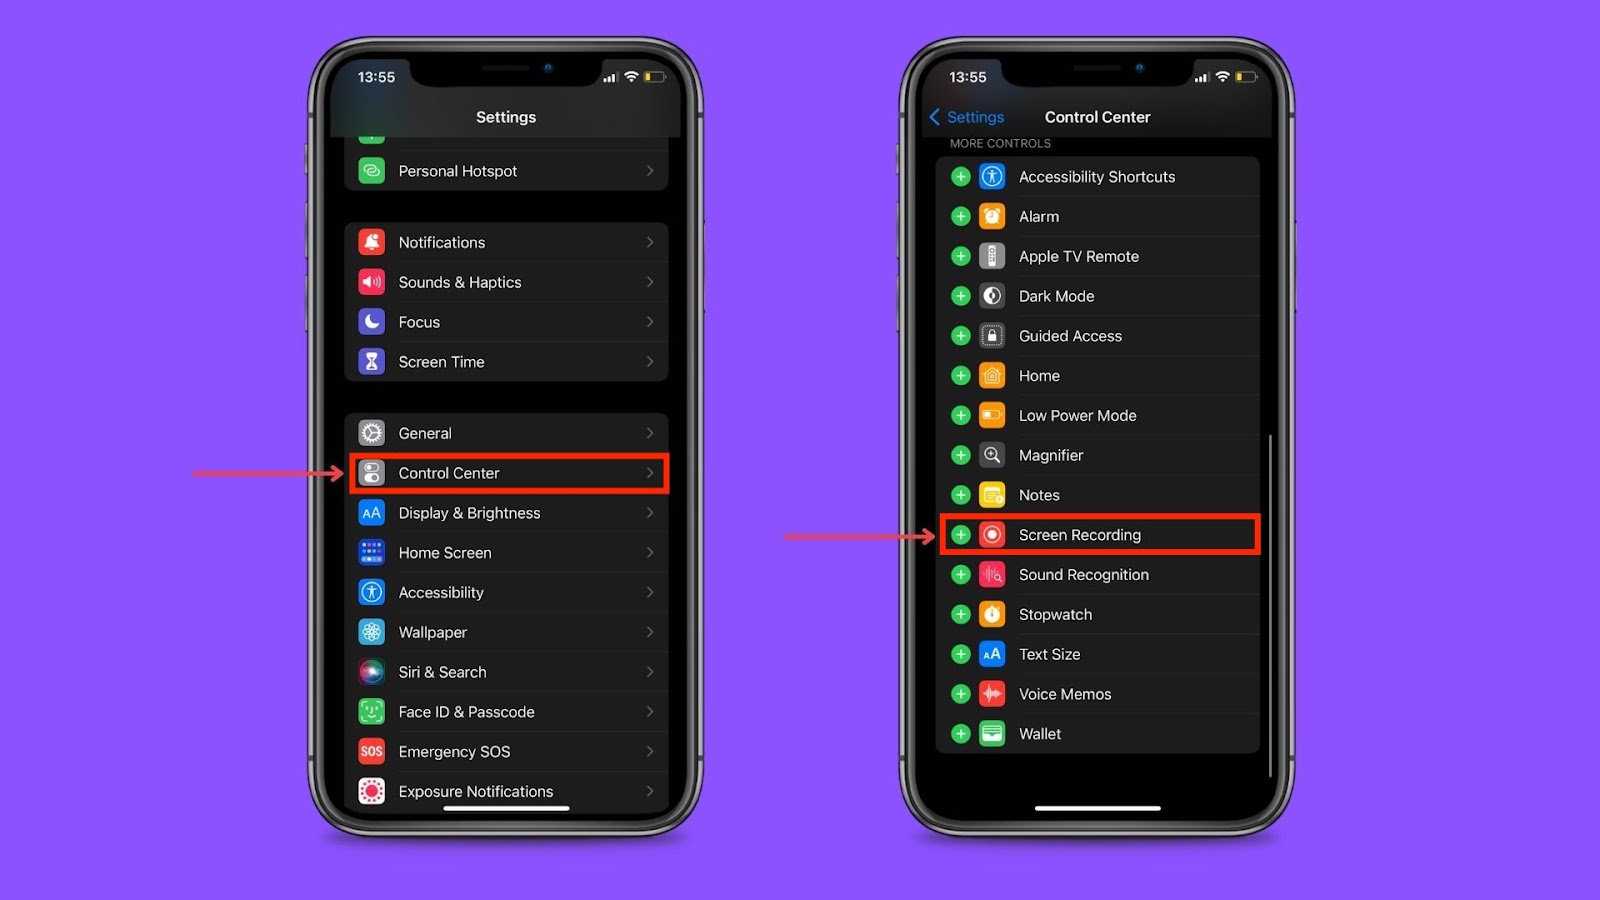
1. Open the Control Center in the Settings of your device and tap the plus (+) icon next to the Screen Recording icon to add it to your Control Center. It should be added by default, but you can check to be certain.
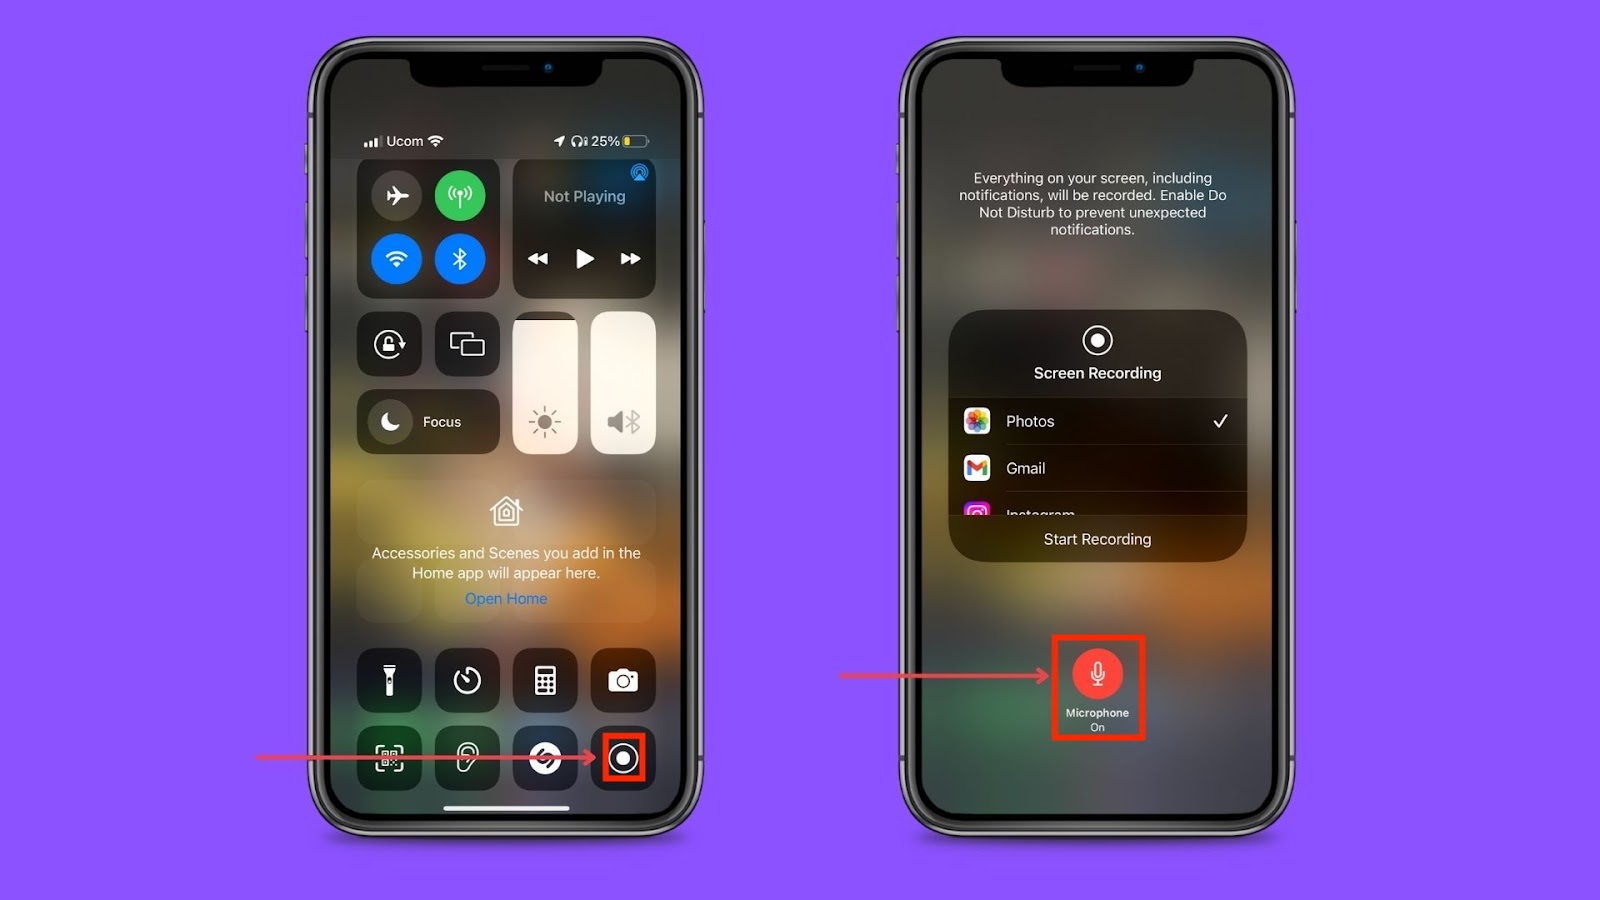
2. If you're using iPhone 12 or later models, swipe down the top-right edge of your screen to open the Control Center. For earlier iPhone models, swipe up from the bottom of the screen. Tap on the Screen Recording tool in your Control Center. Remember that the recording will also pick up internal audio (apps, web, etc.) if you have your device's ringer turned on. Turn the ringer off if you wish to exclude internal audio.
If you want the screen recording to accept external audio from the microphone as well, press and hold the Screen Recording button and turn the microphone on as shown in the picture below, and press “Start Recording.” When the recording is complete you can also choose where to export the output. It will be saved in the Photos app by default.
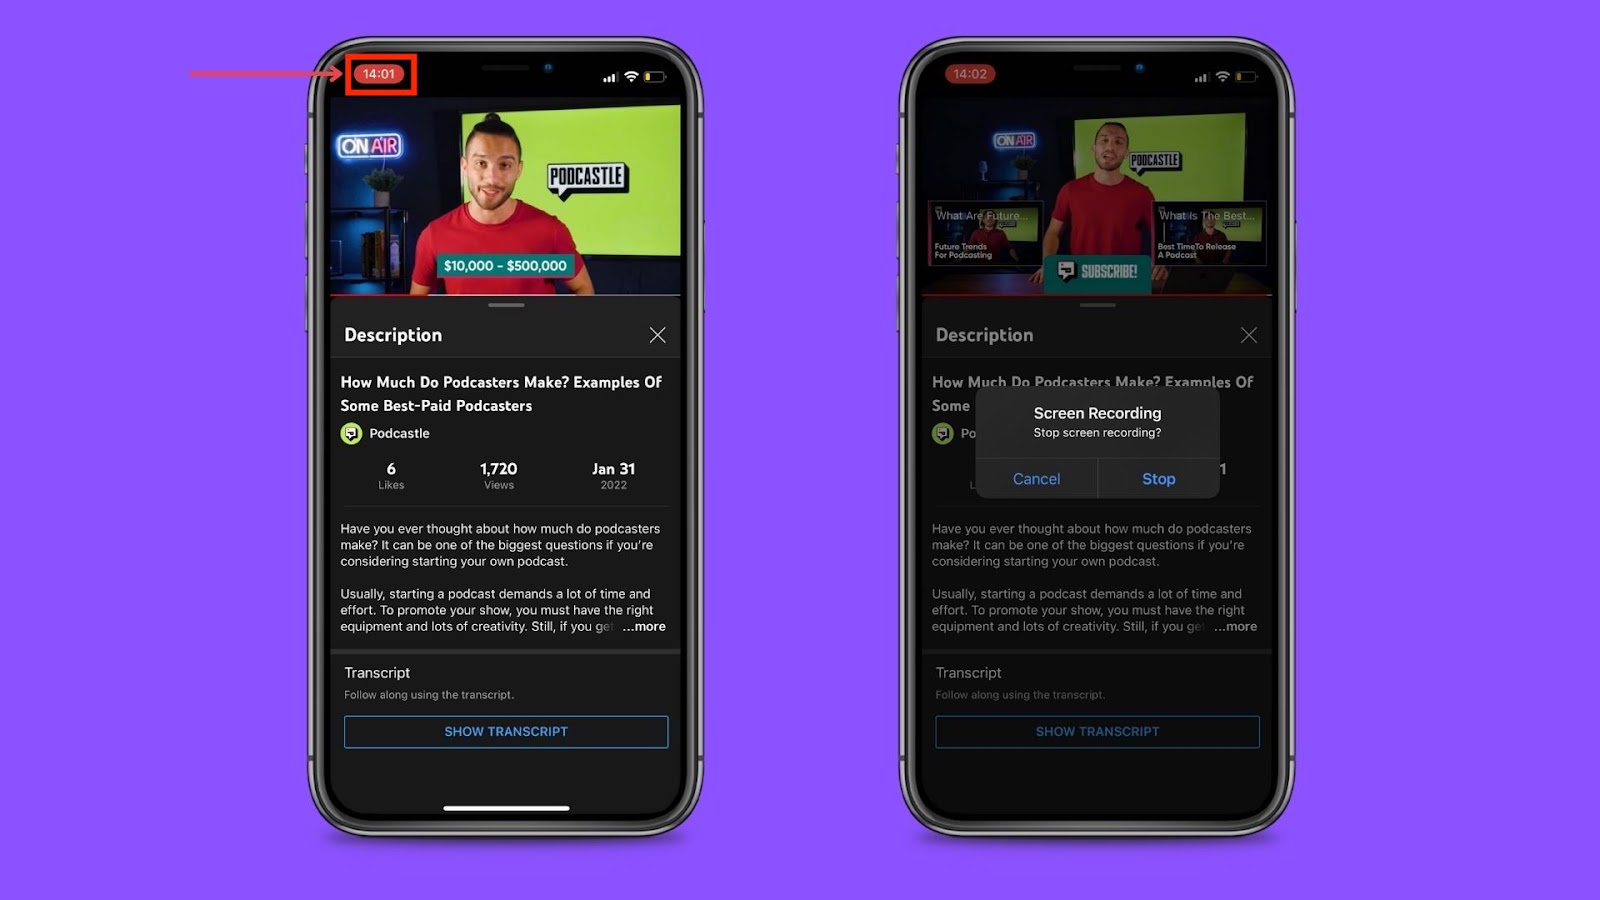
3. Your clock should now have a red background, indicating that the screen recording session is on. To end the recording, tap on the clock and tap on "Stop." Go to your Photos app and find the screen recording in the “Recent” folder.
Note: While the examples depicted are of iPhones, the process also applies to iPads.
Screen Record with QuickTime Player on macOS
If you need to capture a recording of your screen - with or without audio - on macOS, the quickest way is to use the built-in QuickTime Player app installed on all Macs. If you have deleted the software, you can always redownload it from the App Store. Sometimes re-installing Quicktime on older macOS versions can fail with a prompted error message like "Quicktime can't be installed on this disk." , you need to use a Quicktime alternative instead, such as EaseUS RecExperts to record any region of the Mac screen.
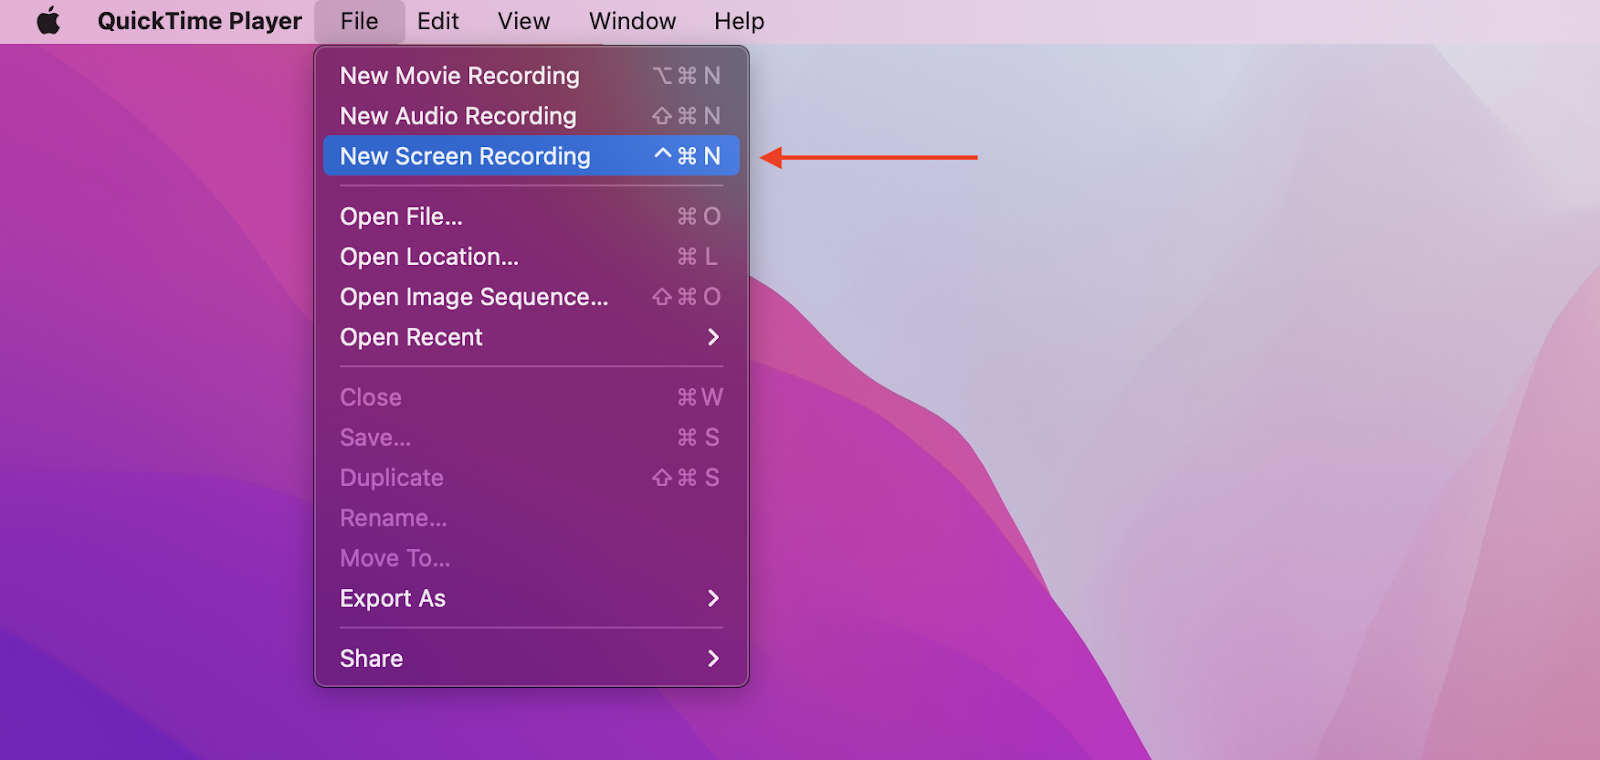
1. Open QuickTime Player and click on the "File" option on the top-left of the screen. If you can't see the options bar, hover your mouse at the top part of your screen and it will appear. Proceed to click on "New Screen Recording."
Alternatively, you can launch a new recording with shortcuts. With QuickTime Player open press Control (⌃) + Command (⌘) + N. With QuickTime Player closed, or while on other apps, press Command (⌘) + Shift (⇧) + 5.
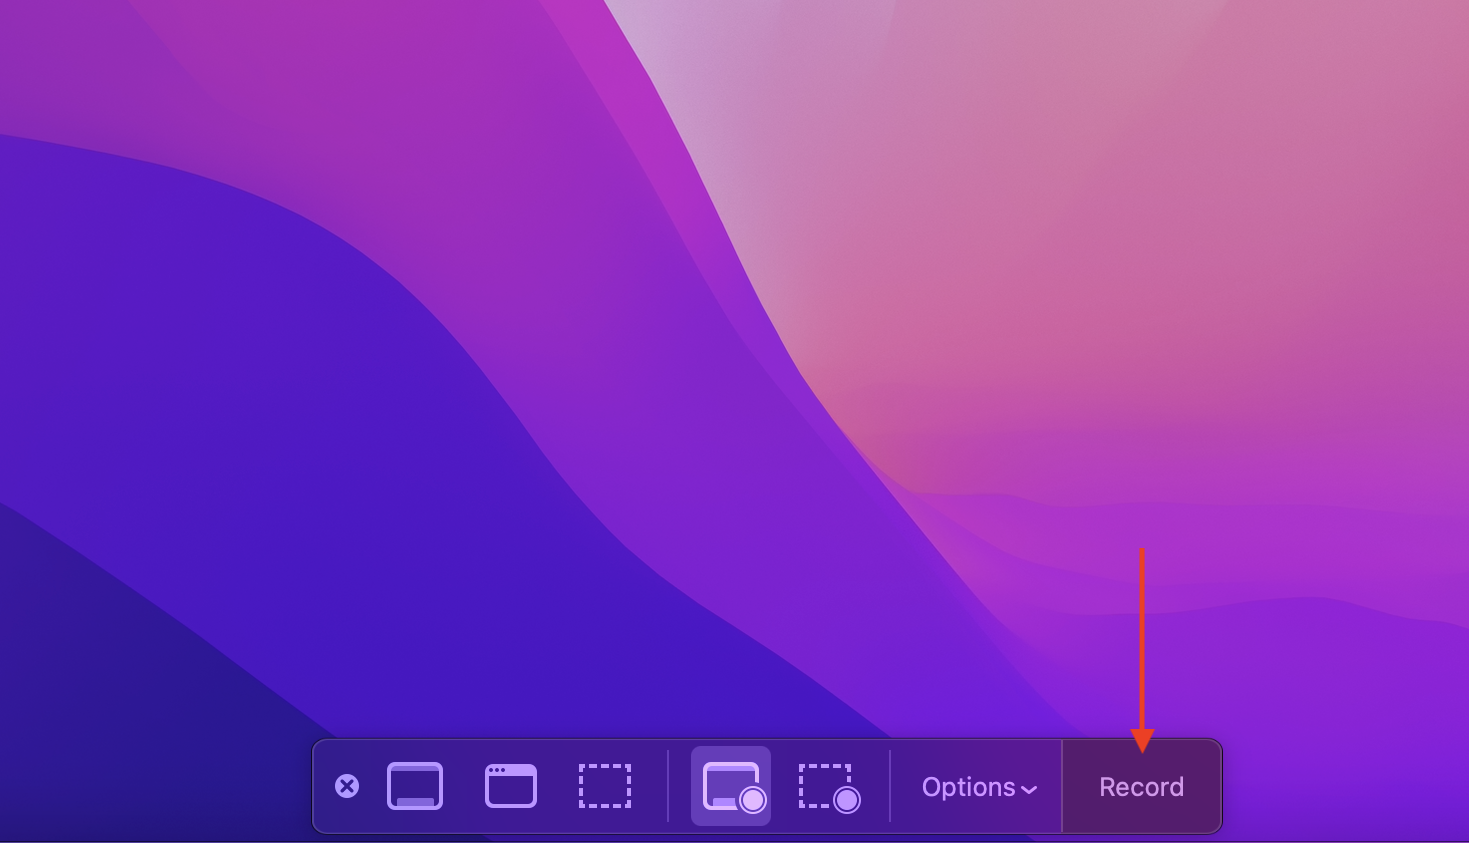
2. You should now see a control bar at the bottom of your screen. Click on "Options" to view the options menu, and configure the screen recording settings (save location, timer, microphone, and other options). Press on the "Record" button to start the screen recording session.
The control bar will also let you decide which parts of the screen you include in the frame. You can either record the entire screen or the selected portion.
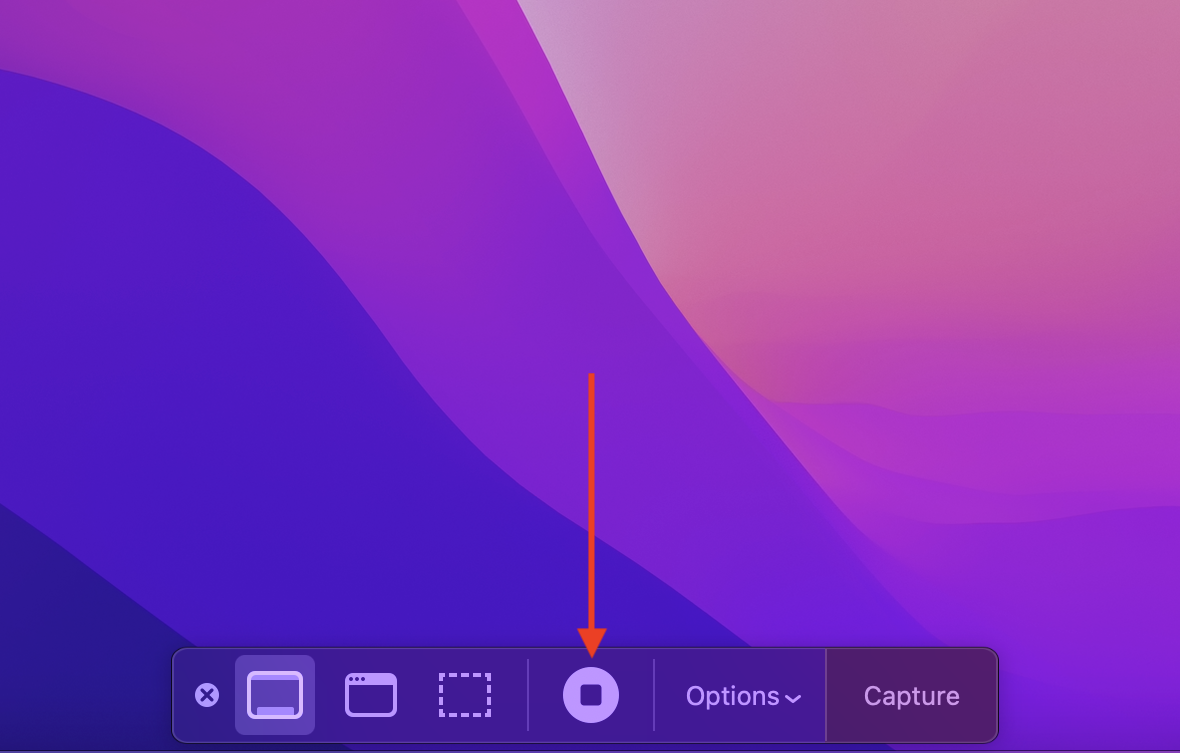
3. To finish the recording session, open the control bar by pressing Command (⌘) + Shift (⇧) + 5, and click on the “Stop” icon.
Add Polished, Professional Audio to Screen Recordings with Podcastle
Podcastle is an AI-powered audio editor that easily adds professional audio to your screen recordings. With Podcastle you can record your voiceover directly in the app or upload an existing audio file. Once uploaded you can edit and improve the sound quality without any audio production knowledge. You can also add background music and sound effects to enhance your recording.
To get started, sign up for a free account at Podcastle.ai. Next we'll show you how to record your audio on Mac and what tools you can use to get high-quality sound.
Note: To better synchronize Podcastle with your screen recording, we recommend recording your voice during the screen recording session. Make sure you turn off the audio input source in your QuickTime Player from the "Options" menu in the control bar by selecting "none" under the "Microphone" section.
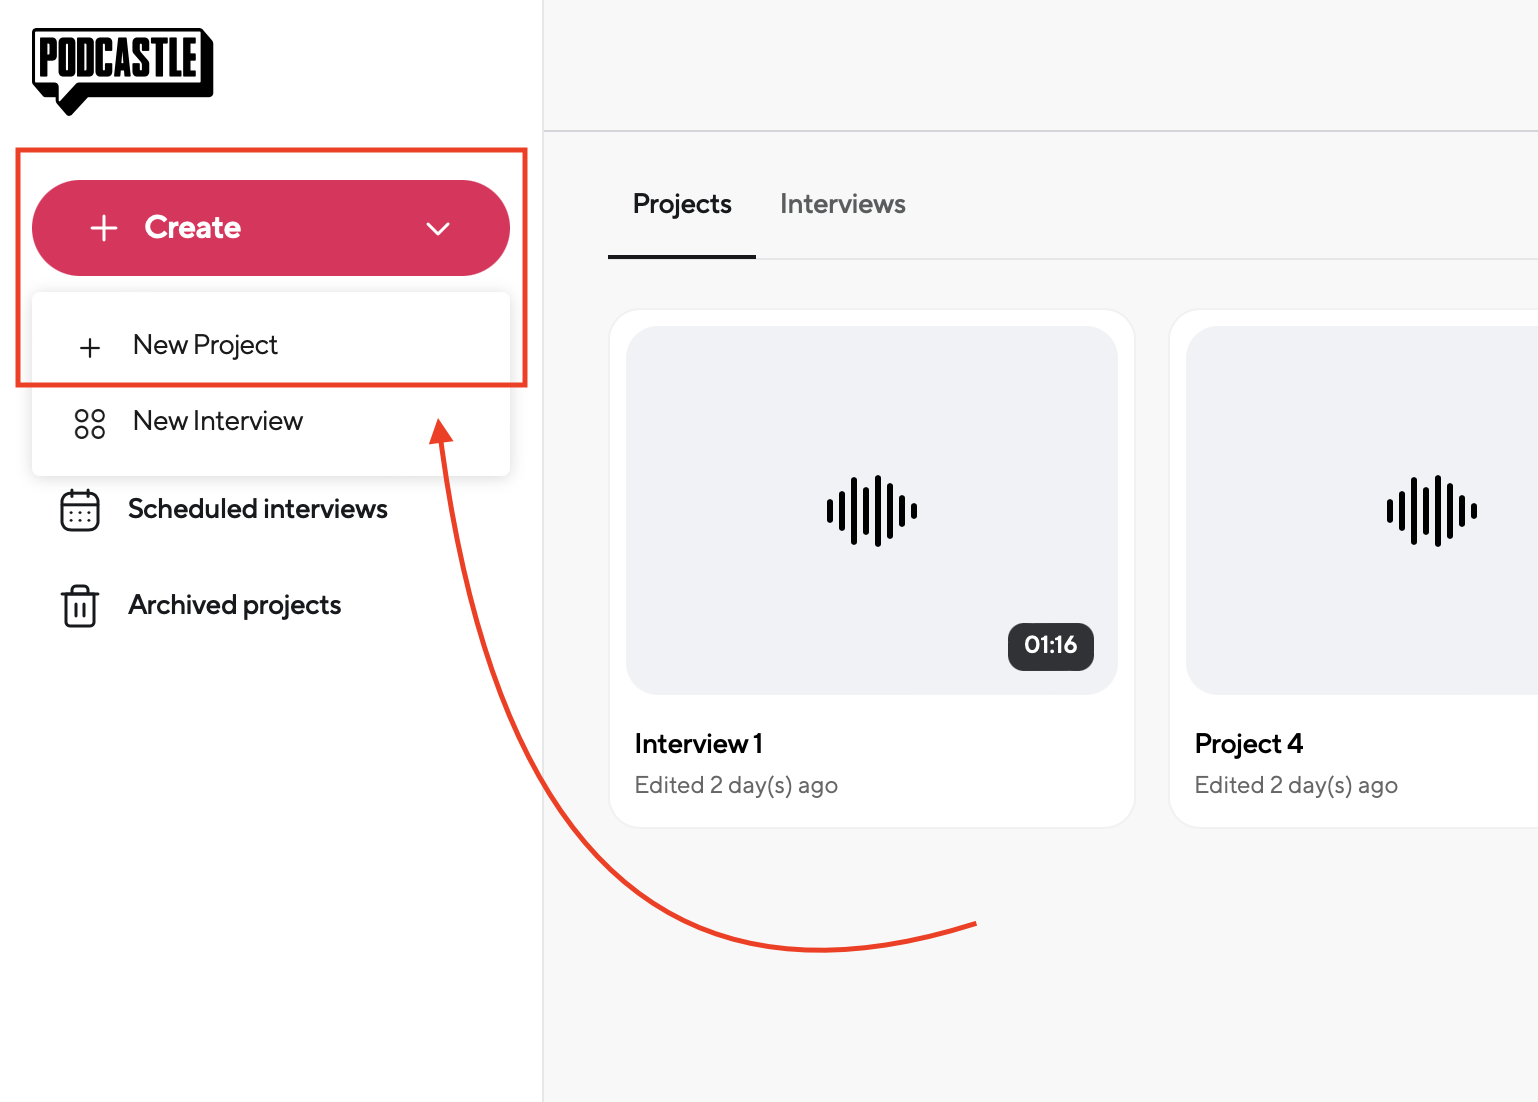
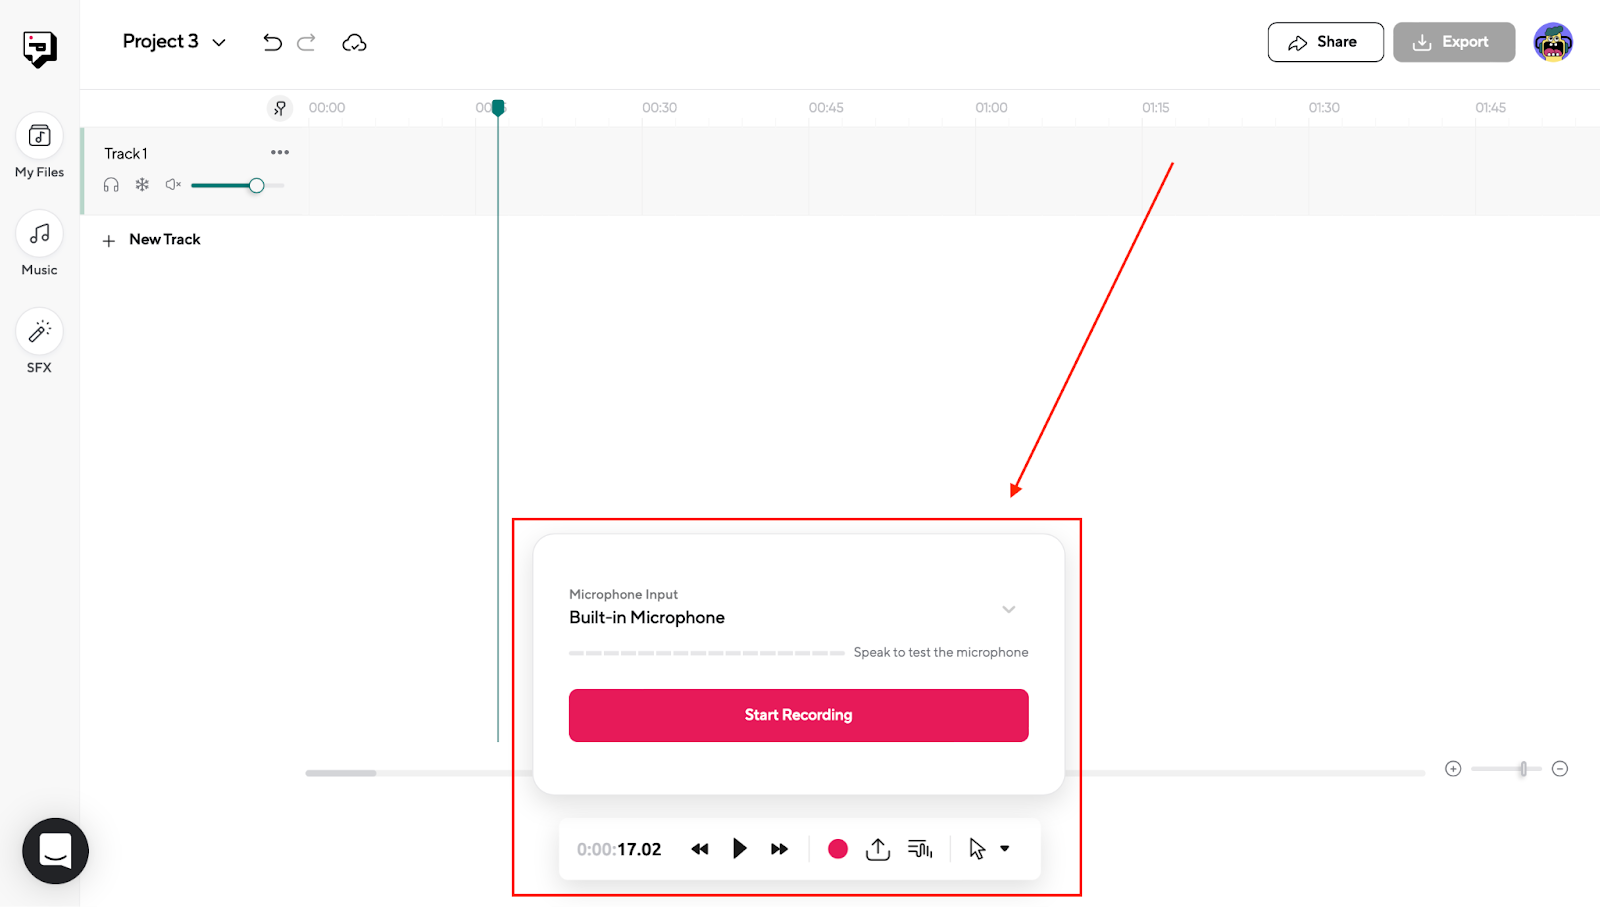
1. Open your Podcastle dashboard, click on the "Create" button and select "New Project." You will be redirected to the project dashboard, where you can record your audio and upload a file to make adjustments.
2. Click on the “Record icon” in the player menu at the bottom to start. Alternatively, you can press "Shift+R" as a shortcut. Choose your desired input source from the dropdown menu and test your microphone to ensure it registers the sound. Start recording when you're ready.
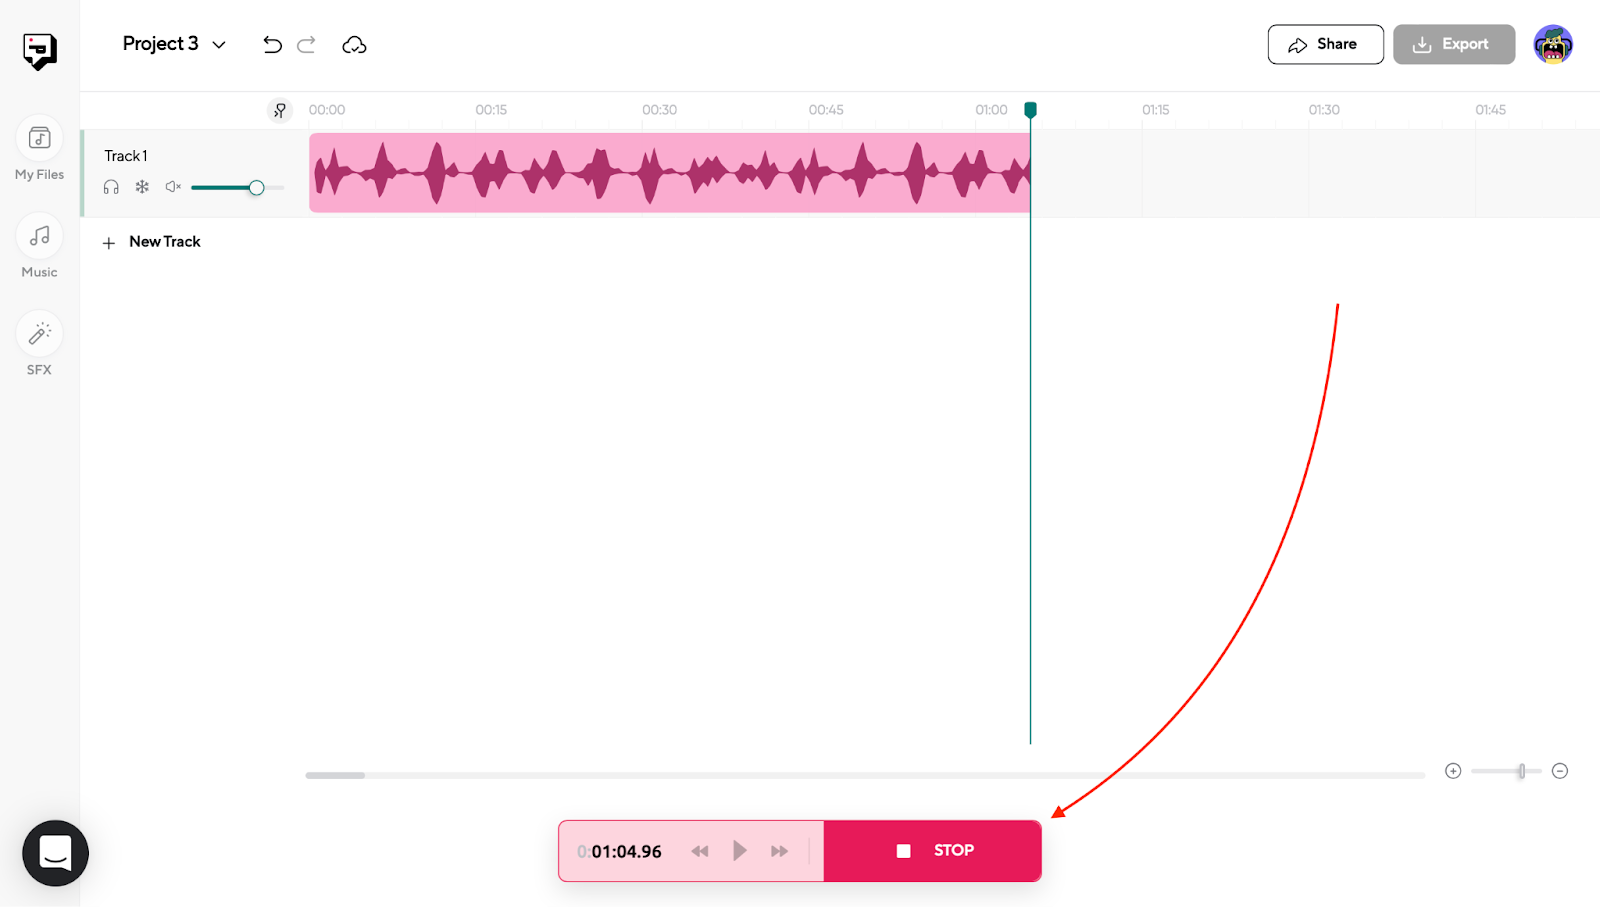
3. Once you're finished recording, press "Stop." You can now see your audio track and edit it in Podcastle. You can also continue recording or create a new audio track.
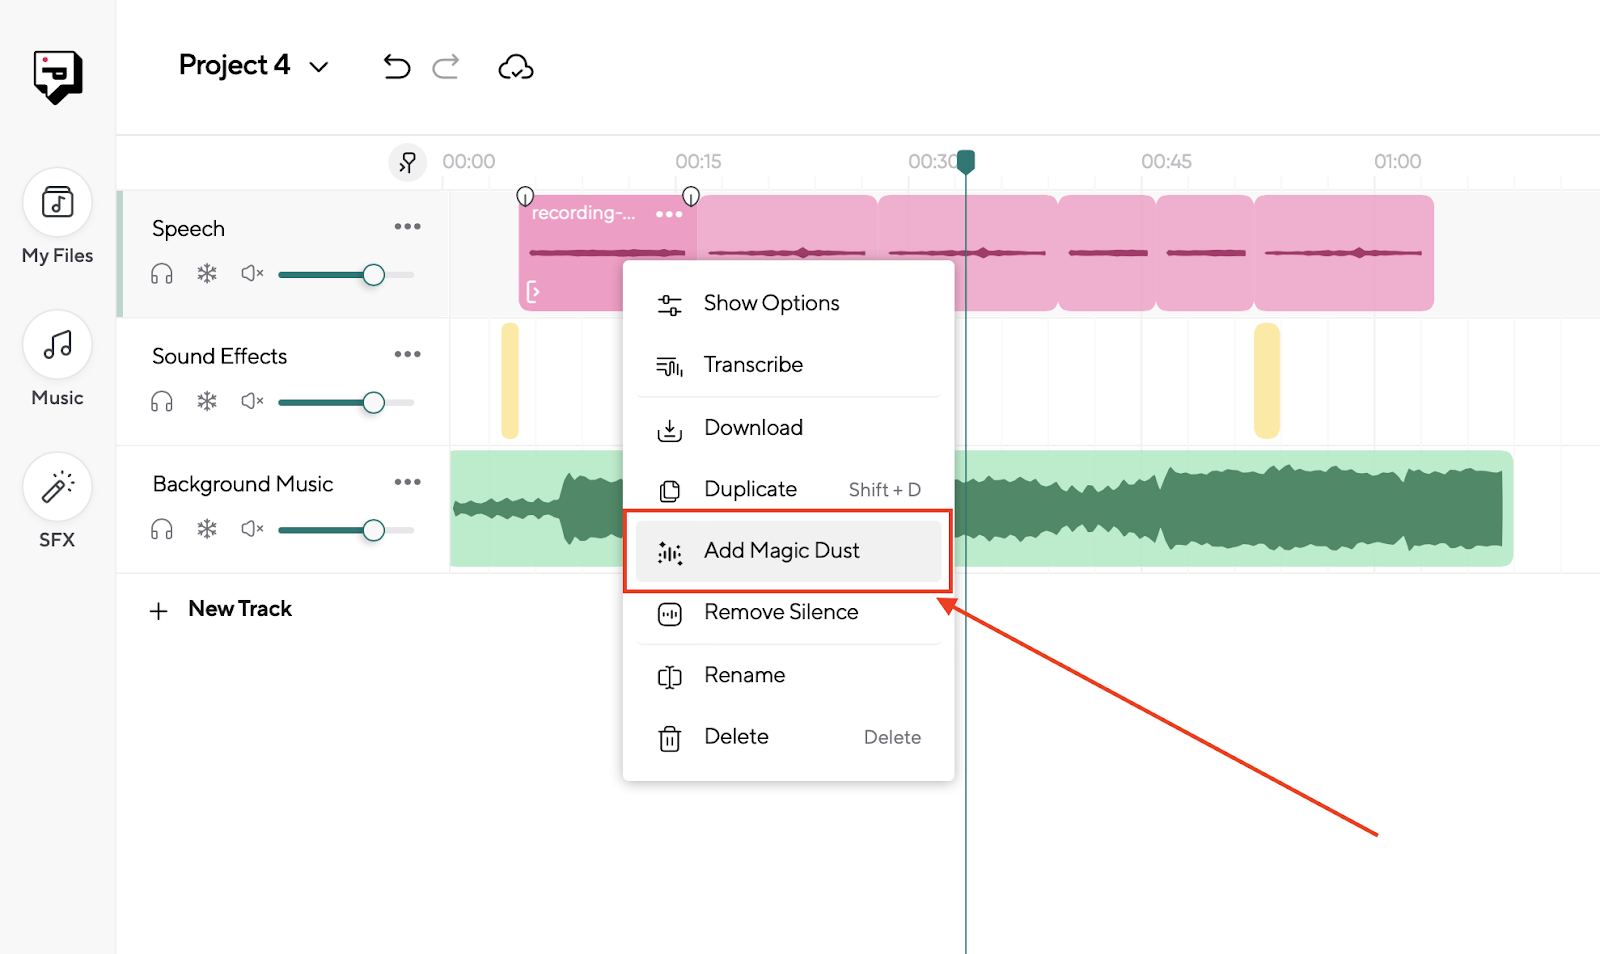
4. Use the Magic Dust feature to make your audio sound flawless instantly. To apply this feature right-click on your audio recording track and select "add Magic Dust." The feature will isolate your voice and make it stand out with excellent quality. It can remove background noise, soften loud voices, and amplify low ones.
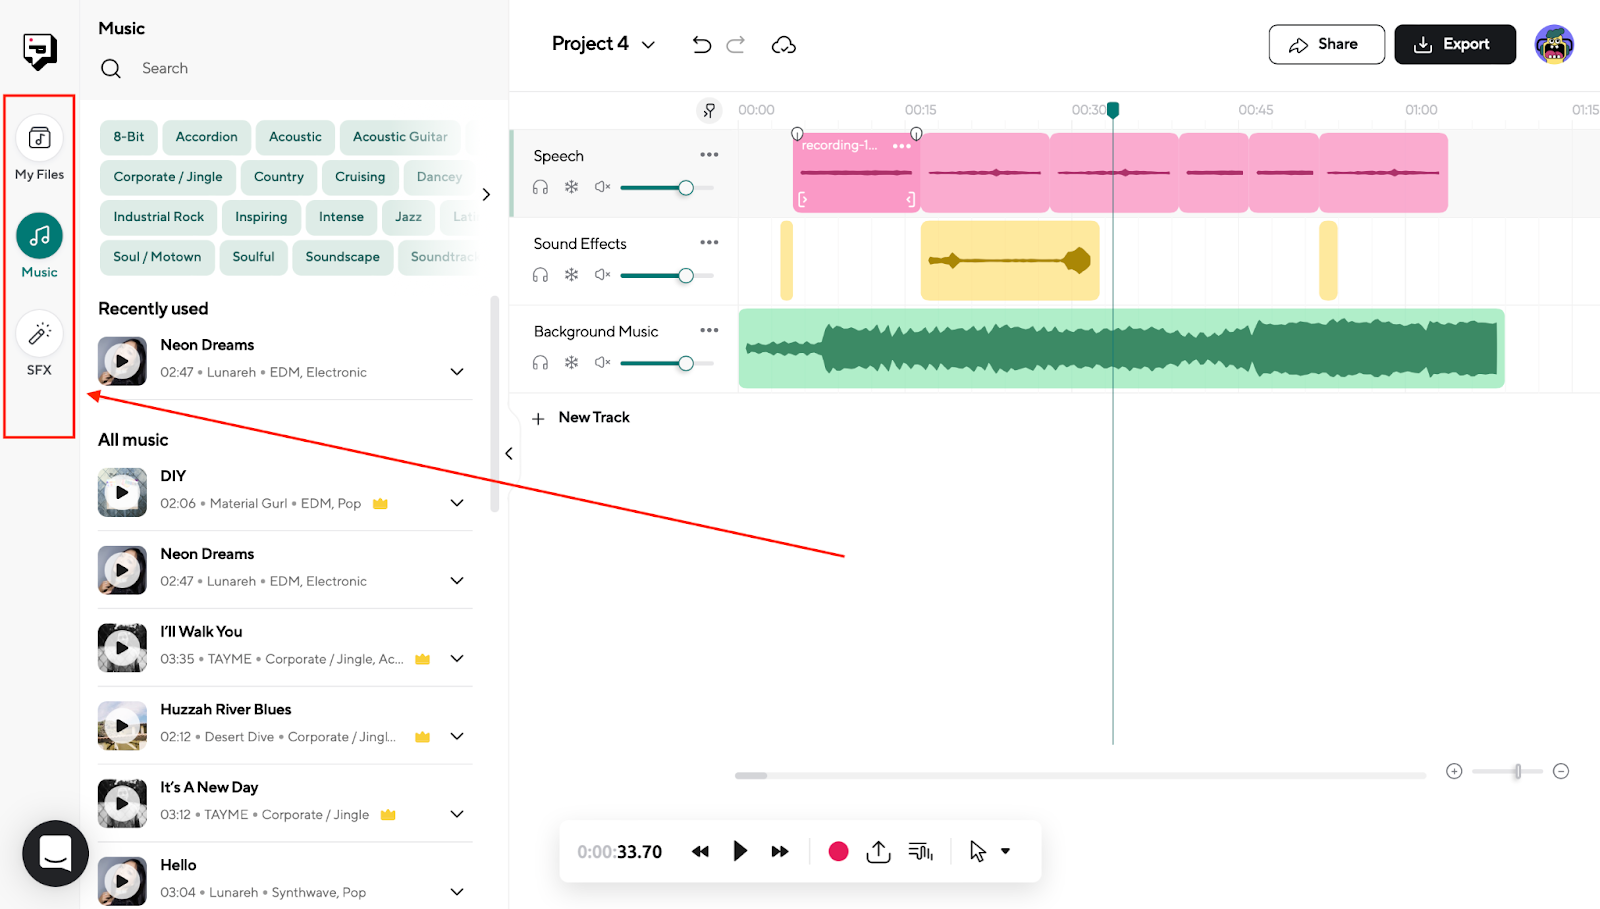
5. Add music and sound effects (SFX) to your project. Click on the icons on the left side of your screen to open a catalog of copyright-free music and SFX. You can preview them by clicking on the play icon and add them to your project. Alternatively, you can upload audio files from your Mac by dragging and dropping the files into your Podcastle project.
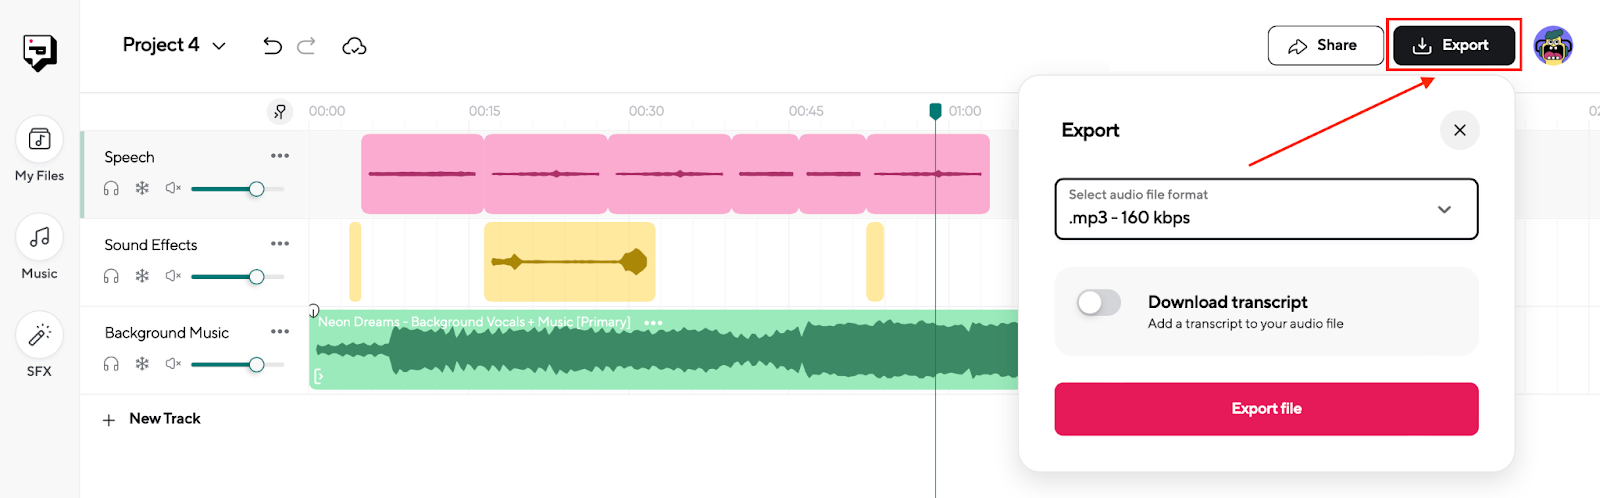
6. To export your audio file, click on the “Export” button at the top right corner, select an audio file format from the dropdown menu, toggle the “Download Transcript” button if you want the text version, and export your file.
Additional Pro Tips For Podcastle
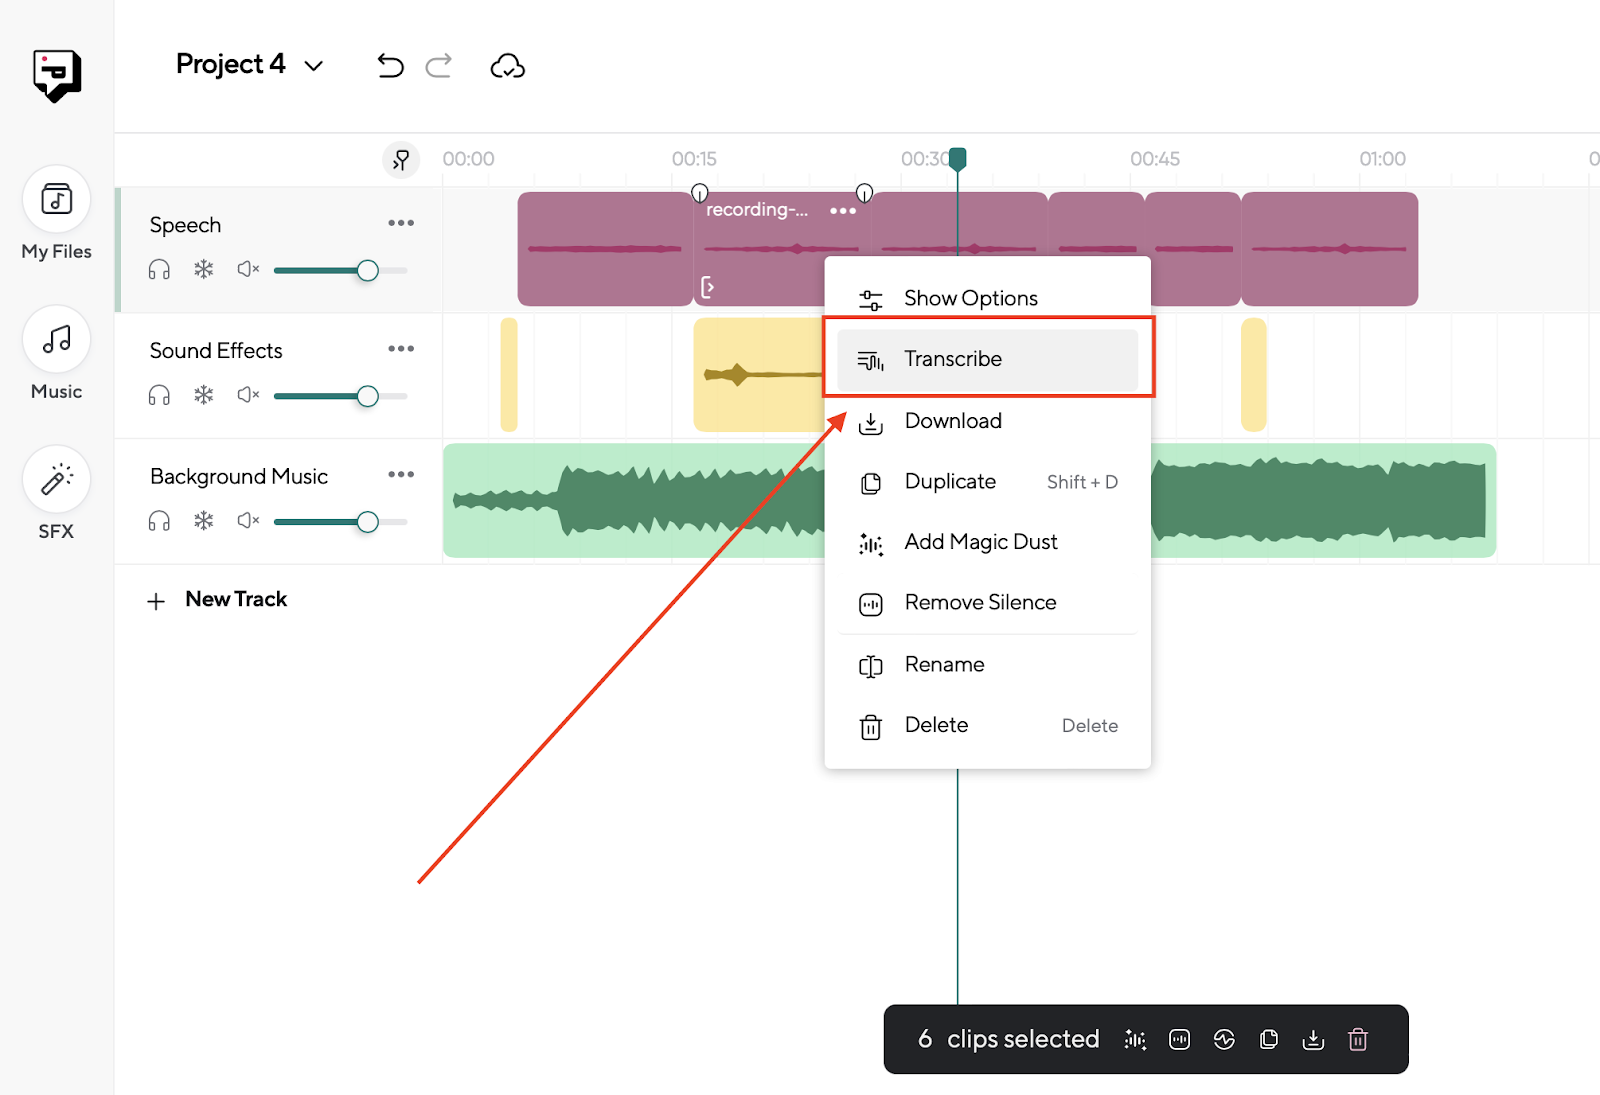
Pro Tip #1: Depending on the purpose of your screen recording, you might need the transcript of your audio for various purposes. Right-click on your audio track and select "Transcribe." You will have your text in a few seconds.
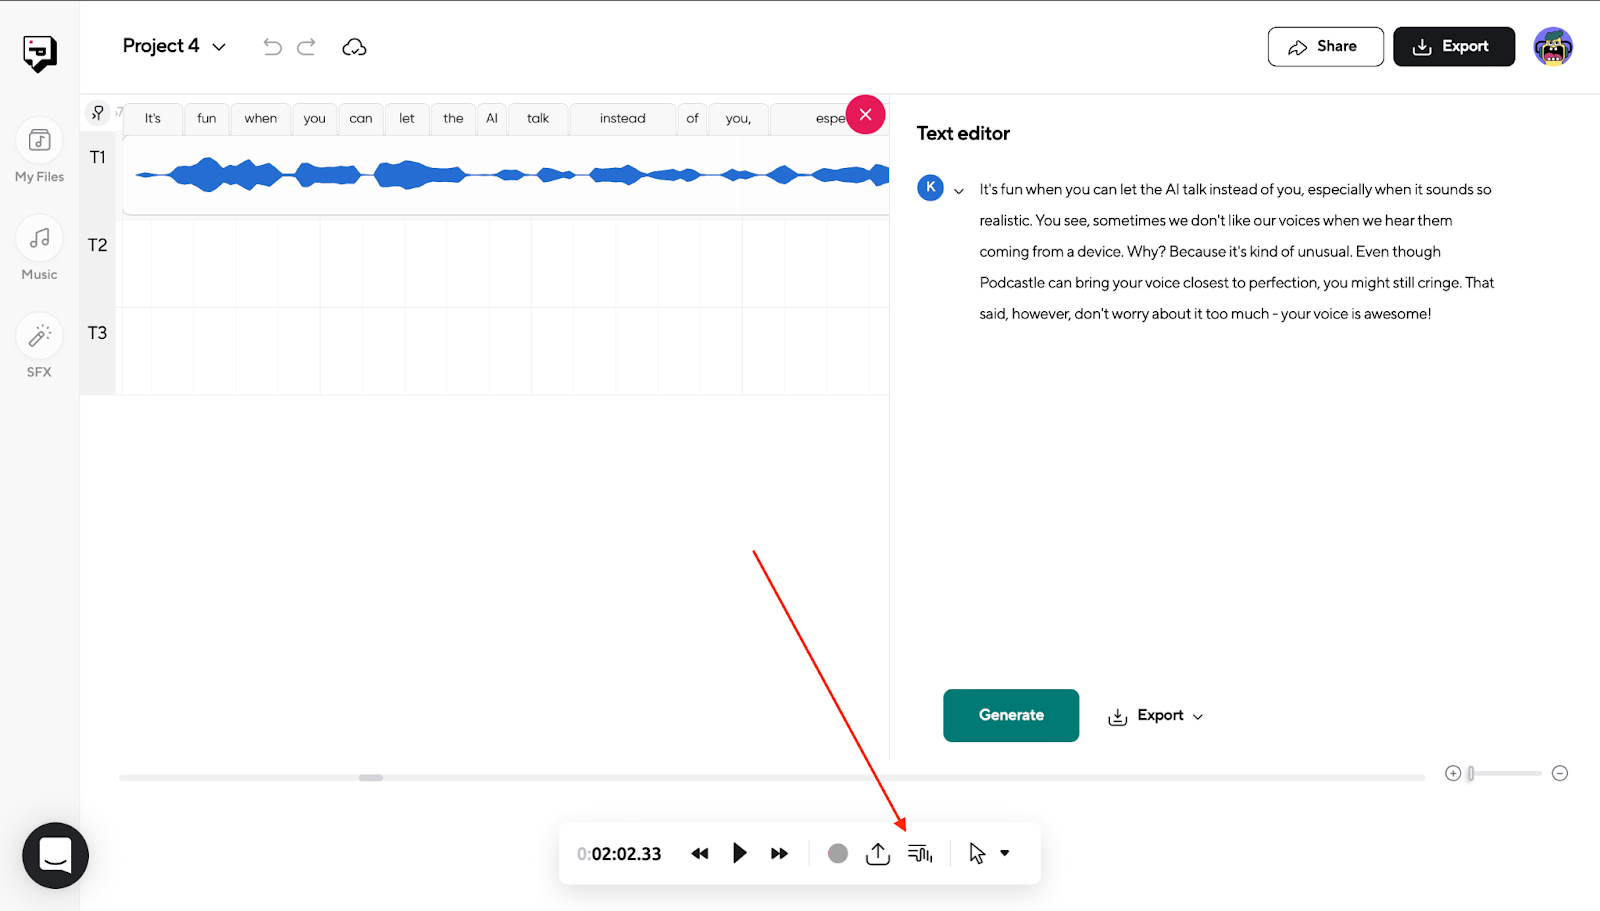
Pro Tip #2: You can also convert text to speech with realistic AI voices. Move your mouse and click the "text-to-podcast" button at the bottom of your screen. Write your text in the text editor, choose the voice from the dropdown menu, and click "Generate" to get an audio version of your text.
Merge Video And Audio With iMovie On Your Mac
You can now add your voiceover on your macOS or iOS screen recording via iMovie. You can also do this with other paid and free video editing software if you wish, but iMovie comes natively with your Mac, so you don’t have to download additional software.
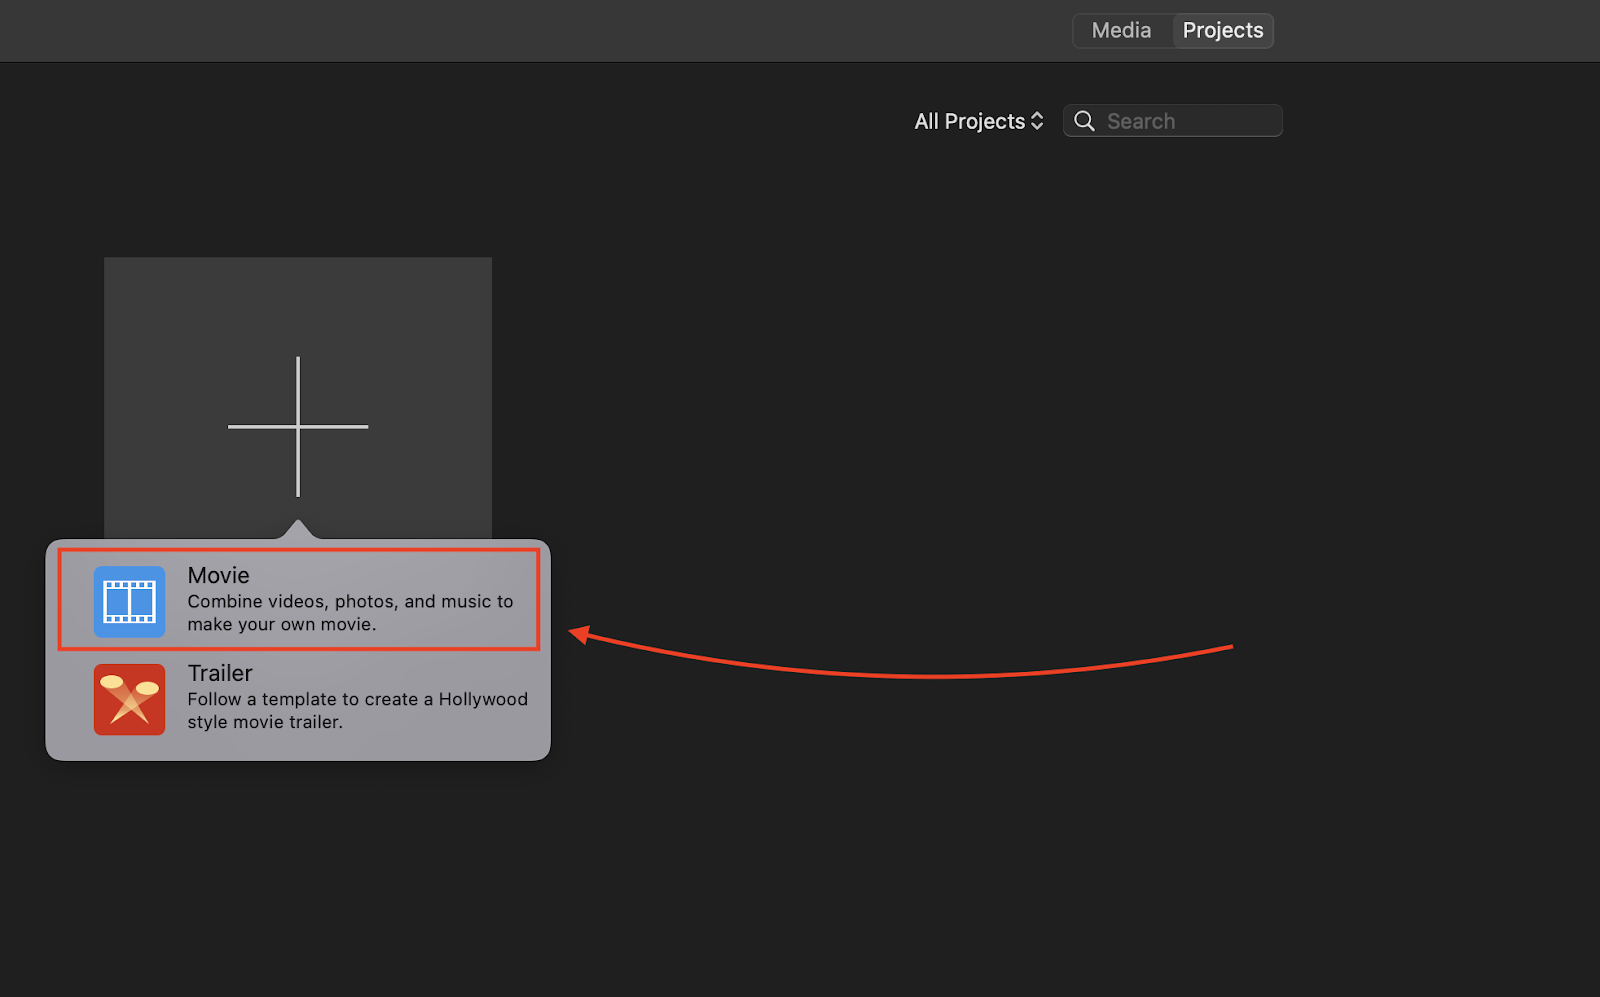
1. Airdrop the video from your device to your Mac and open the iMovie app. If you deleted the software previously, you can download it from the App Store. Click on “Create New” and select “Movie” in iMovie.
2. Drag and drop the video and audio to iMovie on separate tracks and synchronize them. You can also make additional changes to your video.

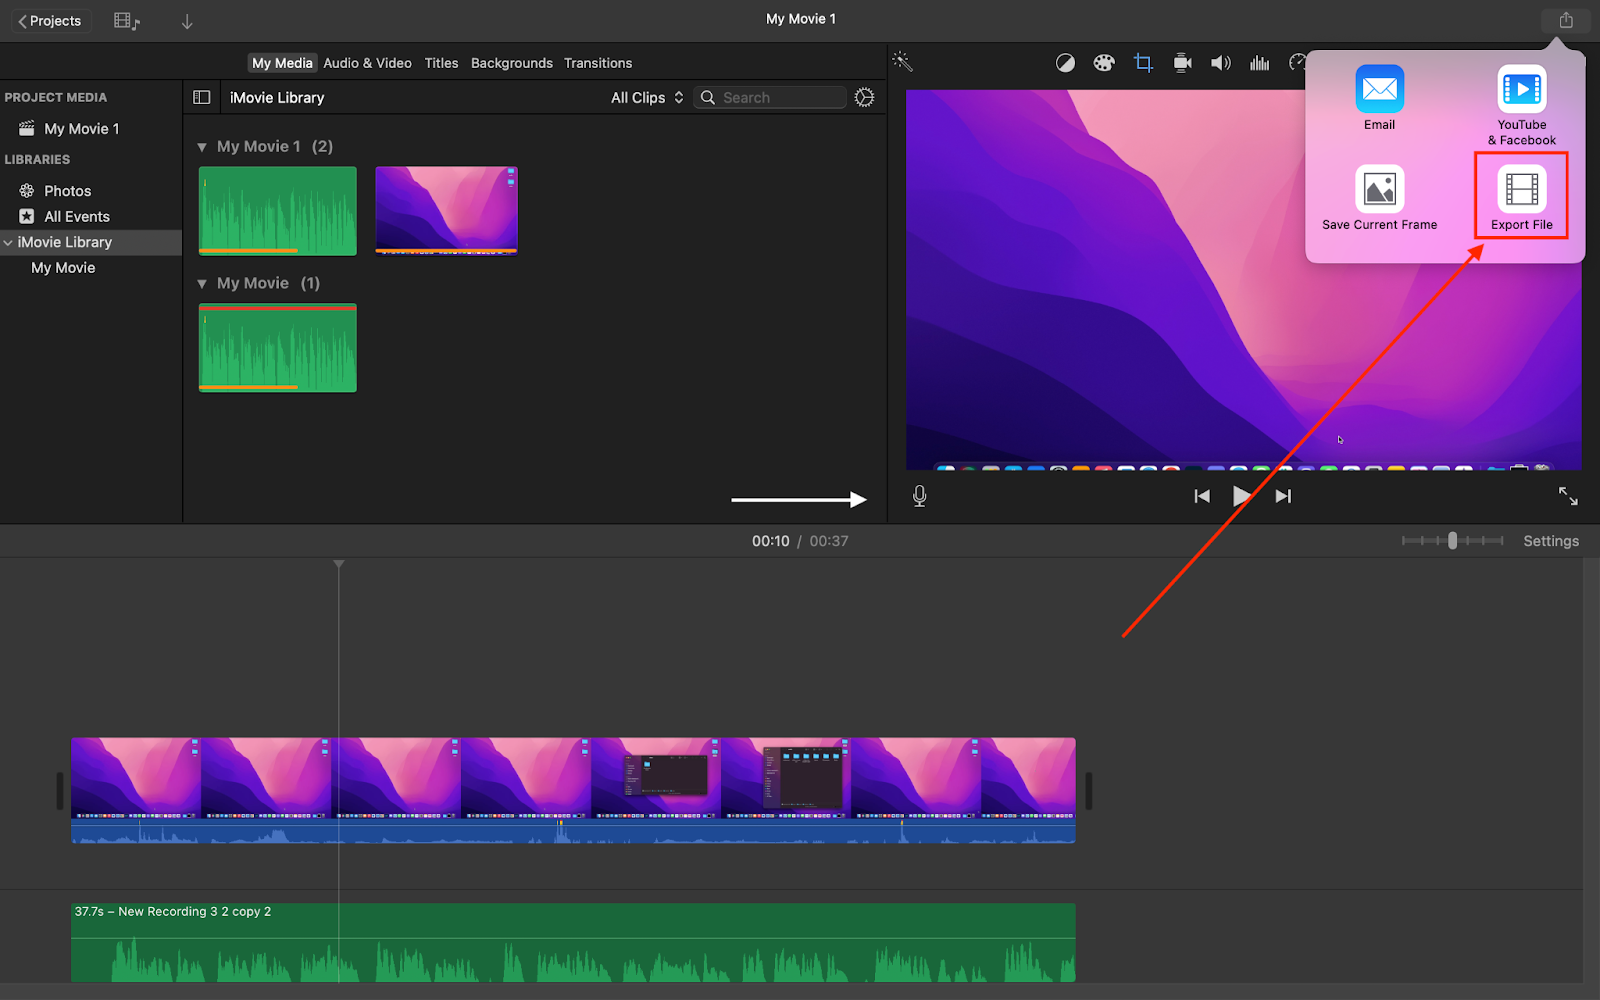
3. Click on the icon at the top-right of the app and select "Export File." Configure the export settings and click “Next.”
Conclusion
Whether you're recording a tutorial, a software review or maybe a gaming walkthrough, or simply want to add audio commentary to your screen recordings, Podcastle is the best tool for the job. With its easy-to-use interface and powerful features, you can create high-quality audio tracks that will make your screen recordings sound more professional and polished.


)