You can have a strong idea, a solid hook, and a smooth edit. But if your video isn’t the right size, TikTok will quietly push it to the side. It might look blurry. It might get cropped. It might feel off in the feed. And once that happens, you’ve already lost the scroll.
Video size isn’t a small detail. It affects how your content shows up, how people engage with it, and how far it spreads. Especially now, when every other creator is using advanced tools to polish their content. In a feed full of sharp, full-screen videos, the wrong format sticks out for the wrong reasons.
This guide gives you the latest specs, real advice, and a few tools to make your content hit properly in 2025.
What are the Best TikTok Video Dimensions?
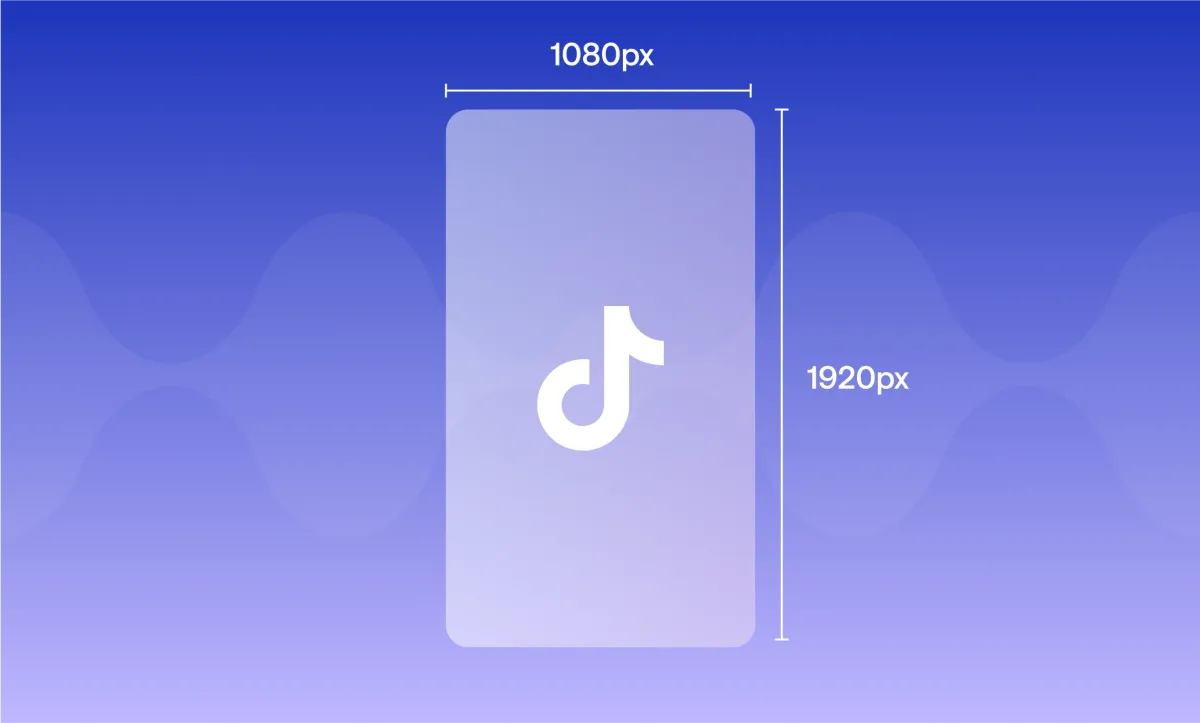
TikTok is built for vertical video, and the ideal resolution is 1080 by 1920 pixels. That gives you a clean, full-screen look that feels native to the app. It’s the size most creators default to when shooting directly on their phone or editing in tools like CapCut or Premiere.
But here’s the thing: TikTok doesn’t require that resolution. It accepts pretty much any resolution you upload, all the way down to 144p. You could record a meme in 360p, toss it into the app, and it’ll play just fine. The platform doesn’t block or reject videos based on quality, but the catch is how that quality affects how your content looks, feels, and performs.
Low-res videos are usually fine for memes, reposts, or anything that doesn’t need to look polished. In fact, rough quality sometimes adds to the humor (after all, they do say that the best memes are always the low-quality videos). But if you’re trying to build a brand, land sponsorships, or keep people watching for more than a few seconds, resolution matters.
As of 2025, TikTok still doesn’t support true 4K playback. You can upscale a video to 2160 by 3840 if you want, but TikTok will compress it. There’s no real advantage unless you’re repurposing the clip for other platforms that do support 4K. Even then, it’s best to work from a high-quality 1080p version and resize as needed.
So here’s the bottom line: TikTok will accept almost anything, but that doesn’t mean everything performs the same. If you want your content to look good and feel intentional, start with 1080 by 1920. If it’s meme content, feel free to break the rules.
Aspect Ratios That Work (And When to Use Them)
We can't ignore the fact that TikTok was designed for 9:16 vertical video, and that’s still the format that fills the screen and gets the best visual experience on the app. It feels immersive. It looks natural. It’s what most viewers are used to seeing when they scroll.
But 9:16 isn’t the only option that works. Plenty of creators use 1:1 (square) and 4:3 (a bit taller than square), and their videos still get tons of views and engagement. The reason? Those formats fit the type of content they’re posting.
1:1 is common for meme pages, reaction videos, and repurposed clips. It loads fast, works well for split-screen formats, and still feels fine on mobile. You can even post it in 360p and no one will care, because for memes, the humor carries the post, not the resolution. The same goes for 4:3, especially when creators are pulling clips from YouTube, old shows, or vertical podcast setups. It can look slightly awkward if you don’t format it right, but if the content is strong, people stick around.
The key is being intentional. If you’re uploading a square or 4:3 video, you need to frame your content with that format in mind. Keep captions and key visuals centered. Avoid placing text too close to the edges where TikTok’s UI elements might overlap it. And make sure the format fits the tone. Don’t post a polished brand ad in 360p and expect it to land.
In summary: If you’re making something meant to grab attention, tell a story, or showcase your editing skills, go vertical and stick to 9:16. If you’re posting a meme, a quick reaction, or a clip from something else, 1:1 or 4:3 is fair game. What matters is that the format fits the content, and your audience expects it to look that way.
TikTok File Size, Format, and Compression
TikTok doesn’t reject your video based on how big it is, but once you go past certain limits, it quietly compresses the file behind the scenes. That compression affects how sharp your video looks once it’s live. You won’t always notice it, but your audience might—especially if your content relies on details, fast motion, or visual polish.
Let’s break down exactly what you’re working with in 2025.
File Size Limits by Device
The maximum upload size depends on how you’re posting:
- Android: 72 MB
- iOS: 287.76 MB
- Desktop: 1 GB
If your file goes over these limits, TikTok will compress it automatically. And that compression can blur details, reduce color depth, and create artifacts around text or motion. So if you’re posting something that should look clean and intentional, it’s worth staying under the cap.
Supported File Types
TikTok accepts the following formats: .mp4, .mov, .mpeg, .3gp, and .avi. Among these, .mp4 is still the most popular with creators. It keeps file sizes low without sacrificing quality, and it works smoothly across nearly every editing platform.
.mov also works well, especially for those editing in Apple environments. Formats like .3gp and .avi are older but still supported. If you’re working with repurposed footage or older tools, they’ll upload fine, though you might lose out on some modern compression benefits.
If you’re aiming for consistency and the best balance of size and quality, .mp4 with H.264 compression remains the most reliable choice.
Recommended Bitrate
Bitrate controls how much data is used to encode your video. Higher bitrates mean cleaner visuals, but larger file sizes.
Here’s what TikTok recommends in 2025:
- MP4 or MOV: 1 to 2 Mbps
- HEVC: 2 to 4 Mbps
That’s the baseline. If you want your video to look crisp, especially at 1080p, aim for 5 to 10 Mbps using variable bitrate (VBR). That gives your video enough room to breathe without making the file unnecessarily huge. If you’re creating fast-paced content with sharp transitions or lots of movement, leaning closer to 8 or 10 Mbps makes sense.
Just keep an eye on your final file size. Even a clean export can get rejected if you’re over the limit for your device.
Supported Frame Rates
TikTok supports frame rates between 30 and 60 frames per second. There’s no benefit to going higher than 60, since TikTok won’t display it. A stable 30 fps works well for most content, especially talking head videos, tutorials, or memes.
Use 60 fps if you’re posting action-heavy footage, gaming clips, or anything that would benefit from smoother motion. Just keep in mind that higher frame rates increase your file size. If you’re editing on your phone and trying to squeeze into that 72 MB Android cap, 60 fps might be too heavy for longer clips.
How to Compress Without Losing Quality
If your final file is too large, the worst thing you can do is re-export it with extreme compression. That usually wrecks the sharpness and adds weird glitches around text, logos, or motion. Instead, use tools that give you better control over bitrate and resolution:
- Podcastle: Export your footage in the perfect resolution, file format, and dimensions needed using AI tools to enhance your footage and instantly resize videos.
- HandBrake: Great for desktop compression without killing quality
- Shutter Encoder: More advanced settings if you know your way around formats
- CapCut Desktop: Easy presets, especially useful if you’re already editing there
What's the TikTok Video Length Limit in 2025?
TikTok gives you a lot more room to work with than you might expect. If you’re recording directly inside the app, your video can be up to 10 minutes long. But if you’re uploading a finished video, you can go even longer: up to 60 minutes per upload.
That doesn’t mean people want to watch something that long. For most creators, the best-performing videos still sit between 15 and 60 seconds. These are quick to digest and easy to share. They also tend to get the highest completion rates, which matters if you care about reach.
That said, long-form content is growing on the platform. In 2025, more creators are posting 1 to 3 minute videos and seeing great results. This is especially true for storytelling, tutorials, interviews, and commentary. If the pacing is right and the content delivers something worth sticking around for, longer videos can actually outperform short ones.
Just keep in mind that TikTok’s algorithm watches for how people interact with your video. If viewers drop off in the first few seconds, your reach will shrink regardless of how long or valuable the rest of the video is. So even if you’re posting a 3-minute explainer or a 7-minute recap, the first few seconds still need to grab attention.
TikTok Thumbnail Size, Dimensions, and More
Thumbnails on TikTok don’t get as much attention as they do on YouTube, but they still matter, especially if you’re posting to your profile often or building a series. A clean, clear cover can make your feed feel more intentional and clickable, even if most people find you through the For You Page.
TikTok lets you choose a frame from your video to use as the cover, or you can upload a custom one if you’re using tools like CapCut, Canva, or Premiere Pro. If you care about aesthetics or you’re building a brand, uploading your own thumbnail is the better move. It gives you more control over what people see at a glance.
The recommended size is the same as your video: 1080 by 1920 pixels. But within that frame, you’ll want to design with margins in mind. TikTok overlays text and icons in the corners of the screen, and that can cut into your cover. So keep your text and faces centered and avoid placing anything important near the edges.
Safe zones can shift depending on your device, but a good rule of thumb is to leave at least 250 pixels of padding on the top and bottom. That gives your title or branding enough room to breathe without getting covered by the video title or the follow button.
As for the style, bold titles with clear fonts work best. Use high contrast colors so your text stands out from the background, and don’t overdo it. One clear phrase is better than three small ones. Think of it like a mini billboard, not a poster.
If you’re posting a series, keep your covers consistent. Use the same layout, font, or color palette so people recognize your content in your grid. That consistency helps with retention and makes your account look like it was built with purpose.
TikTok Ad and Sponsored Content Dimensions
Like regular videos, most TikTok ads use the 9:16 vertical format, sized at 1080 by 1920 pixels. That’s the default across nearly every ad placement. Whether you’re making an in-feed ad, a Spark Ad, or a TopView slot that appears when the app opens, the full-screen vertical format is what performs best.
But ad creatives also need to follow safe zone rules more strictly. TikTok’s interface adds extra overlays to ad content, including profile names, calls-to-action, and sponsored labels. So if you put logos, text, or faces too close to the edges, they might get partially covered or look cluttered. Keep your key visuals and text safely within the center 80 percent of the screen—both vertically and horizontally.
Here’s a quick rundown of common ad types:
- In-Feed Ads: Appear between organic content. They blend in visually but need strong hooks and clean formatting to keep people watching.
- TopView Ads: These play the moment someone opens the app. They fill the screen and autoplay with sound, so they’re ideal for storytelling or eye-catching visuals.
- Spark Ads: These use existing organic posts as sponsored content. That means the video needs to look native to TikTok while still aligning with brand goals.
If you’re creating sponsored content through a brand partnership (not a formal ad), the formatting is still important. Vertical, full-screen videos with good lighting, centered framing, and clear messaging feel more professional. Even meme-style integrations should be built intentionally if you’re getting paid for the work.
How to Resize Videos for TikTok with Podcastle
Once you’ve got your TikTok format locked in, the next step is editing your video to match. If you want to work faster without lowering your quality, Podcastle is one of the best tools to use. It gives creators an easy way to build polished TikTok videos that look native to the platform, without wasting hours on tiny edits or jumping between apps.
Here’s how to do it, step by step:
Step 1: Start a New Vertical Project
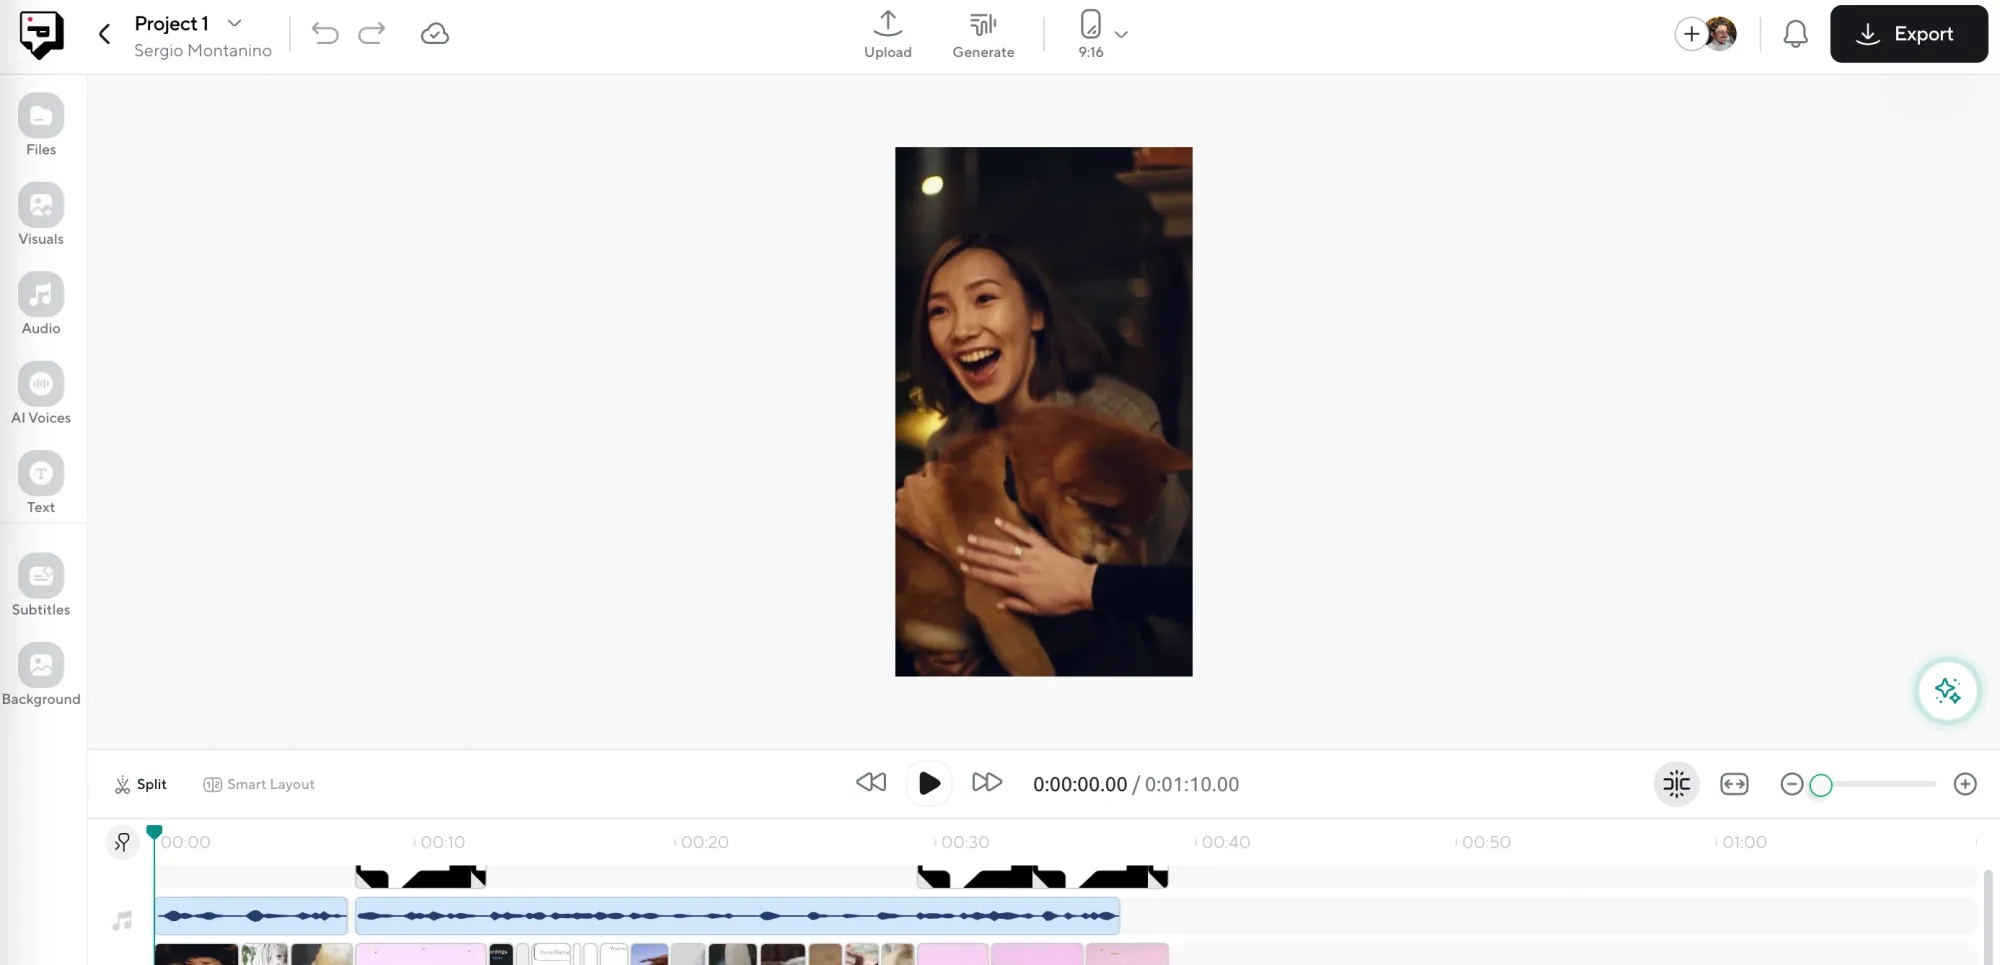
Log into your Podcastle account and click “Create” followed by “Video Project.” Upload your video files, or if you’re starting from scratch, use Podcastle’s built-in stock visuals to find the right shots.
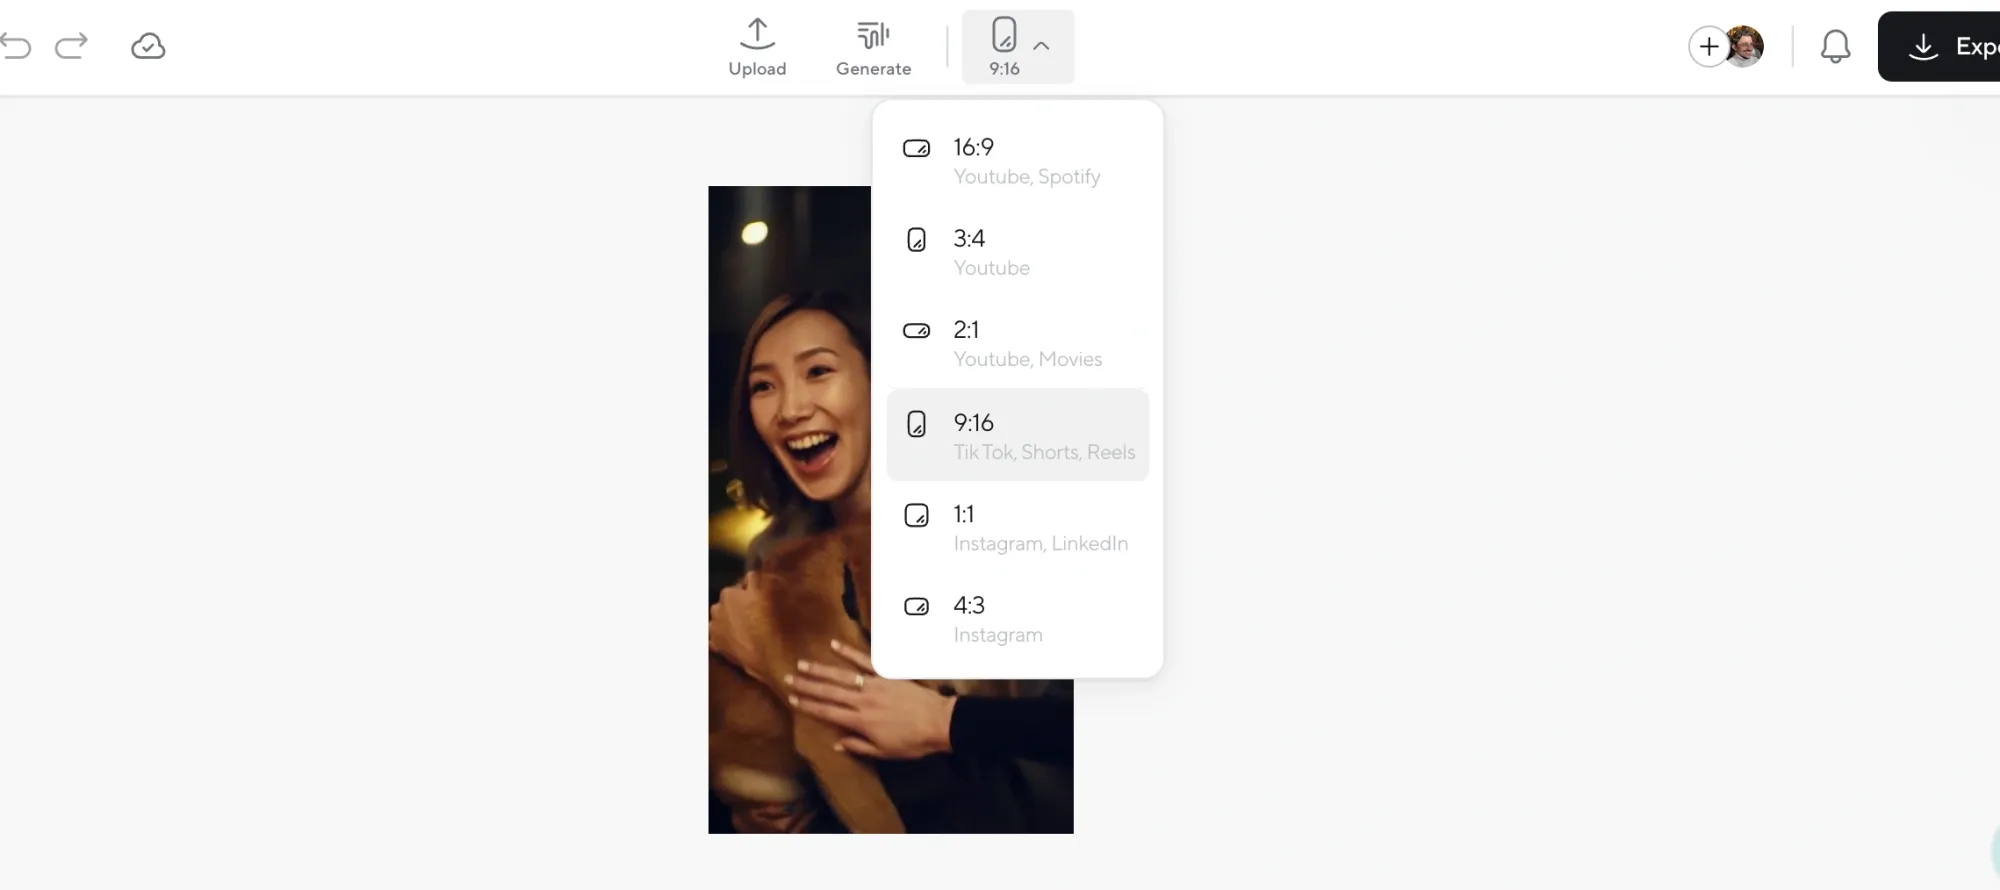
When prompted to choose a format, select the 9:16 aspect ratio. That’s perfect for TikTok, but it also works across Reels and Shorts if you’re repurposing later.
Step 2: Instantly Resize Your Clips
If your video doesn’t fit the 9:16 frame properly, you can resize and reposition it inside Podcastle’s editor. Just click the clip in the preview window and drag to scale it up or down until it fills the frame the way you want. You can also move it around to center the subject or adjust the crop. This makes it easy to adapt horizontal or square footage into a clean vertical format without losing key parts of the shot.
Step 3: Add Text and Captions
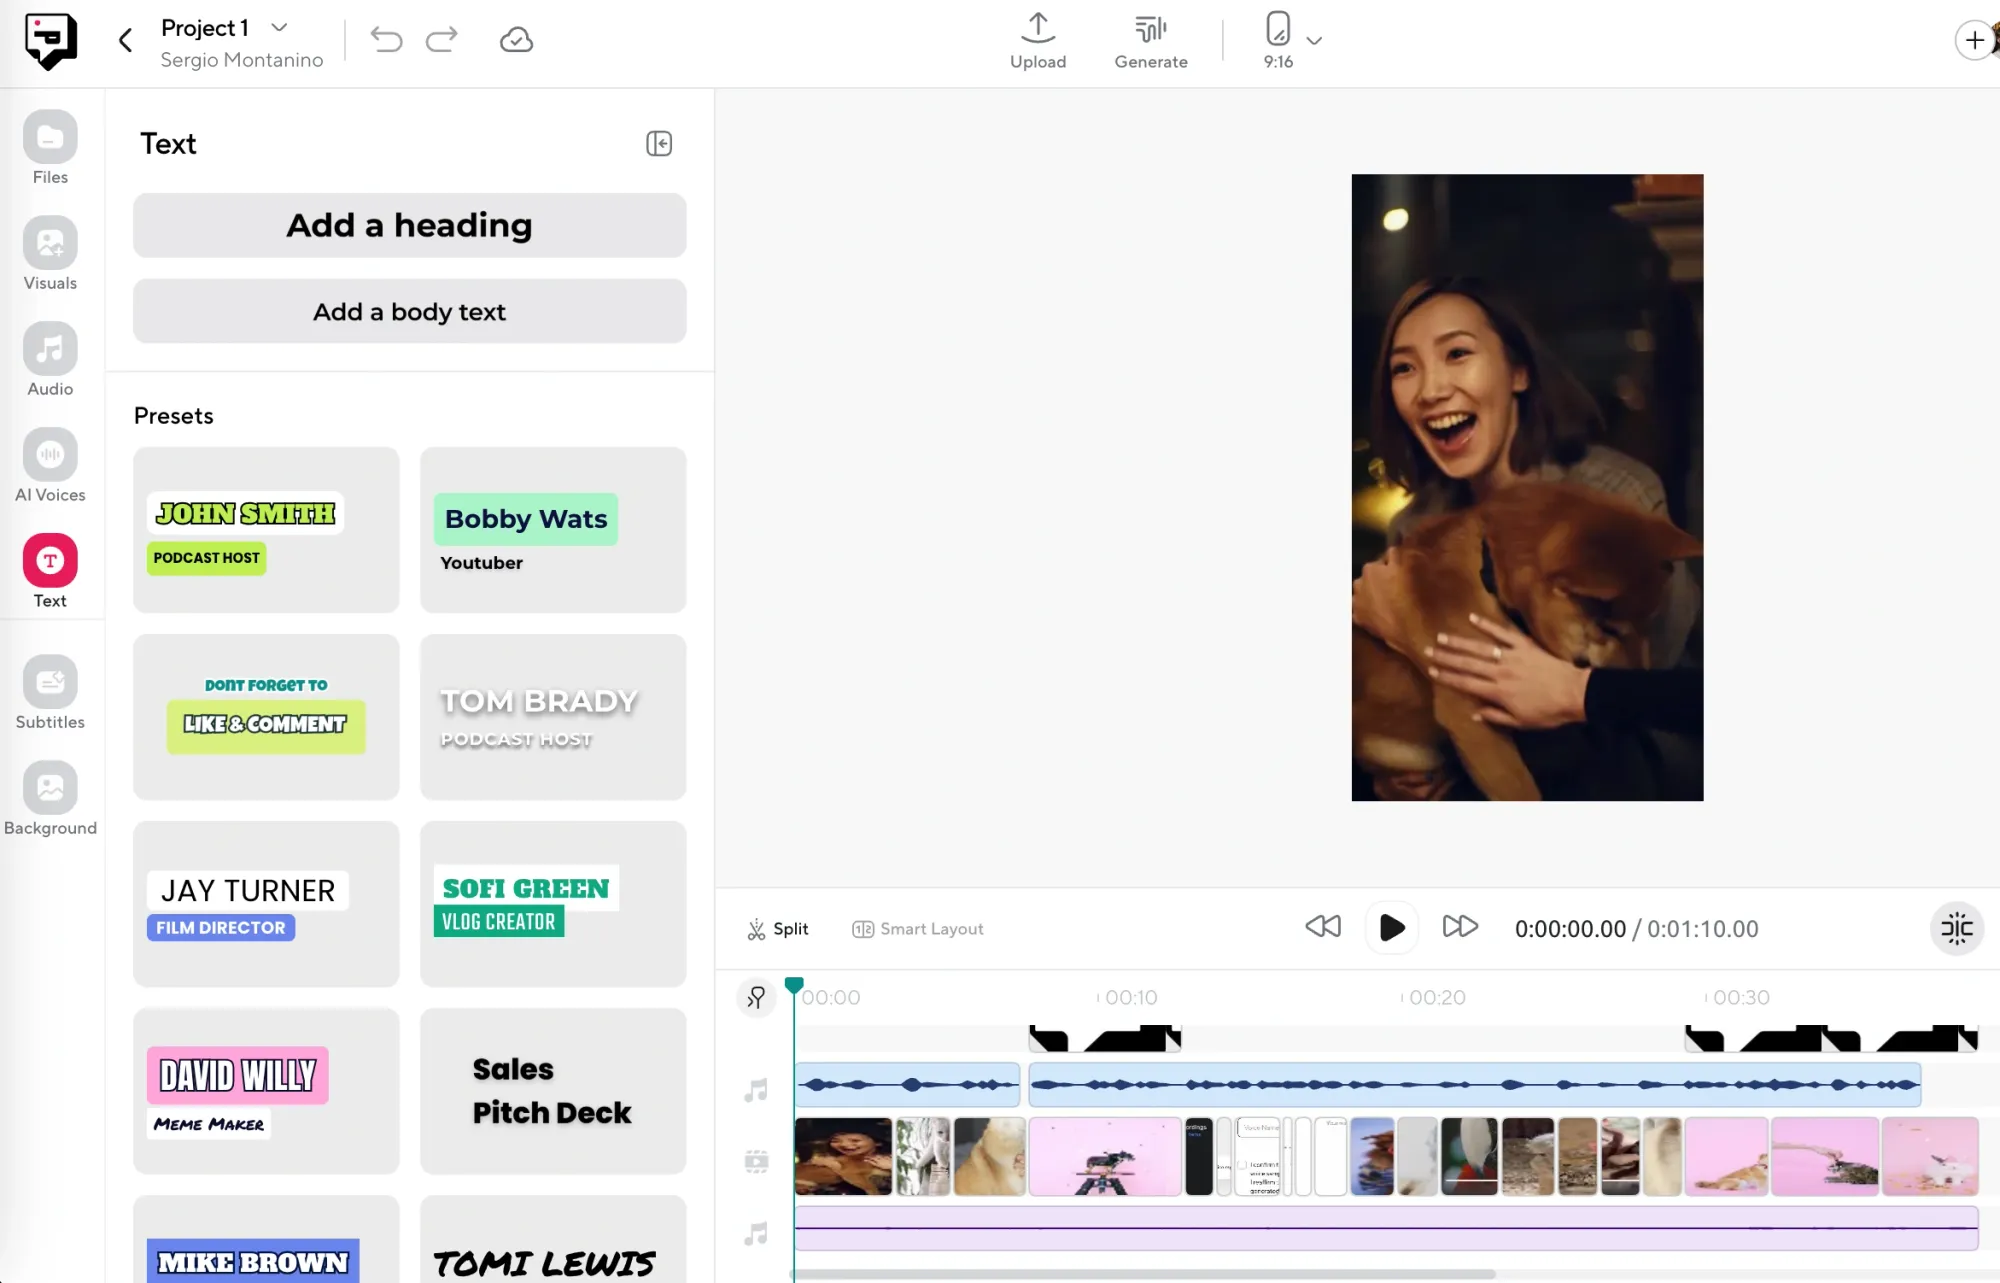
Click the Text tool to add titles, labels, or calls to action. You can choose from a range of preset styles or customize your own. If you want captions, just hit “Captions” and Podcastle will auto-generate them using its built-in AI.
You can also adjust font, color, position, and timing so everything lines up exactly how you want.
Step 4: Add Music or Voiceover
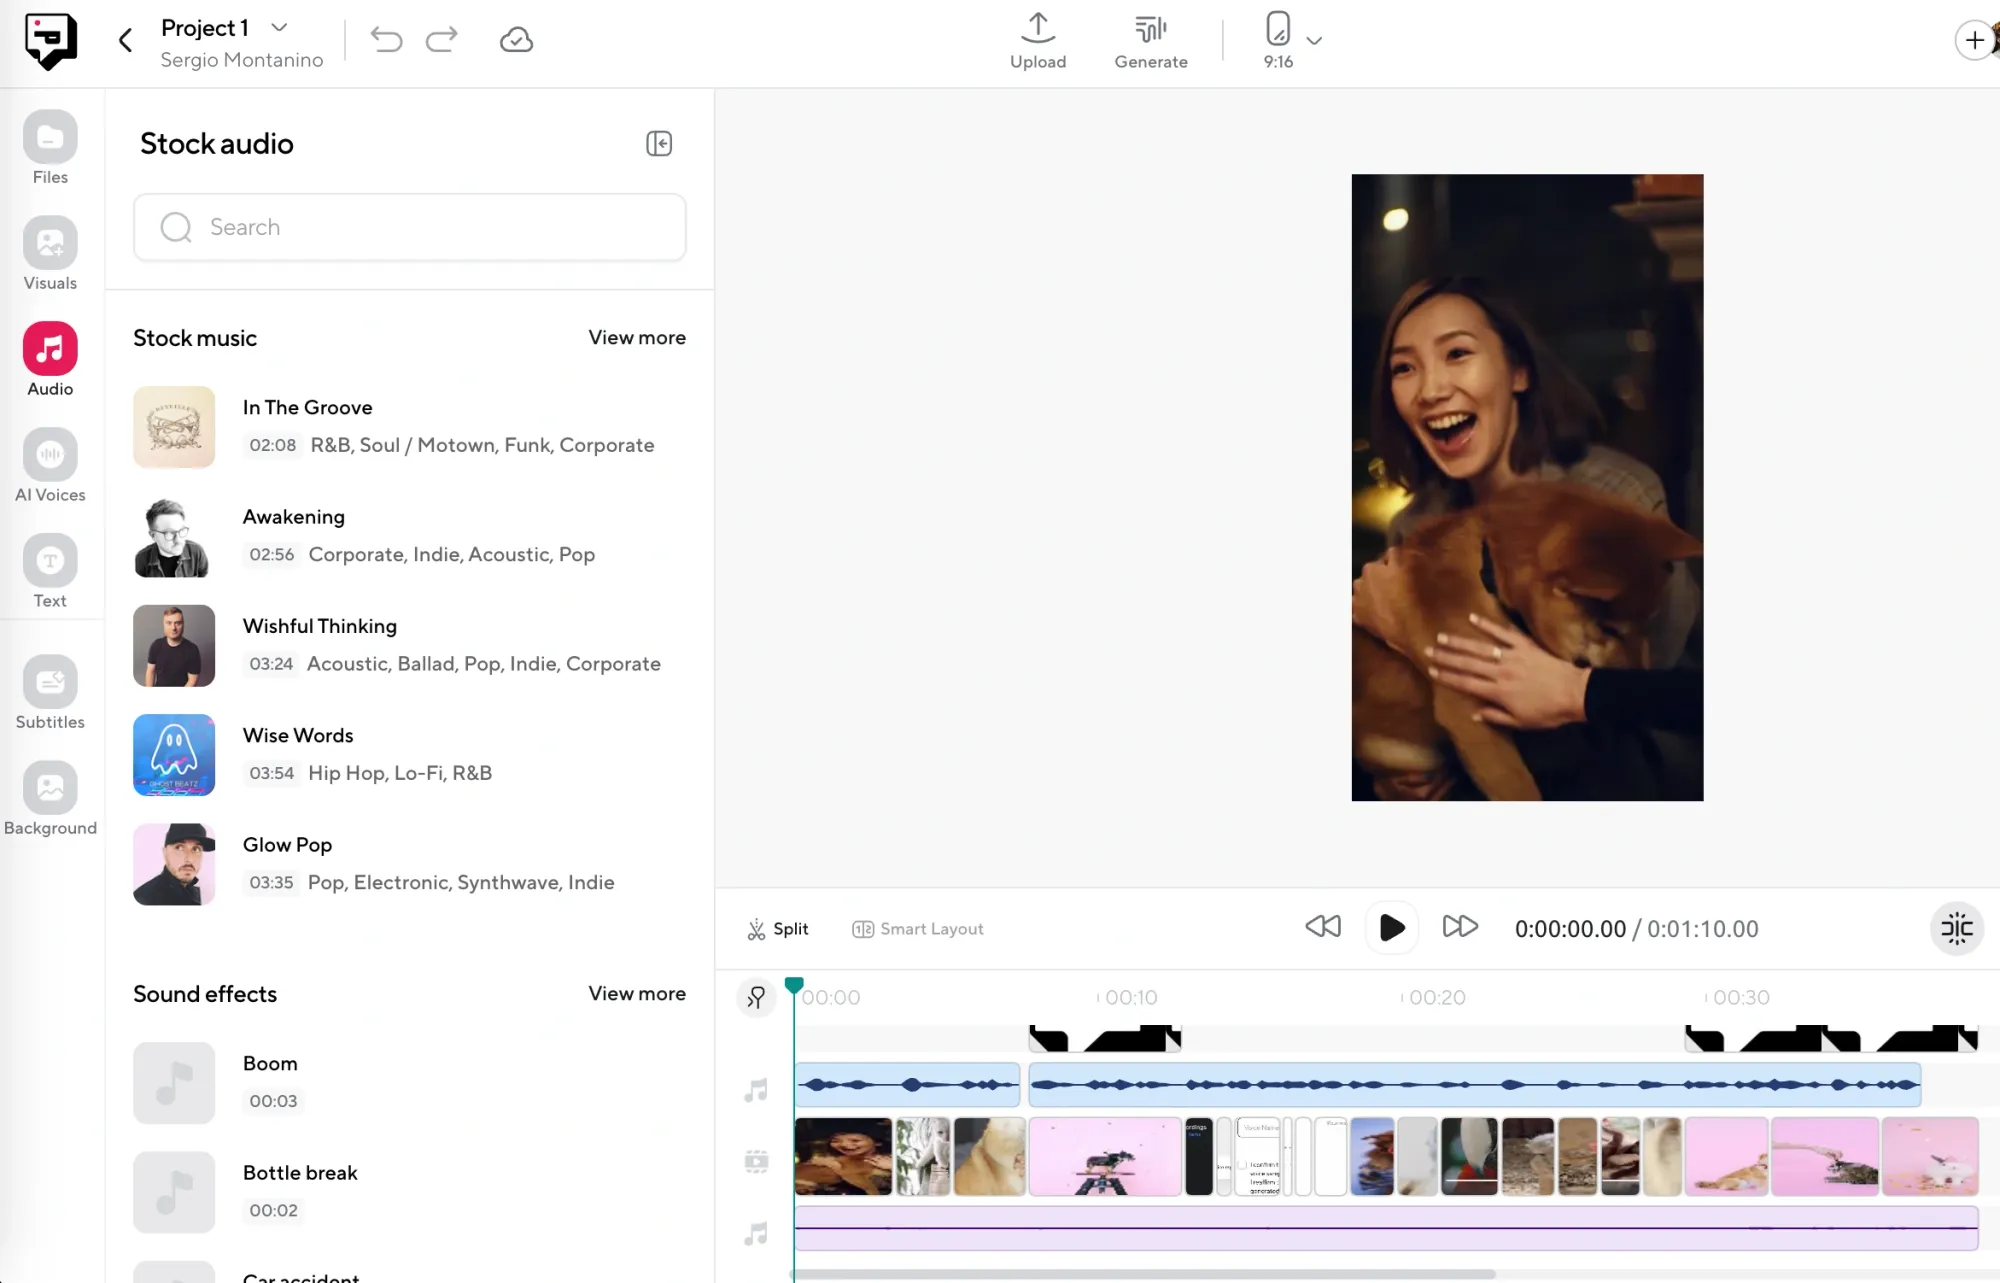
You can drag in your own music, or browse Podcastle’s library of royalty-free sound effects and background tracks. Every sound is easy to preview and place directly onto your timeline.
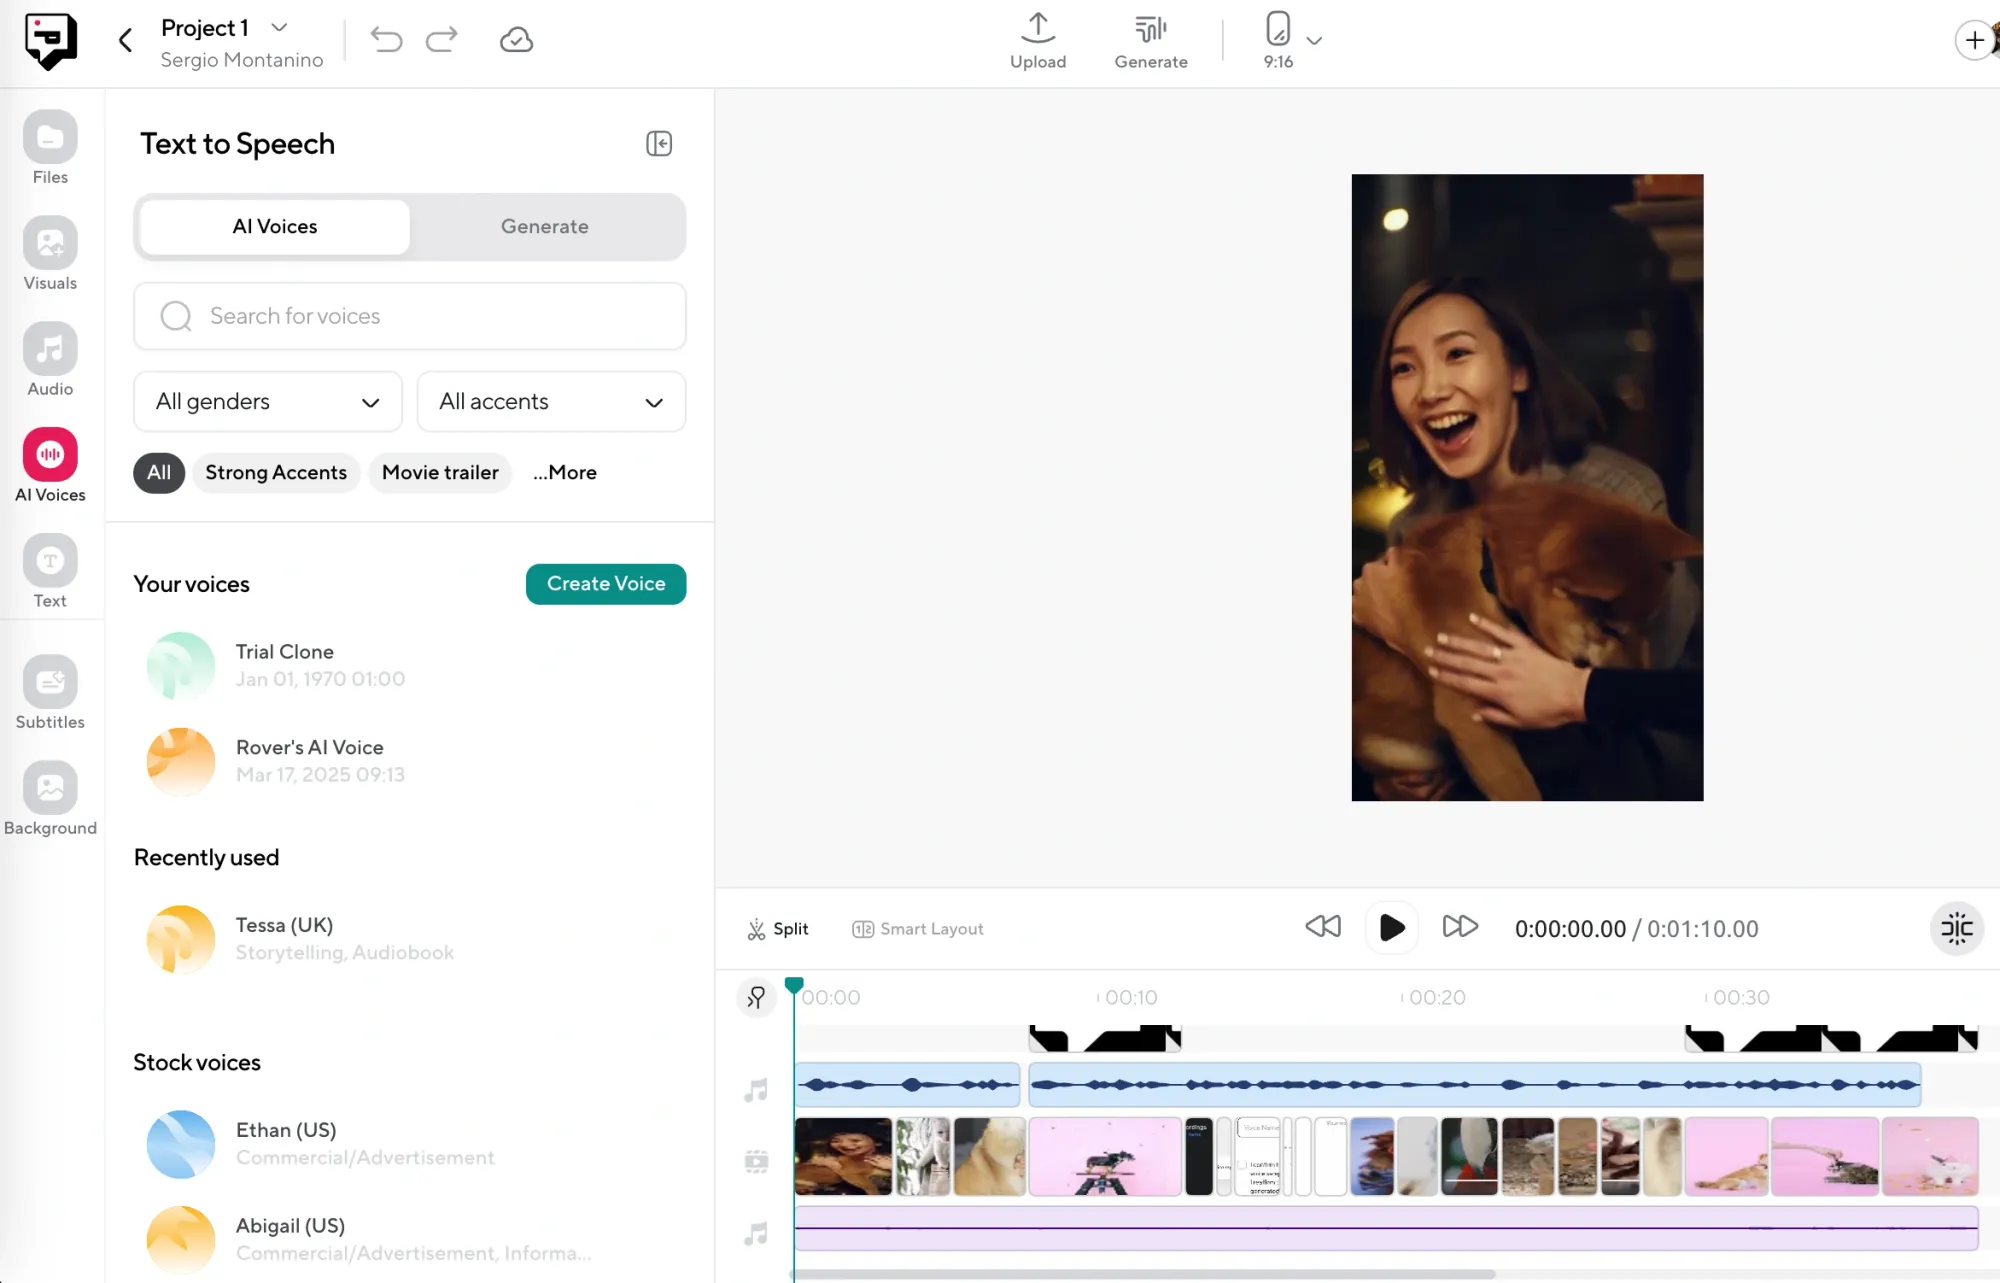
For voiceovers, you’ve got options. You can record your own voice straight into the editor. Or, if you don’t want to record at all, just type your script and use one of Podcastle’s 1000+ natural AI voices to bring it to life. You can even clone your own voice and reuse it across future TikTok posts without needing to re-record each time.
Step 5: Enhance with AI Tools
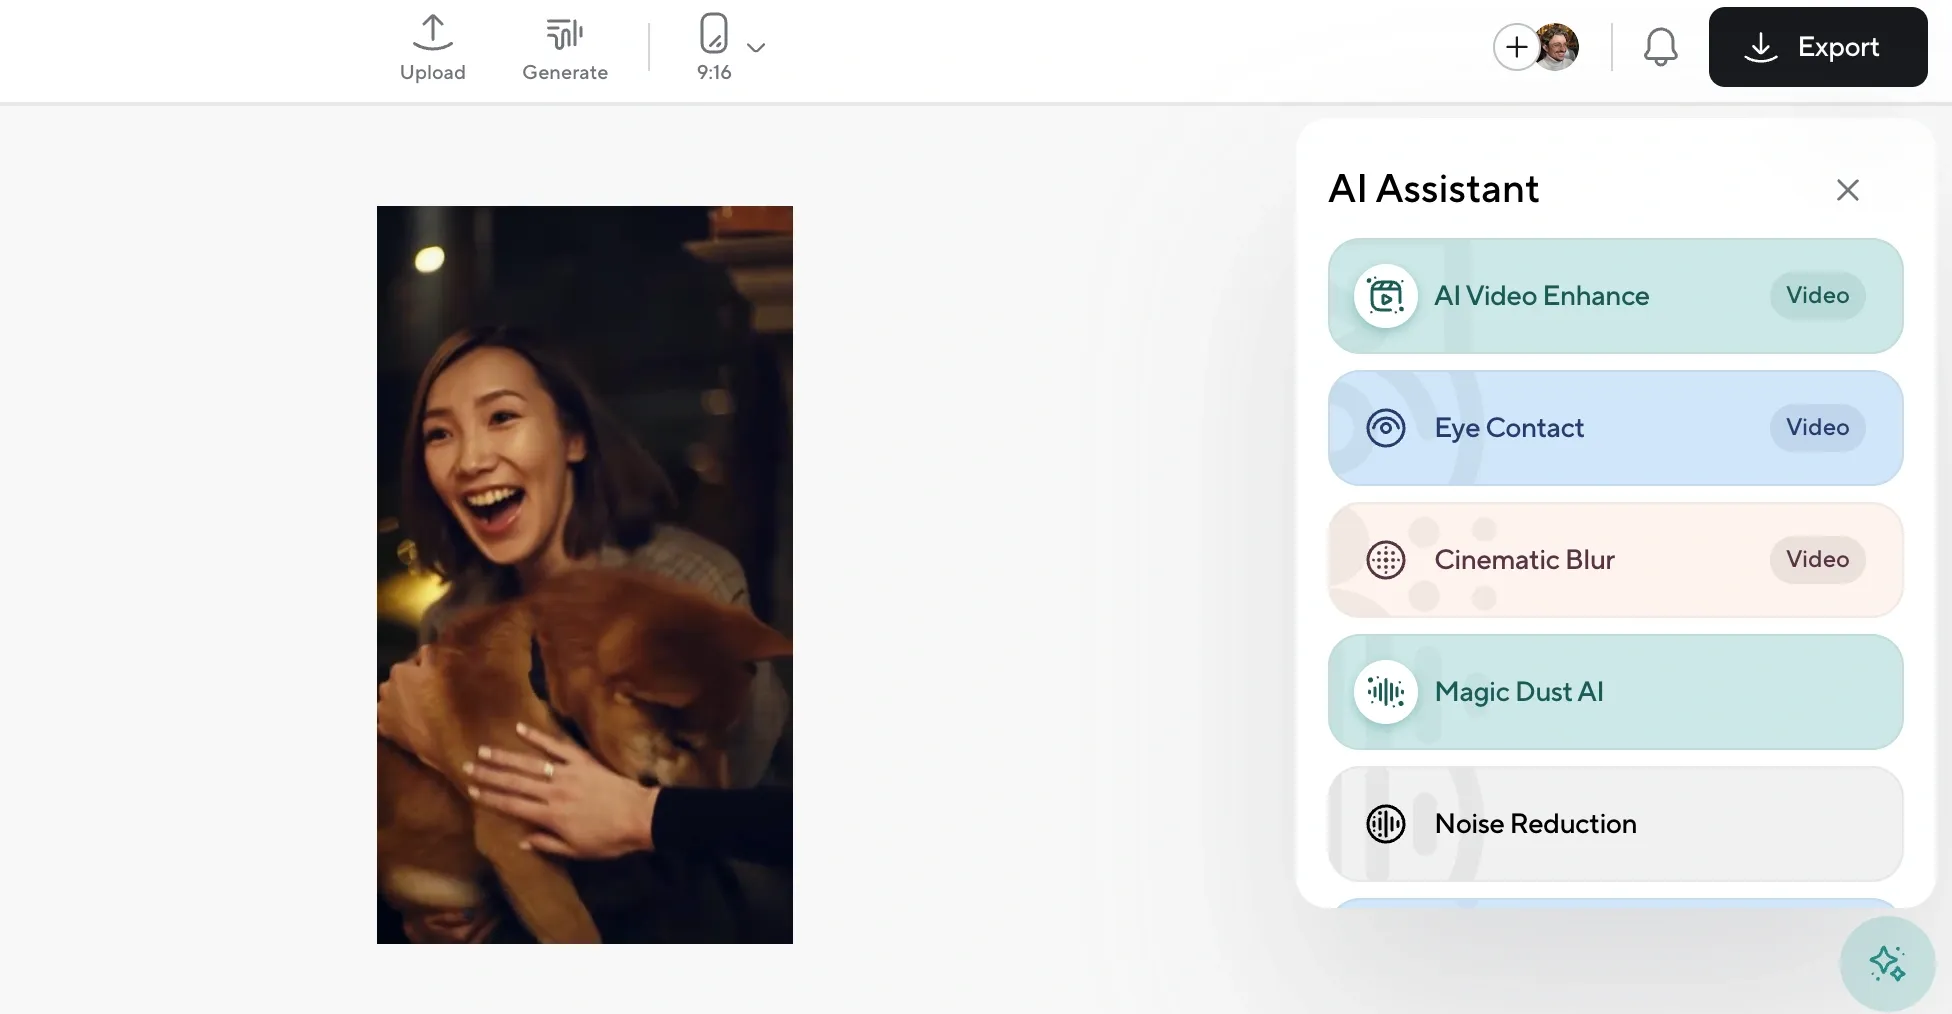
If you want to take your edit further, Podcastle includes a set of AI-powered tools to clean things up. You can fix eye contact, add cinematic blur, enhance low-res footage, or reduce background noise, all without needing advanced editing experience.
These tools are especially useful for creators who record on mobile or in less-than-perfect lighting and want to level up the final look before posting.
Step 6: Export Your Video for TikTok
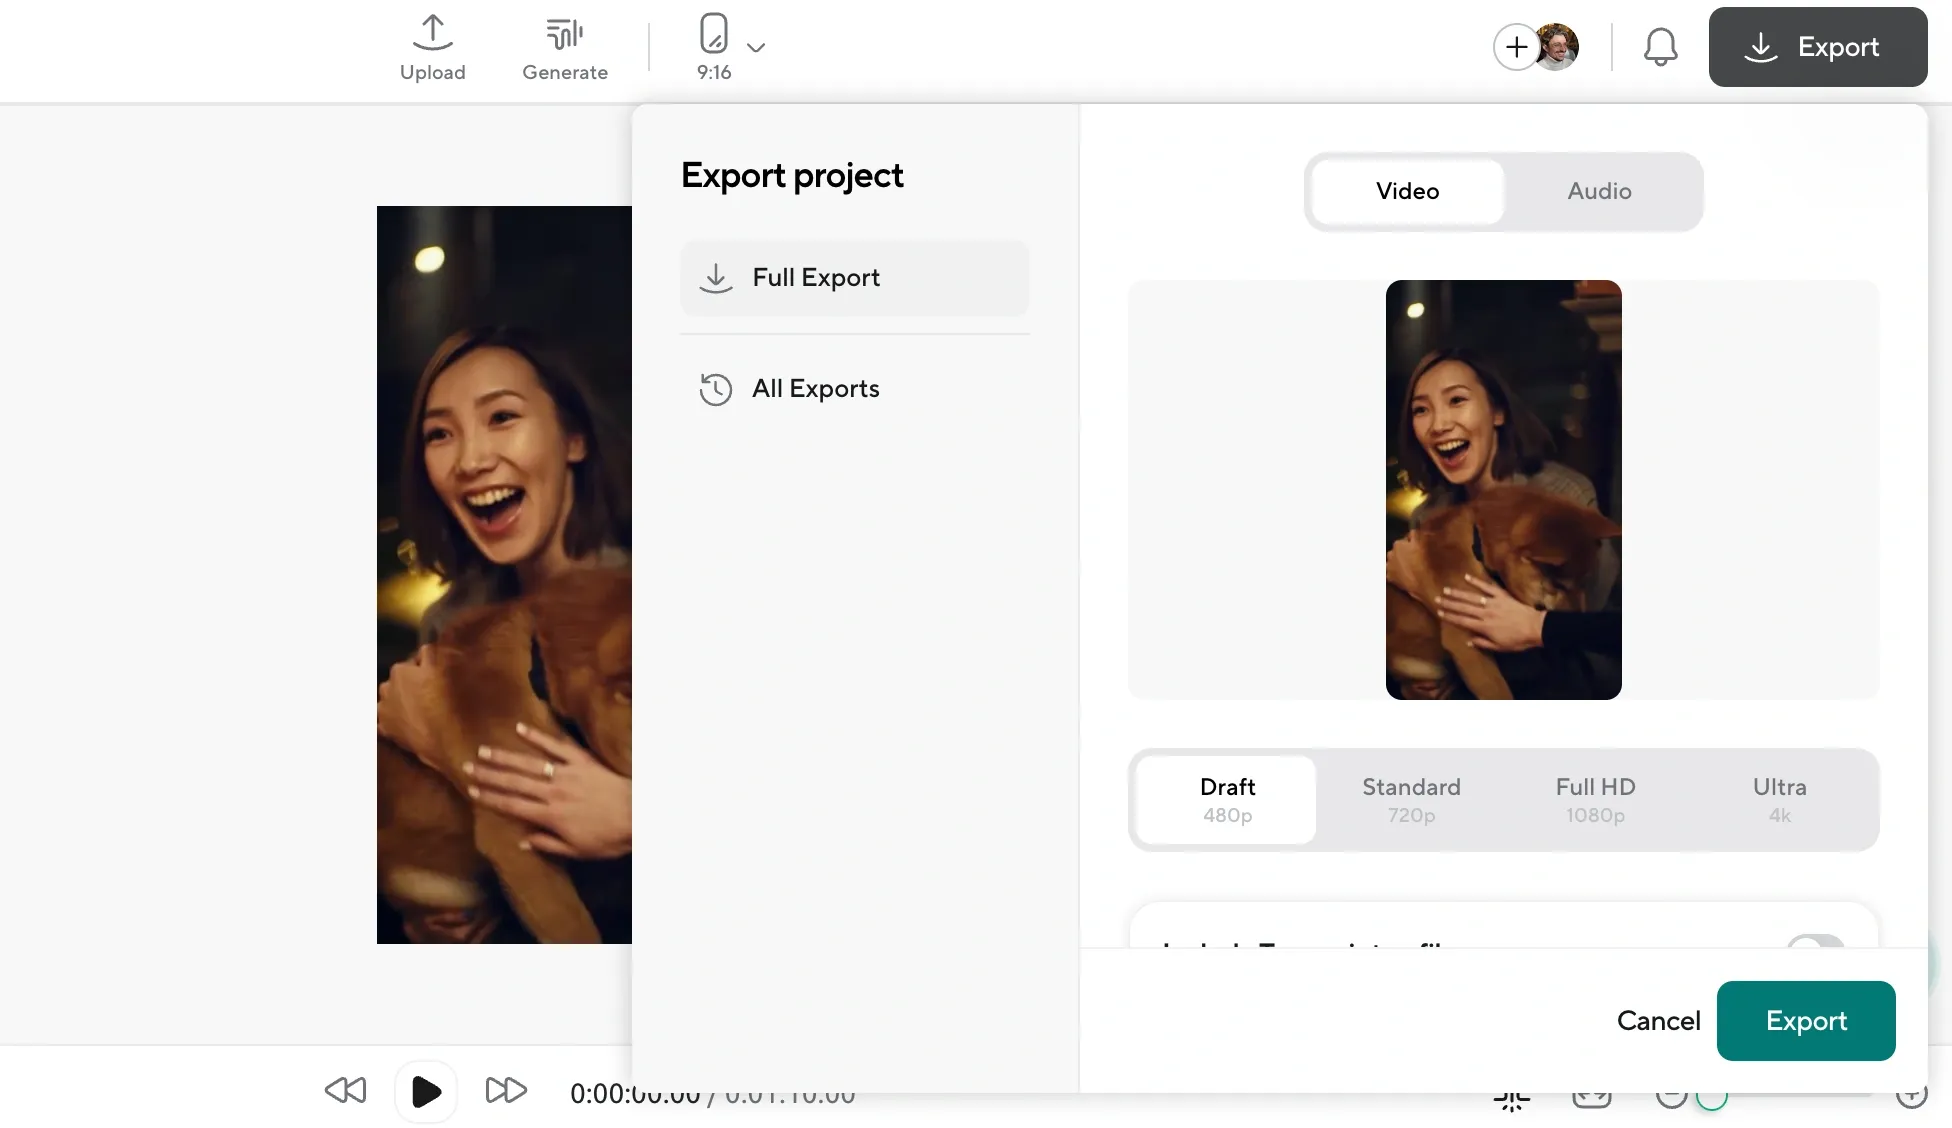
Once everything’s in place, your edits, your sound, your captions, click Export. Choose the MP4 format with a 1080 by 1920 resolution to make sure your video looks great on TikTok.
From there, just upload it through the app or on desktop, and you’re good to go!