If you're a dedicated iOS user looking for creative ways to record a video of yourself on a Mac, we're here to help! Whether you are recording a short promo clip or want to create longer engaging video content for your followers, your Macbook has all the basic in-built tools to provide you with high-quality visuals.
Apple has an impressive native toolkit for everyone interested in amateur video recording. However, if you plan to take your vlogging, vodcasting or YouTube career to the next level, we recommend experimenting with some of the many third-party apps custom-tailored for this purpose.
Without further ado, let's take a look at how to record yourself on a Mac using three different methods:
How Can I Record Myself on a Mac?
To get started, you need a Macbook and plan for the content you want to create. MacOS native apps may be enough for quick and simple recording. However, depending on your video content's purpose and your own ambitions, you may prefer to invest in more professional and advanced options that will enhance the quality of your recordings.
1) Record Yourself with QuickTime App
2) Record Yourself with iMovie
3) Record Yourself with online recording software
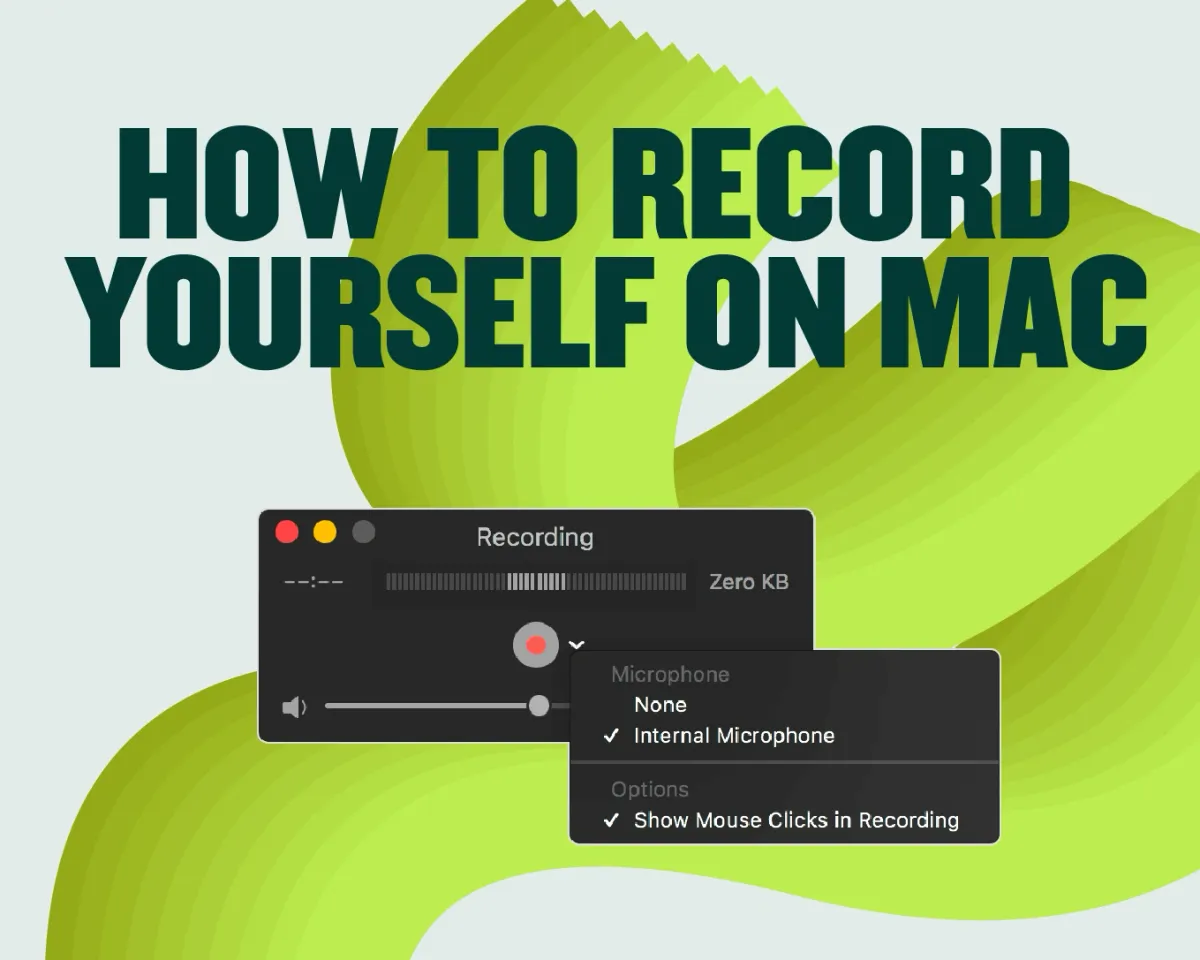
Let's begin with a step-by-step guide about how to record yourself on a Mac using the in-built QuickTime app.
1) Record Yourself with QuickTime App
QuickTime is one of the most popular media players developed by Apple. It's available on all Mac computers and can be used to record both audio and video.
1) To start recording, open QuickTime Player from your applications;
2) Start a New Movie Recording from the Go File section;

1) The system will begin recording as soon as you hit the red button;
2) Press the same red button to stop the recording;
3) Click the Save button to save the recording in your Mac's preferred folder.
For screen recordings, use the QuickTime app to record your screen with a few simple steps:
1) Open the app;
2) Start a New Screen Recording from the Go File section;

1) Select the screen area you want to capture and press the red button to begin screen recording;
2) Press the recording icon again to stop it;
3) Don't forget to save the video.
If you want to edit your recording or add some effects, you will need other video editing software to enhance your final product's quality and overall look.
2) Record Yourself with iMovie
iMovie is another amateur option for everyone who wants to start recording videos on their Mac. It's a basic yet very effective video editing software that comes pre-installed on Apple computers. Mac owners can record video directly to their iMovie library via the FaceTime HD camera. Here's how to do that:
1) Open the iMovie application;
2) Click on the Import button to open the Import window. It must be a downward arrow. However, if you fail to find it on your desktop, click the Media button in the toolbar to see it;

1) Move to the Cameras section of the Import window and choose the built-in camera option;
2) You will also need to specify the event to which your recording will be sent. Choose one of the options available or create a new event;

1) Start recording by pressing the Record button below the live video image;
2) Press the same button again to stop the recording.

Once you finish recording, your video will be automatically saved in the event you have specified. Click to learn more about media and events organization in iMovie.
This app is very user-friendly and easy to navigate. So, even if you are a first-time user, you will quickly get the hang of it.
Pro Solution for Advanced Recording
For those looking for a more professional solution, the Internet is full of software options for recording, editing and publishing videos for a broader audience. Many of these come with a free trial so that users can explore features and decide whether they fit their needs before making a purchase.
Let's see what the market has to offer for iOS users!
Record Yourself with Third-Party Apps
Depending on your purposes and the type of content you want to create, third-party apps can be a great addition or even a better alternative to QuickTime or iMovie.
For example, suppose you plan to record yourself for a vodcast episode or a how-to tutorial. One of the best tools to use is Podcastle, a feature-rich and versatile solution that allows you to record high-quality audio and video calls on your Mac. Podcastle is an all-in-one toolkit for podcasters with a user-friendly interface and high-quality video recording and editing options.
Podcastle has advanced AI-based functionality that can automatically edit your video and audio recordings. It also offers a wide range of sound enhancement tools to make podcasts sound more professional.
Record a video of yourself on Mac with Podcastle's Video Interview tool. Due to its simplicity, Podcastle has quickly become one of the most popular apps for content creators.
Here's how to record and edit top-quality video content with Podcastle:
- Create a personal account at podcastle.ai and choose a subscription plan that best suits your needs. Storyteller is the most popular plan to help users get started with content creation. It allows users to record separate audio and video tracks for each participant. With up to 4K video download quality, your recordings will look great on any screen;
- Start a new project in the Recordings section by clicking on the Create button in the center;
- On the next page, you can specify the type of content you want to record. Choose between audio-only or video recordings;
- Click the Start Recording button to run the tool;
- Once you're ready to save the recording, press the same button again. It will automatically pause the recording. The best part about Podcastle is that users can resume the recording after pressing the stop button. When the final raw version of the recording is ready, click on the Hang button to leave the studio.
Find the recorded files in the Recordings section. This is where users can edit their tracks, enhance the quality to get more immersive and crisp-sounding audio, and download the final files to their Mac.
Edit Audio Quality with Magic Dust
Amateur content creators sometimes forget that audio quality is just as important as video quality. This is especially true for those planning to post their content on social media platforms like YouTube or Instagram.
If you want to improve your recordings' audio quality, we recommend using the Magic Dust feature. It is the platform's most loved and appreciated sound enhancement tool.
To use Magic Dust, go to the Recordings section, choose the file you want to enhance, and click on the Magic Dust button. The AI-powered tool will clean all the background noise and make your audio sound more professional.
Recording video and audio content is easy when you have the right tools. With Podcastle you have everything you need to get started and produce high-quality content your audience will consume enthusiastically and come back for more.
Happy recording!


