Before you can make something great, you need a solid recording. That’s where OBS Studio comes in. It’s free, powerful, and used by creators all over the world to capture everything from gameplay to tutorials.
That said, it might feel a bit intimidating at first, but once you get the hang of it, it’s surprisingly straightforward. With the right setup, OBS can help your videos look sharper, sound clearer, and feel more polished overall.
This guide will walk you through everything you need to know to start recording with OBS, step by step.
Key Takeaways: How to Record with OBS Studio
- OBS Studio is a powerful, free tool for high-quality video recording and streaming. It supports full customization, multiple sources, and pro-level control without costing a cent.
- The OBS interface is key to getting started. Scenes, Sources, the Audio Mixer, and the Preview Window all work together to let you build dynamic video layouts.
- Recording settings matter. Choosing the right format (like MKV), resolution, encoder (NVENC or x264), and bitrate can drastically improve your video quality without overloading your system.
- Streaming setup takes just a few extra steps. By linking your platform, adjusting output settings, and creating a scene with audio and video sources, you can go live with full control.
- OBS has a learning curve. From audio levels to bitrate tweaks, success with OBS depends on knowing how to configure it for your system and your goals.
How to Install OBS Studio
Before you can start recording or streaming with OBS Studio, you’ll need to get it installed and set up properly. Worry not, since it only takes a few minutes:
- Download the OBS Studio: Go to the OBS Studio website and download it for your operating system. It’s available for Windows, macOS, and Linux.
- Install: Once the OBS installer is downloaded, run it and follow the setup instructions.
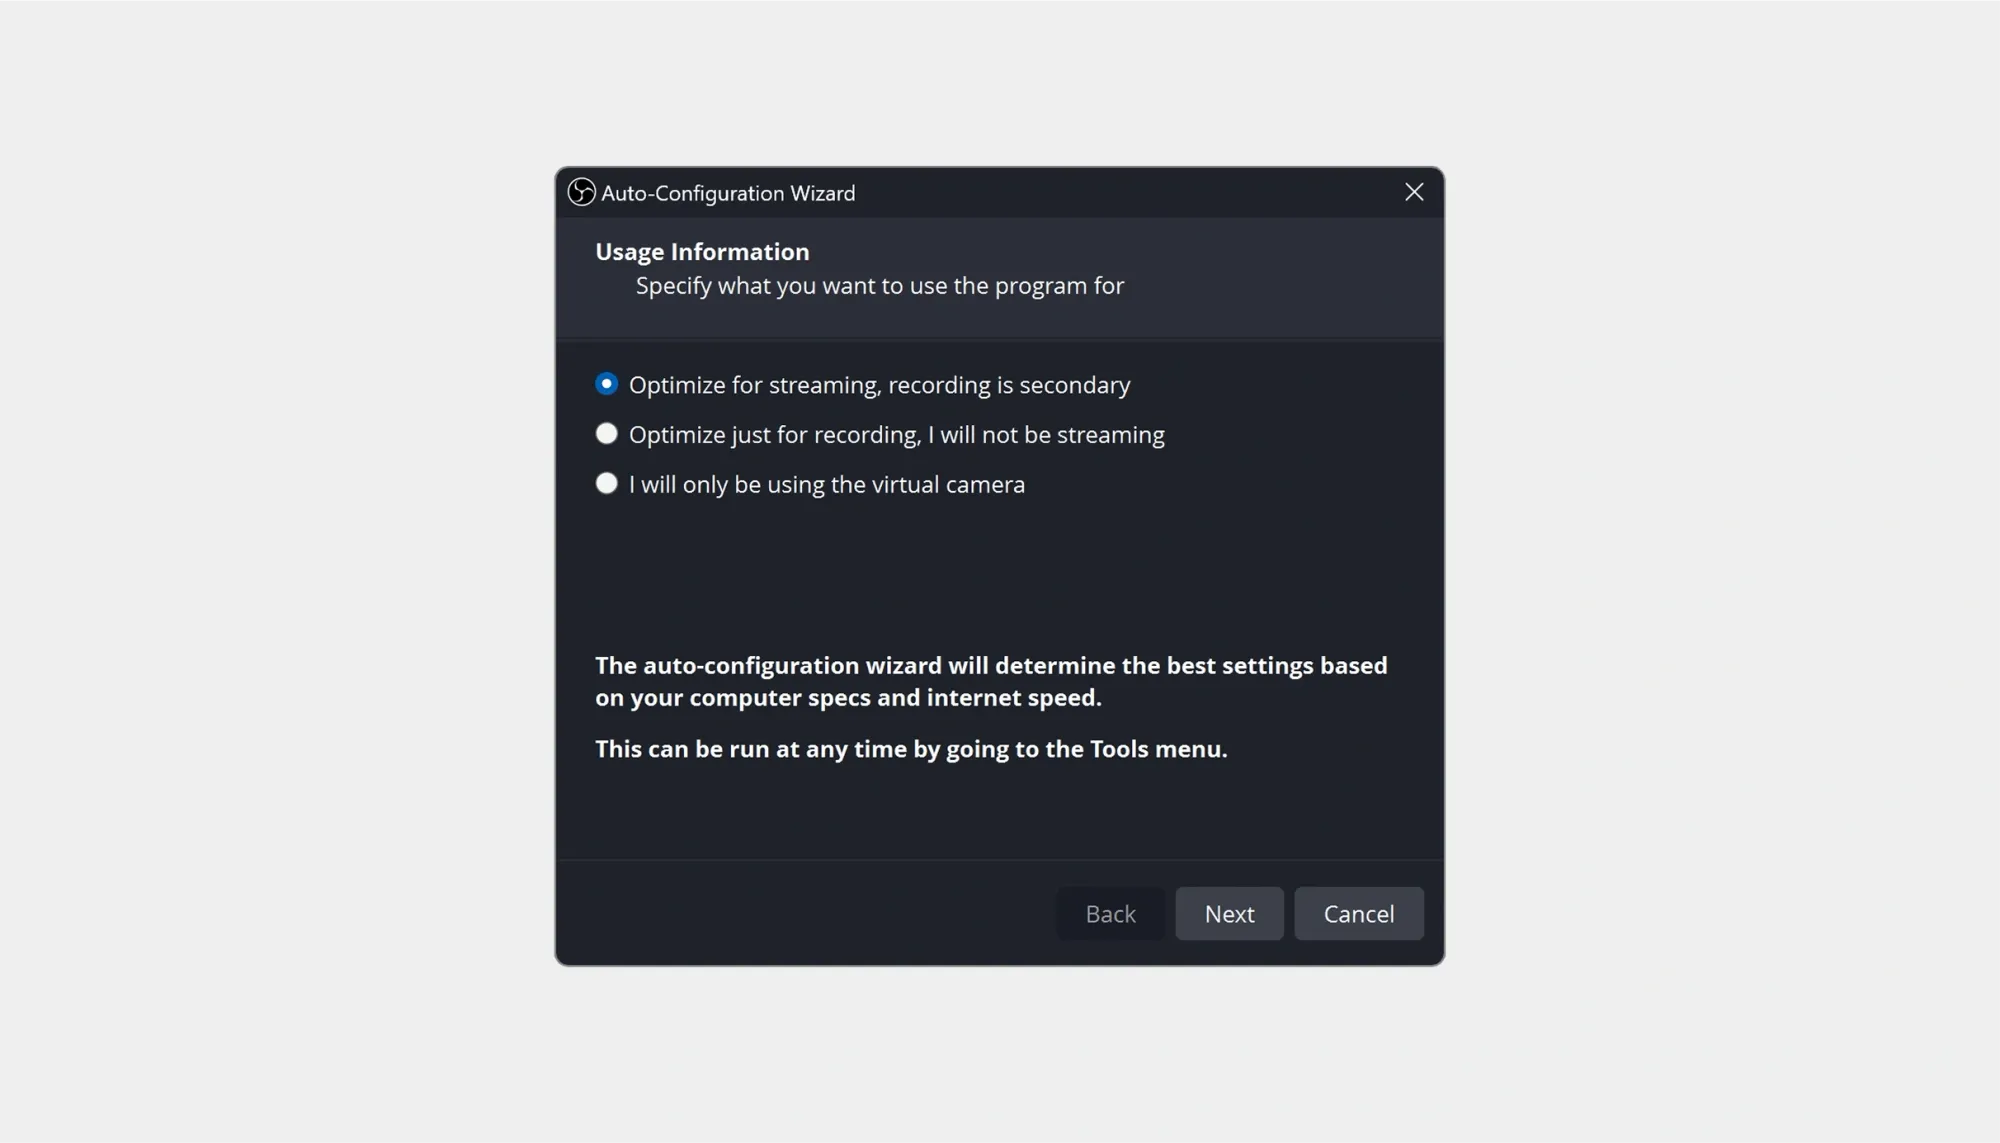
- Set it Up: On first launch, OBS will offer you to set it up based on your video recording requirements. For instance, select “Optimize just for recording” if you're not planning to stream, and OBS will automatically adjust your settings based on your system specs. If you later change your mind about any of the settings, you can adjust them instantly.
The OBS Interface: How does OBS Work?
At first glance, OBS Studio may seem challenging, but once you understand the layout, it’s surprisingly intuitive. Here’s a breakdown of the key parts of the interface so you can get comfortable recording and streaming right away.
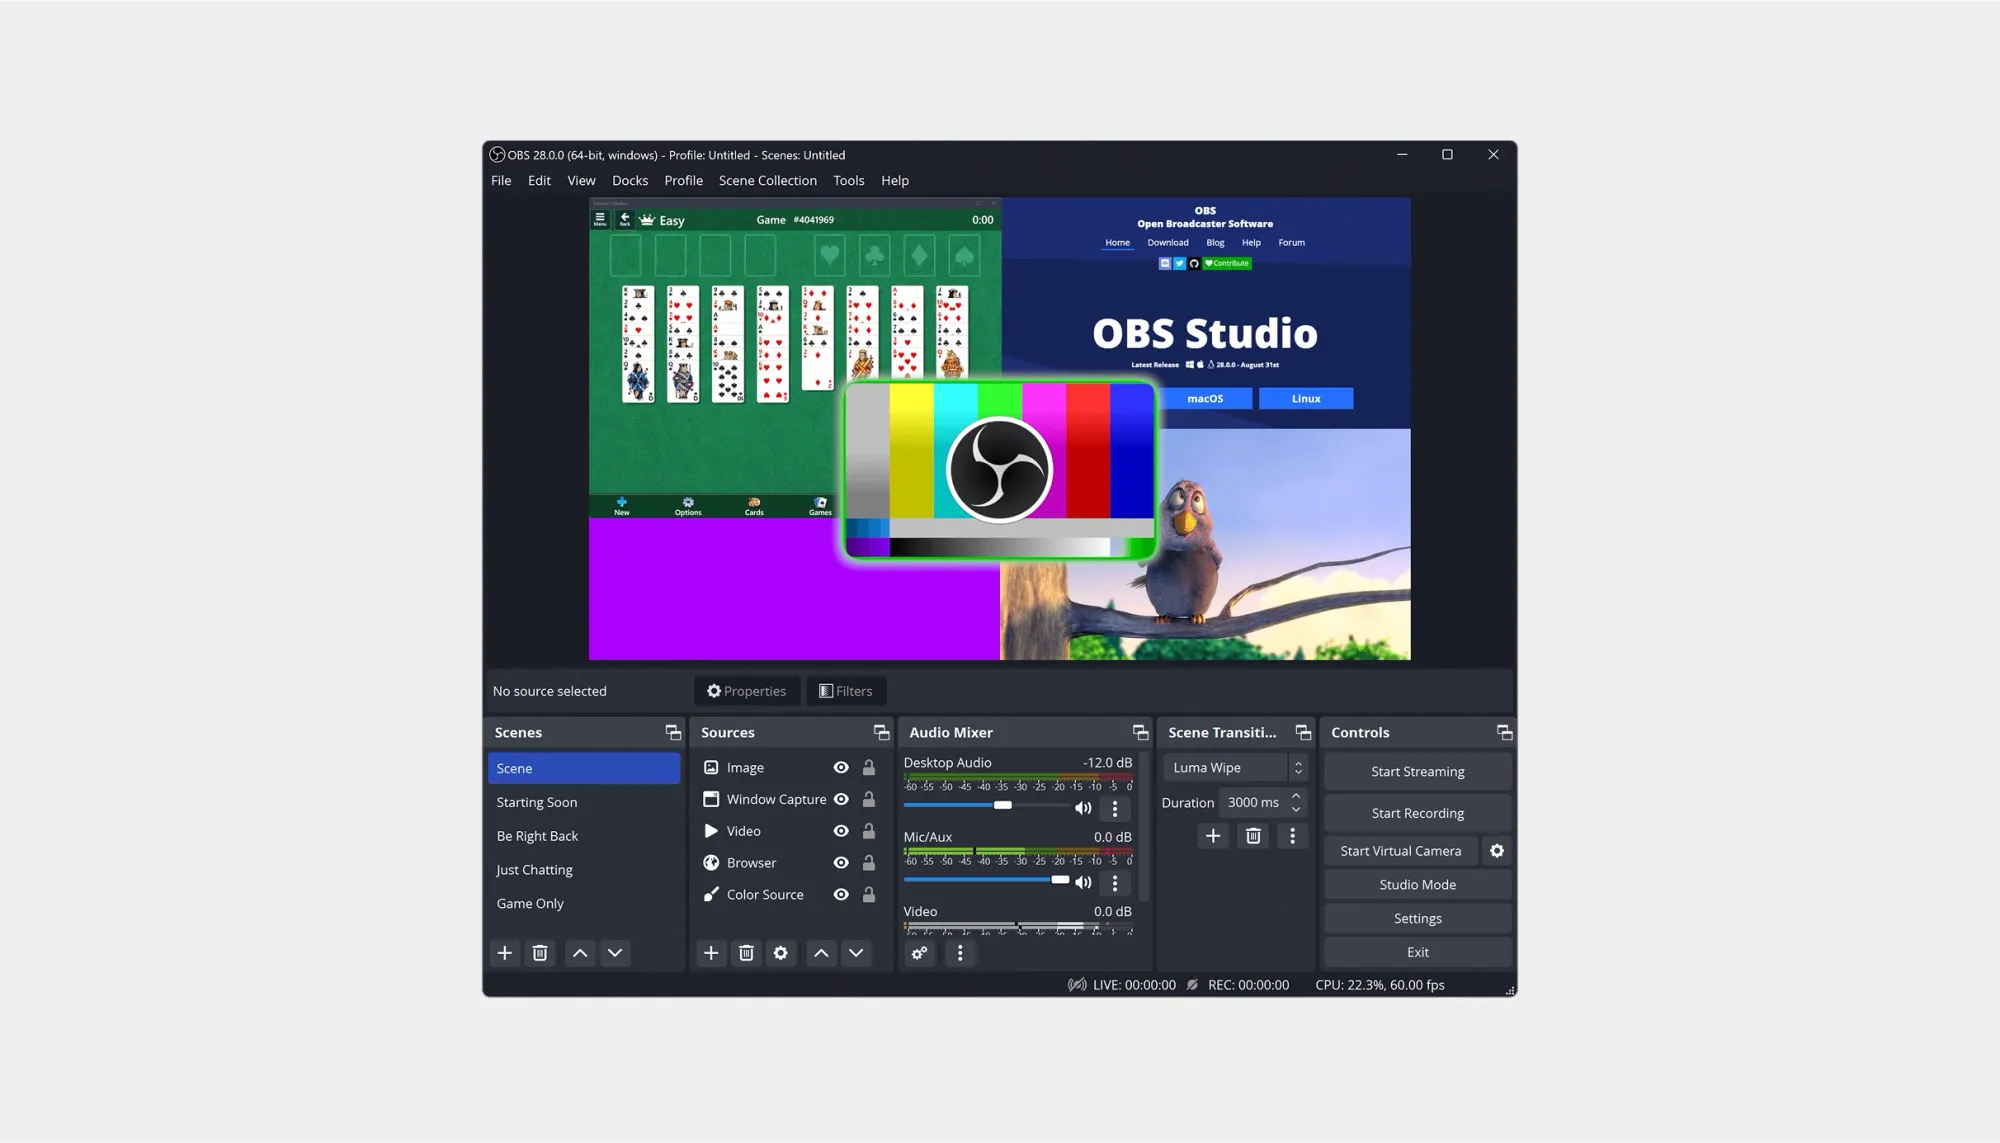
1. Scenes
Think of Scenes as your “canvas.” Each Scene holds a collection of Sources. You can use it to create different setups for various recording needs, like one scene for your webcam, another for screen recording, or a custom layout for live tutorials.
2. Sources
These are the elements within your scene, such as screen, webcam, images, videos, text overlays, etc. They are for layering different visual elements. You can stack them, resize, crop, and move them around in the preview window.
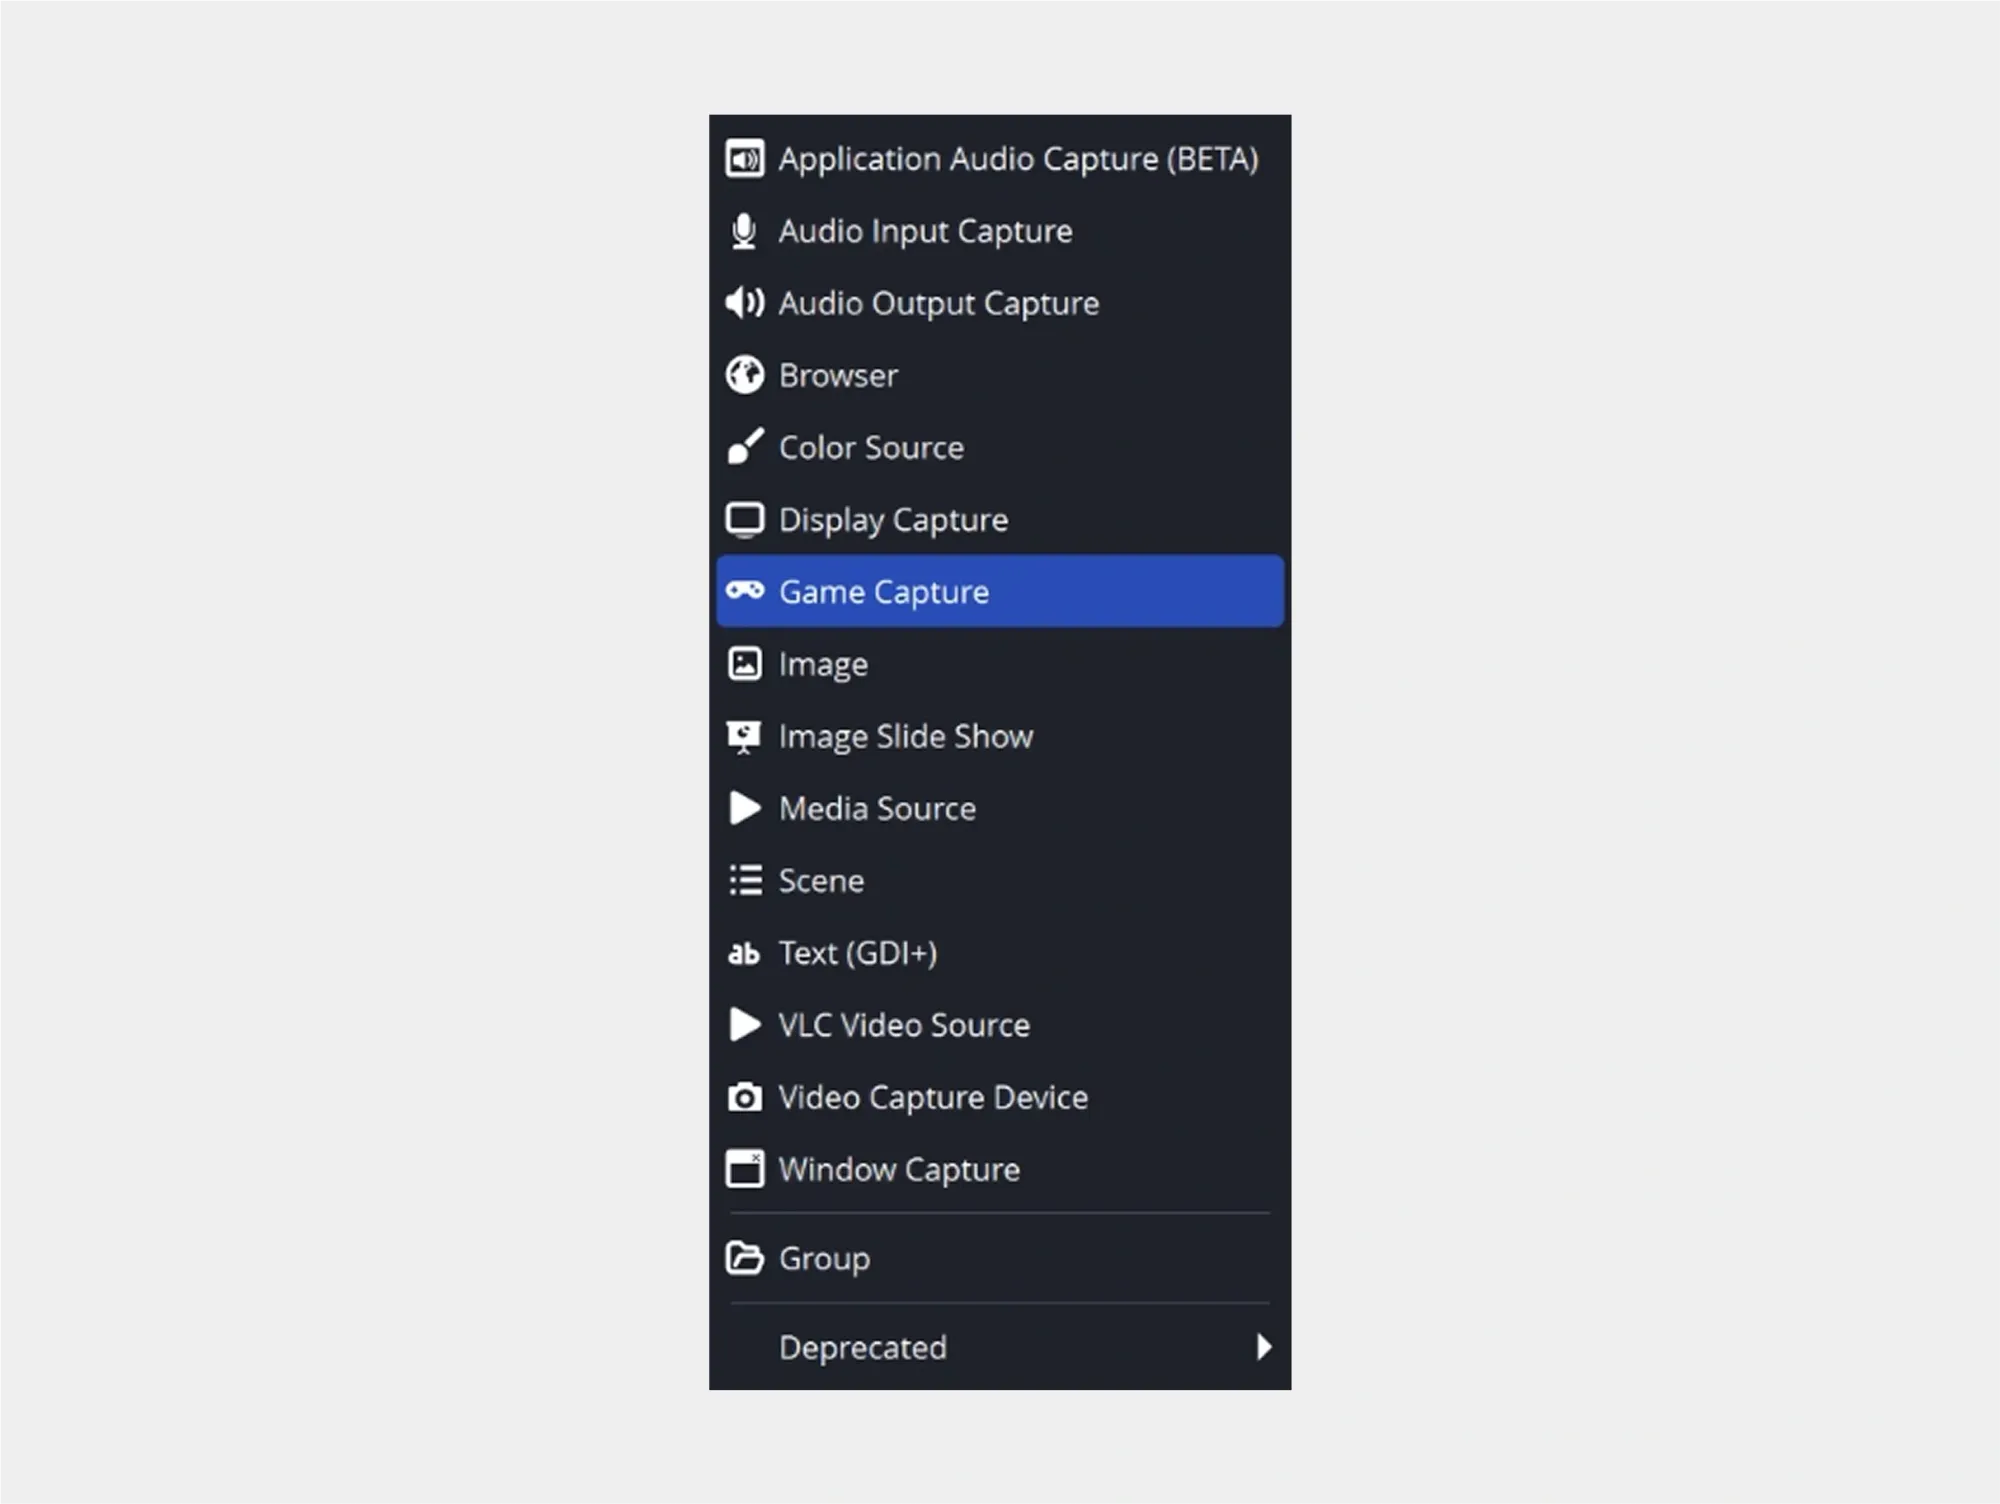
Here are some common Sources:
- Display Capture - Records your entire screen
- Window Capture - Records a specific app or window
- Game Capture - Optimized for recording games
- Video Capture Device - Your webcam or external camera
- Image / Text - Static overlays like logos or captions
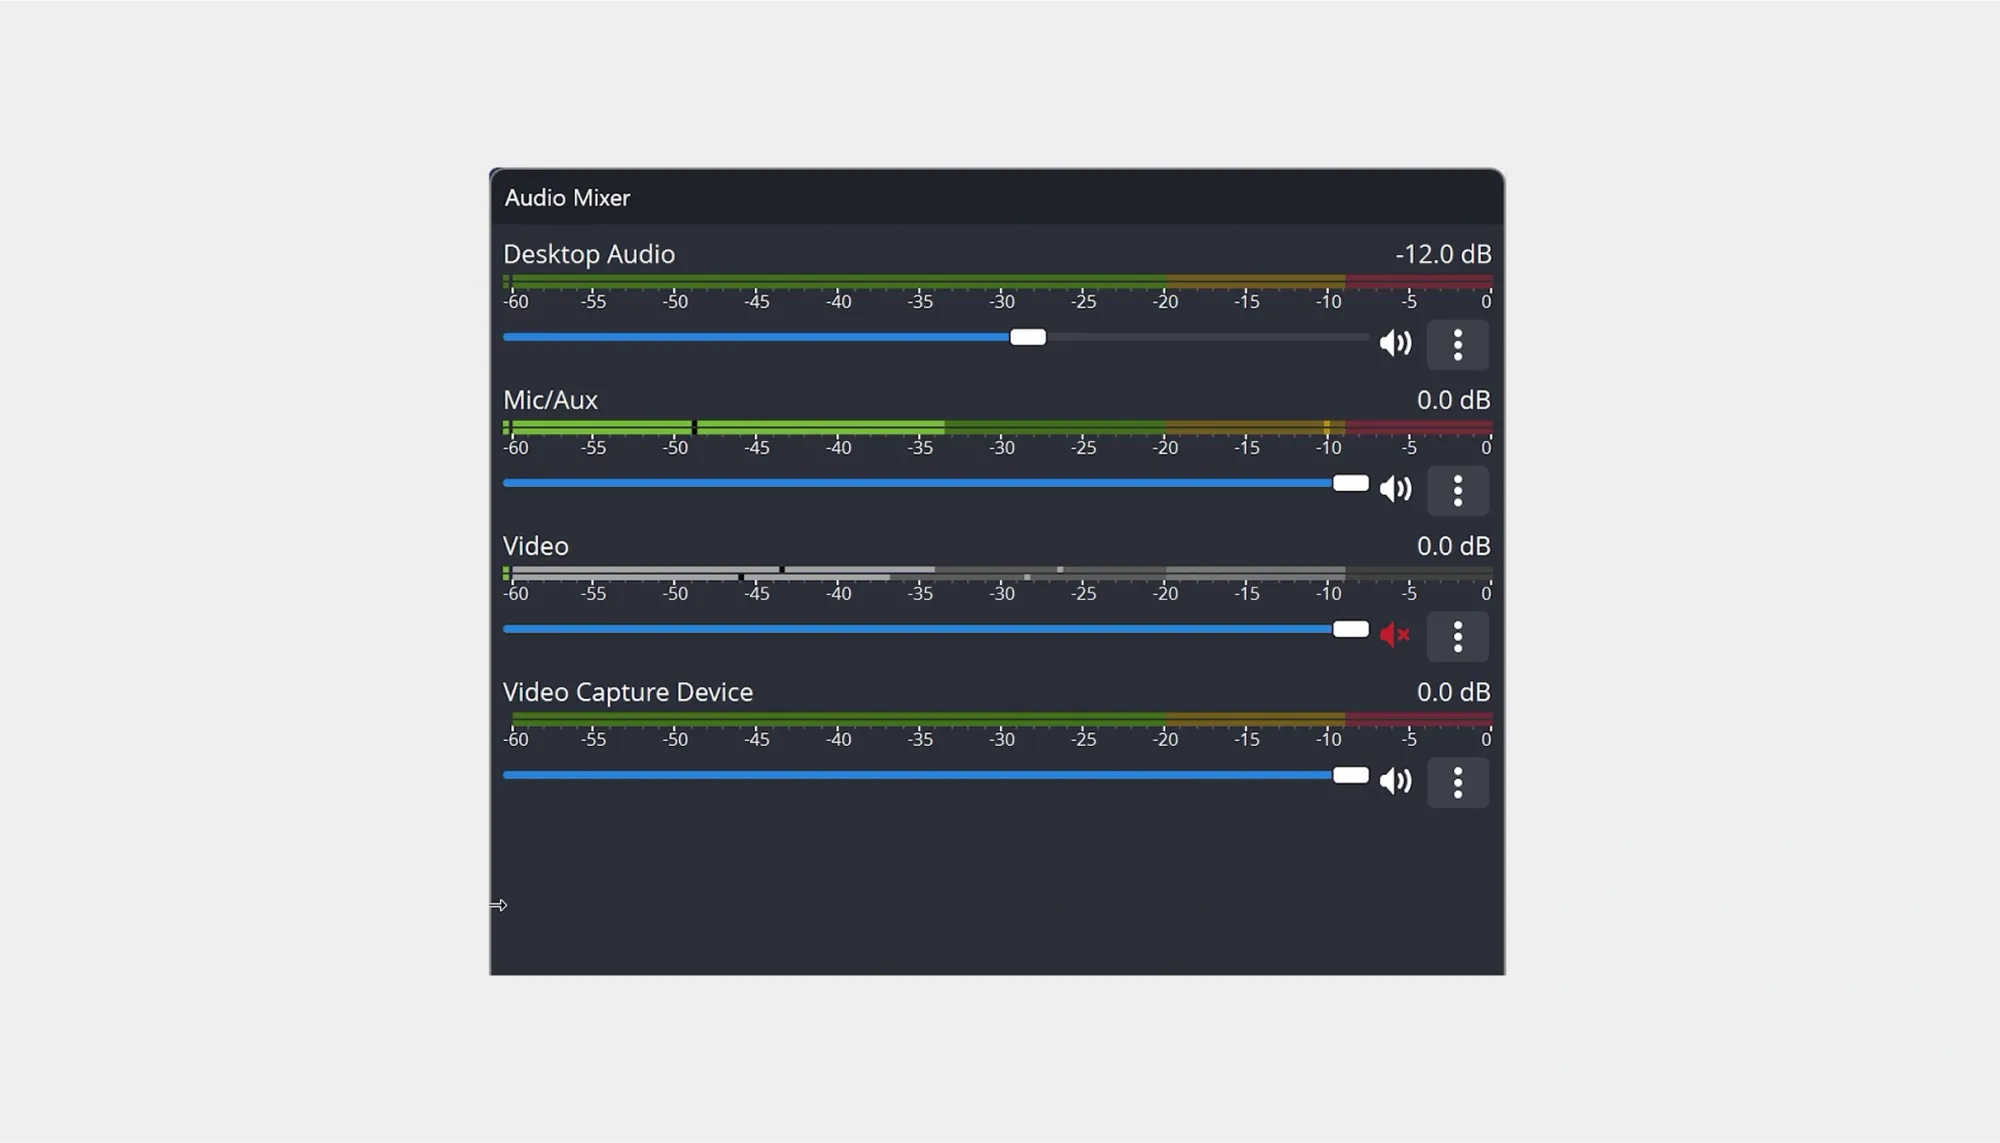
3. Audio Mixer
This controls the volume levels of your mic, desktop audio, and any other audio input/output sources. With the audio mixer, you can adjust levels in real-time and mute tracks. You can also add filters like noise suppression or gain.
4. Scene Transitions
Scene transitions allow you to set effects when switching between scenes (e.g., fade or cut). They are great for livestreaming or dynamic video setups.
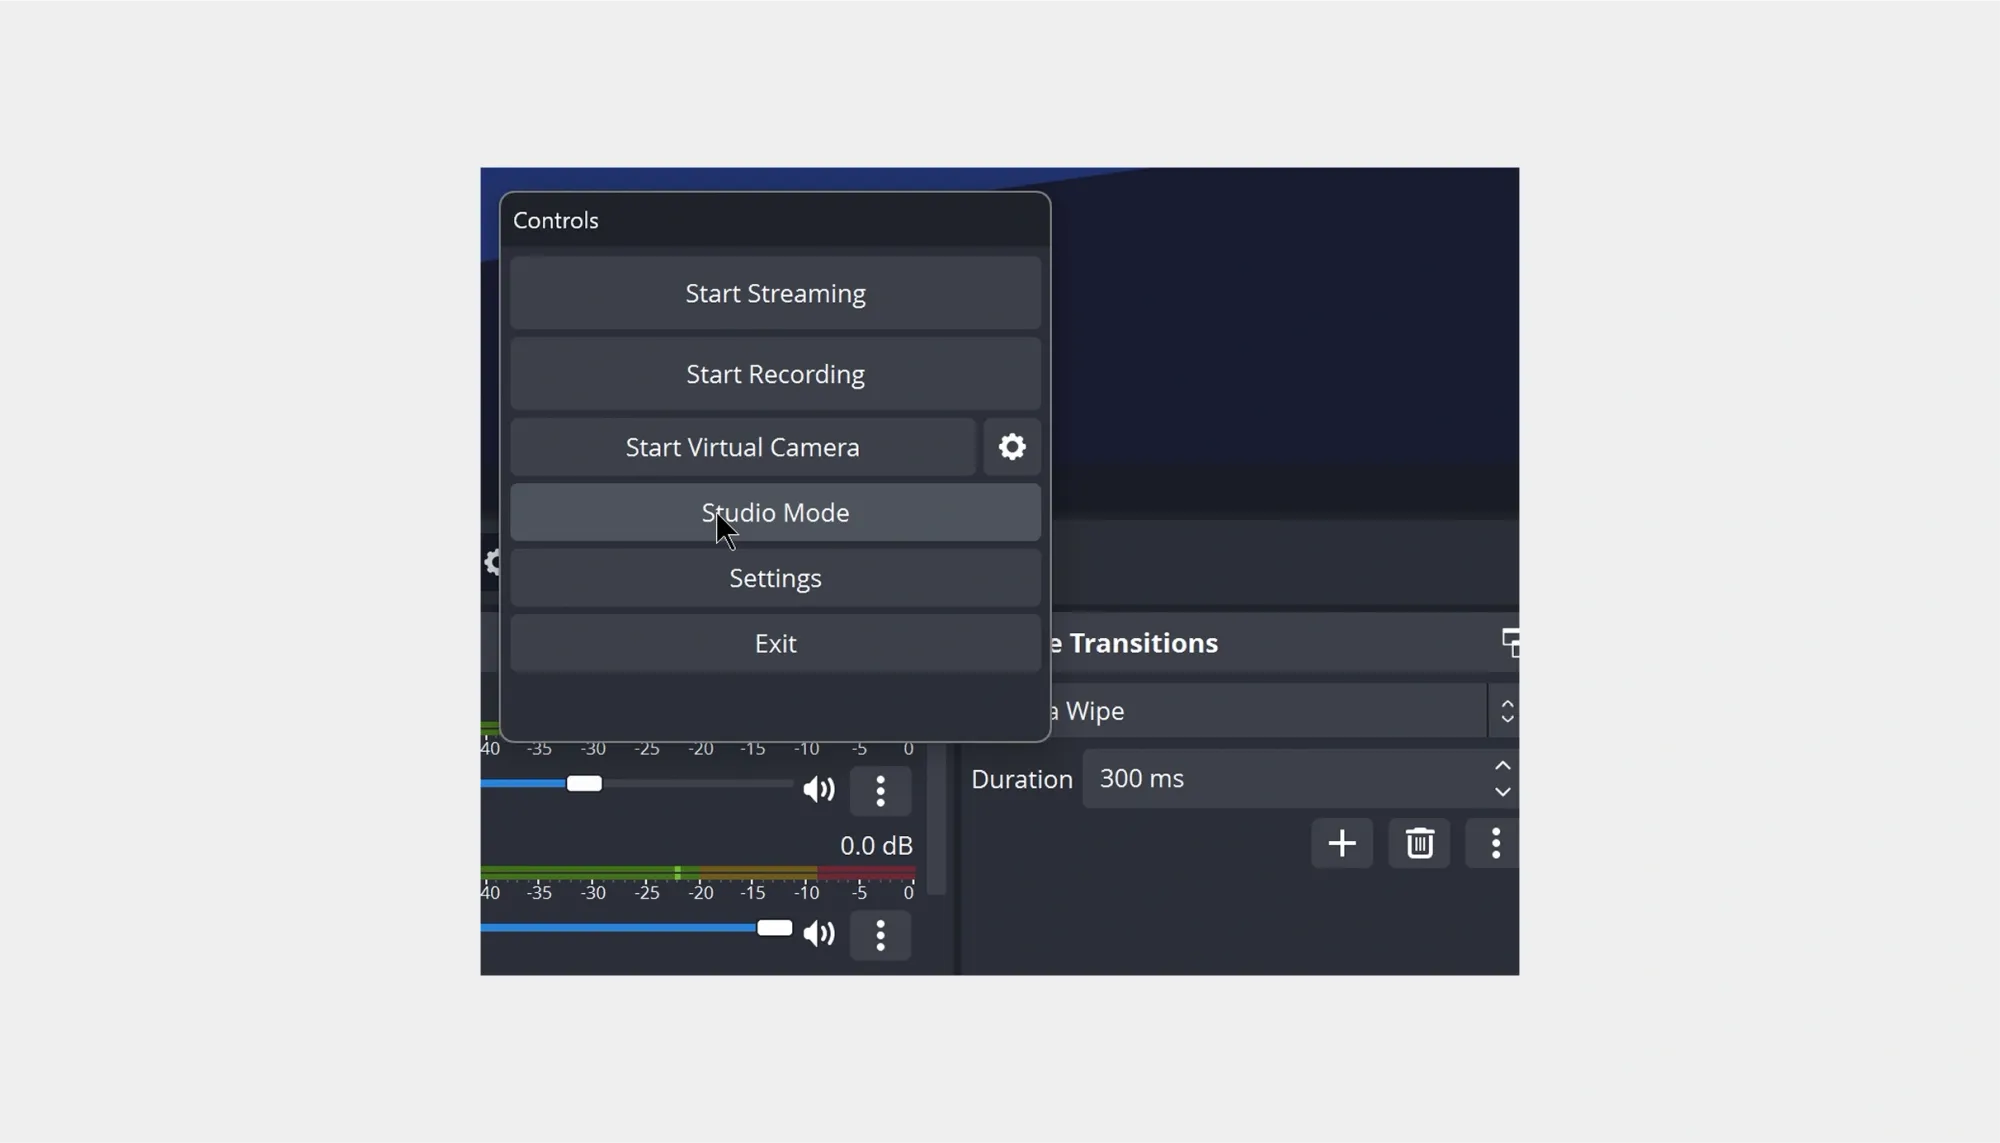
5. Controls
Here you can start/stop your recordings, start streaming, access settings, and exit OBS. You use it as the essential control center for all your sessions.
6. Preview Window
Displays what’s currently being recorded or streamed. It’s used to arrange your sources, check layout, resize elements, and ensure everything looks the way you want.
How to Set Up OBS for Recording
When you launch OBS Studio, you’ll see a blank scene by default. From there, you can start adding Sources to display things like images, text, videos, your webcam, gameplay, or your desktop.
At the bottom of the main window, you’ll find the Sources Dock. Click the + button to add a new source.
But before you hit that record button, it’s important to configure OBS Studio properly so you get high-quality results without lag or issues. Here’s how to set up OBS for recording from scratch:
1. Go to Settings
Click Settings in the bottom-right corner of the interface. This is where you'll configure all your recording preferences. To do so:
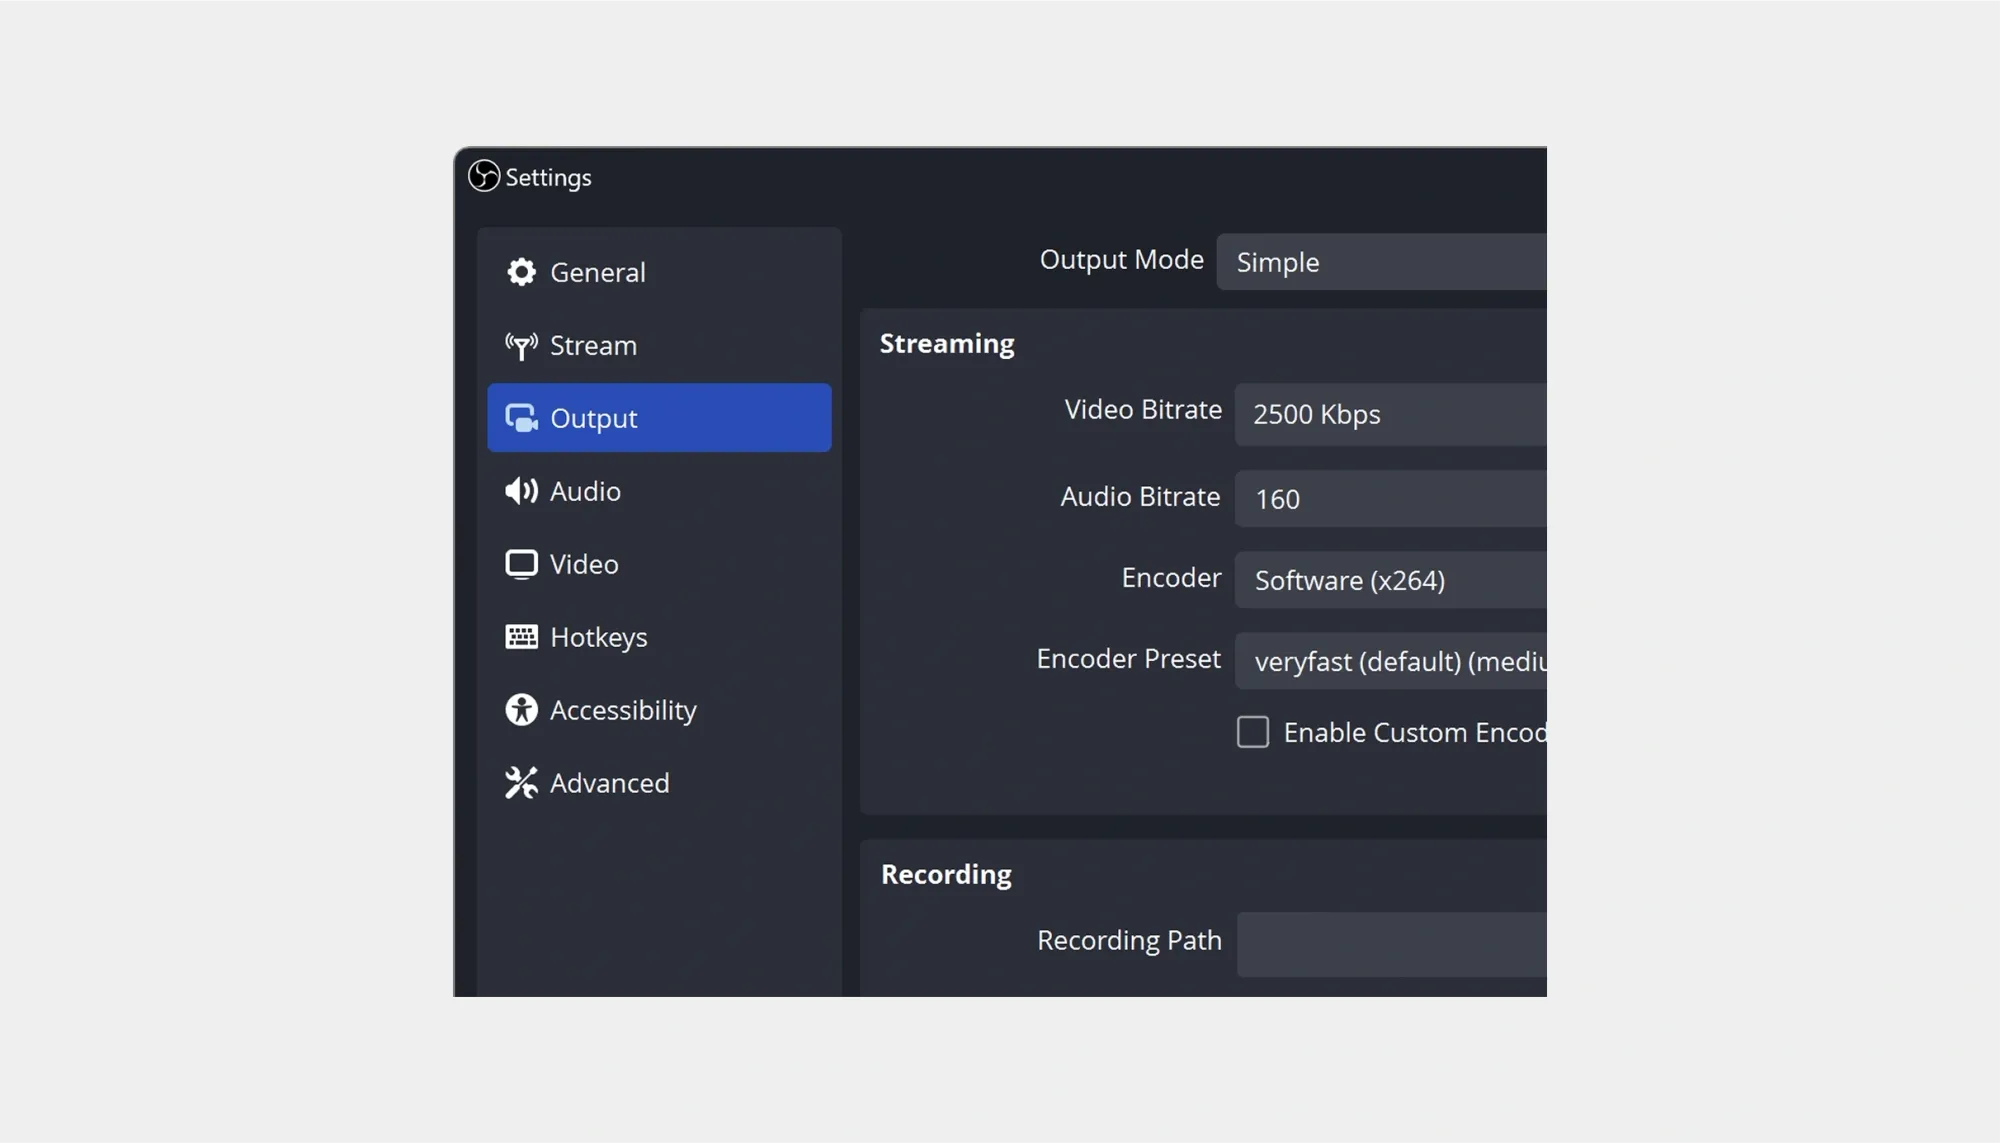
- Navigate to Settings > Output > Recording tab.
- Choose a Recording Path (this is where your videos will be saved).
- Set Recording Format to mp4, mkv, or another supported format (mkv is safer to avoid file corruption; you can remix to mp4 later).
- Choose a Recording Quality: which could be High Quality, Medium File Size with great balance for most users, or Indistinguishable Quality with larger files but near lossless.
- Set Encoder: x264 (CPU-based) or NVENC/AMD (GPU-based), depending on your hardware. NVENC is recommended if your GPU supports it.
2. Set Up Audio
- Go to Settings > Audio.
- Set the Sample Rate to 44.1 kHz or 48 kHz.
- Choose your Desktop Audio and Mic/Auxiliary Audio devices.
- Make sure your mic is selected properly and not muted.
3. Adjust Video Settings
- Head to Settings > Video.
- Set your Base (Canvas) Resolution to your screen resolution (e.g., 1920x1080).
- Set the Output (Scaled) Resolution, usually keep it the same unless you want to record at a lower resolution.
- Choose Common FPS Values (30 or 60 FPS, depending on what you're recording and your system performance).
4. Create a Scene and Add Sources
- In the Scenes panel, click the + to create a new scene (e.g., “Screen Recording”).
- In the Sources panel, click + and choose Display Capture to record your full screen, Window Capture to record a specific app, or Video Capture Device for your webcam
You can add multiple sources and arrange them in the Preview Window.
5. Test Your Audio Levels
- Speak into your mic and play some system audio.
- Watch the Audio Mixer levels, make sure they’re active and not peaking (red zone).
- Adjust sliders or add filters (right-click the source > Filters) if needed.
6. Save Settings and Close
Click “OK” to apply all changes and return to the main screen.
7. Start Recording
When everything looks good, click Start Recording in the Controls panel.
8. Stop Recording and Locate Your File
Once you're done, click Stop Recording. Your video will be saved in the folder you selected earlier (check under Settings > Output > Recording Path).
Where OBS Saves Your Recordings
After you stop recording in OBS Studio, your video is automatically saved to your computer. But where exactly it ends up depends on your operating system. On Windows, recordings are typically saved in your Videos folder by default, while on macOS, they usually go to the Movies folder.
If you’d prefer to keep your files somewhere else, OBS makes it easy to choose a custom location. Just open OBS, head to Settings > Output > Recording, and look for the Recording Path field. Click Browse, select your preferred folder, and OBS will save all future recordings there. It’s a good idea to create a dedicated folder for your OBS videos to keep everything organized and easy to find.
How to Set Up OBS for Streaming
OBS gives you full control over your stream, you just need to set it up right. From linking your platform to adjusting settings, here’s how to get started.
1. Connect Your Streaming Account
- Click the Settings button in the bottom-right corner.
- Go to the Stream tab.
- Under Service, select your streaming platform (e.g., Twitch, Facebook Live, YouTube).
- Choose one of the following:
- Connect Account (recommended) - log into your streaming account directly.
- Use Stream Key - copy your stream key from the platform and paste it into OBS.
2. Set Up Your Streaming Output
- Go to the Output tab and click on Streaming.
- Set the Encoder: x264 (CPU-based) if you don’t have GPU support. NVENC or AMD (GPU-based) for better performance, if available.
- Choose your Bitrate (depends on your internet upload speed): 2500 - 4000 Kbps for 720p, or 4500 - 6000 Kbps for 1080p
- Set Keyframe Interval to 2 (required by most platforms).
- Leave CPU Preset or GPU Preset as very fast or quality for a good balance.
3. Set Up Audio Devices
- Go to the Audio tab.
- Select your Desktop Audio (e.g., system sounds, game audio).
- Select your Mic/Auxiliary Audio (your microphone).
- Leave the Sample Rate at 44.1 kHz or 48 kHz.
4. Adjust Video Settings
- Go to the Video tab.
- Set the Base (Canvas) Resolution (usually your screen resolution).
- Set the Output (Scaled) Resolution (what viewers see): 1280x720 for a lighter stream, or 1920x1080 for full HD.
- Choose FPS (Frames Per Second): 30 or 60, depending on performance and quality needs.
5. Create a Scene and Add Sources
- In the Scenes panel, click the + to create a new scene.
- In the Sources panel, click the + and add: Display Capture or Window Capture for screen content, Video Capture Device for webcam, Audio Input/Output Capture for mics or desktop audio, or obs interface for stream alerts or overlays
6. Preview Your Layout and Test Audio Levels
Check the Preview Window to make sure everything looks good. Arrange or resize sources as needed. Then, speak into your mic and play system audio. Watch the Audio Mixer for activity and adjust sliders to avoid peaking (red levels).
7. Start Streaming
When you’re ready to go live, click the Start Streaming button in the Controls panel (bottom-right). OBS will connect to your selected platform and start broadcasting in real-time. Congratulations, you’re now live!
Best OBS Settings for Recording
If you’re using OBS Studio to record your screen, gameplay, or webcam, getting the settings right can make a big difference. Luckily, you don’t need to be a tech expert to make your videos look great. With just a few quick adjustments, you’ll be ready to record smooth, high-quality videos that won’t slow down your computer.
Here’s a simple breakdown of the best settings to use in OBS for recording.
- The Best Recording Format: The MKV format is safer than MP4, if something goes wrong during recording (like a crash), your file won’t be lost. You can easily convert it to MP4 inside OBS later.
- Recording Quality: With High Quality, Medium File Size, you get a great-looking video without taking up too much space. Want the absolute best quality? Choose Indistinguishable Quality, just be ready for bigger file sizes.
- Resolution: 1920x1080 (Full HD) is a good standard for sharp, clear video. If your computer is a bit older, or you're running into performance issues, try 1280x720 instead.
- Frame Rate (FPS): 30 FPS is great for most tutorials, calls, or simple screen recordings. Meanwhile, 60 FPS is smoother, perfect for gameplay or fast movement.
- Audio Bitrate: The 160 kbps or higher ensures your voice sounds clear and not tinny.
Best Encoder Settings for OBS
The encoder is the part of OBS that turns your video into a file. OBS will usually pick the best one for you, but here’s a simple guide:
- If you have a dedicated graphics card (NVIDIA or AMD), use NVENC (for NVIDIA) or AMD Encoder. They handle recording better and take the pressure off your computer.
- If you don’t have a graphics card, use x264, which uses your computer’s processor. It works just fine, but it might slow things down on older devices .
- And if OBS gives you the option to use NVENC, go with it. It’s a solid, safe choice for smooth recordings.
OBS Bitrate Explained
Okay, bitrate does sound like one of those overly technical terms that only video engineers care about. But if you’re using OBS Studio, it’s worth understanding, and yes, it’s way simpler than it sounds.
What is bitrate?
In plain terms, bitrate is how much data OBS uses every second to create your video. The higher the bitrate, the better, smoother, sharper, and more detailed your video will look.
If your bitrate is too low, your video might look blurry, pixelated, or choppy, especially if there’s a lot of motion, like during gameplay or fast screen movements. If it’s too high, you might end up with unnecessarily huge files or performance issues on slower computers.
Luckily, if you’re recording (not streaming), you don’t need to worry about internet speed or platform limits. You’re just saving to your local hard drive, which gives you more freedom to push for quality.
What’s a “good” bitrate?
There’s no one-size-fits-all answer, but here’s a simple way to think about it:
- If you're recording in 720p at 30 frames per second, a bitrate around 3,000 to 4,000 kbps should look pretty clean.
- For 1080p at 30 fps, aim for 5,000 to 6,000 kbps.
- And if you’re going for 1080p at 60 fps, which is smoother and better for action, go a bit higher, like 6,000 to 10,000 kbps.
Bitrate isn’t something to be afraid of, just something to adjust based on your needs. Want great quality and don’t mind larger files? Push it higher. Want smaller files and quicker exports? Dial it back. And remember, you can always test and tweak until it feels just right.
Record Your Videos with Podcastle
OBS has its perks. It’s free, powerful, and highly customizable. But it can also be complicated, glitchy, and full of trial-and-error setups.
If you’re looking for a faster, easier way to record videos (including screen sharing), Podcastle's Recording and Editing Suite can cut your content creation process in half. All you need to do is:
- Open the Recording Studio – Invite up to 10 remote guests and record in high-quality video and audio, straight from your browser.
- Hit Record and Share Your Screen – Screen share any time during the session, while Podcastle automatically switches between active speakers.
- Edit Instantly with AI Tools – Resize for TikTok, enhance your audio, add AI voiceovers, background music, change your video background, trim, crop, and more.
It’s everything you need to record and polish your content, minus the OBS headaches.
FAQs
How to download OBS on Mac?
To download OBS Studio on a Mac, go to obsproject.com and click the macOS version under the “OBS Studio” download options. Once the .dmg file finishes downloading, open it and drag the OBS icon into your Applications folder. Launch the app, and if your Mac blocks it due to security settings, go to System Settings > Privacy & Security and allow OBS to run. OBS Studio works with macOS 10.13 and above and is fully optimized for Apple Silicon (M1/M2/M3) as well.
OBS not working on Windows 10?
If OBS isn’t working properly on Windows 10, it’s often due to outdated graphics drivers, missing permissions, or conflicts with other software. First, try running OBS as an administrator and make sure your GPU drivers are fully updated. If you’re seeing a black screen, especially when capturing a display or window, it may be due to graphics card switching (common on laptops). To fix it, go to your system’s graphics settings and set OBS to run on your high-performance GPU. Reinstalling OBS or disabling Game Mode in Windows can also help in some cases.
How to record Discord audio with OBS?
To record Discord audio in OBS, you’ll need to capture your desktop sound, which includes Discord. Start by going to Settings > Audio in OBS and setting one of the desktop audio devices (usually your system default) to active. Then, make sure Discord is playing through that device (check in Discord’s Voice & Video settings). Once that’s set up, any sound from Discord, like voice chats, will be included in your OBS recording.
Is OBS Studio safe?
Yes, OBS Studio is completely safe to use. It’s open-source software developed by a large, reputable community and maintained by the OBS Project. It contains no malware, spyware, or ads, and it doesn’t collect any personal data. Just make sure to download it from the official site at obsproject.com, not from third-party sources or “installer bundles,” which may contain unwanted software.
Is OBS Studio free?
Yes! OBS Studio is 100% free and open source. There are no paid versions, no hidden features behind a paywall, and no subscriptions. You can download it, install it, and use it for recording or streaming as much as you want without paying a cent. It’s also supported by a passionate developer and user community, which means frequent updates and lots of helpful tutorials and plugins available online.
Can OBS Studio stream to multiple sites?
Out of the box, OBS Studio can stream to one platform at a time, like Twitch, YouTube, or Facebook Live. However, if you want to stream to multiple sites simultaneously, you can use third-party tools like Restream.io, Streamlabs Ultra, or custom RTMP setups. These services act as a middleman, sending your OBS stream to different platforms simultaneously without placing extra strain on your computer. Alternatively, advanced users can set up multiple OBS instances or utilize plugins, but these methods require more technical expertise.