People upload YouTube videos for a reason: to get views. Whether you’re aiming to educate, entertain, promote a brand, or build a community, your videos are meant to be seen.
But editing is the hurdle that often holds creators back. If you’re not careful, poor editing can be the very thing that stops your content from shining and connecting with viewers.
The good news? There are simple, effective techniques that can take your editing game to the next level.
Here’s your ultimate guide to editing YouTube videos in 2025.
How to edit using YouTube's video editor
Without a doubt, every YouTuber should get familiar with YouTube’s built-in video editor. While it may not rival the advanced editing tools of dedicated software, it’s incredibly useful for quick edits and last-minute tweaks.
Let’s take a full, step-by-step look at how to make the most out of YouTube’s video editor, so you can quickly polish your content and keep your workflow efficient.
1) Open YouTube Studio
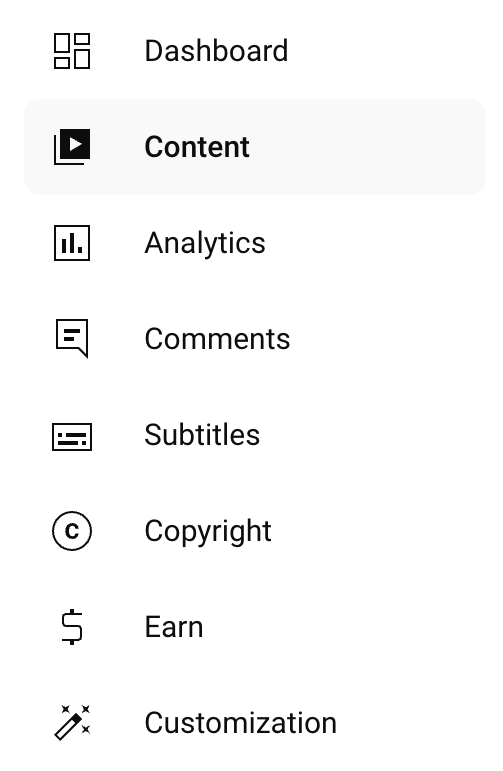
First things first, log into your YouTube studio. Once you’re logged in, click on the "Content" section located on the left panel of your screen, which includes all the videos that have been uploaded to your channel.
PS: Unlike other editing tools YouTubers use, the best part about the YouTube video editor is that it allows you to edit YouTube videos after upload, so any video that you’ve already uploaded can be edited. Pick the video you want to edit and move to the next step.
2) Go to your YouTube video editor
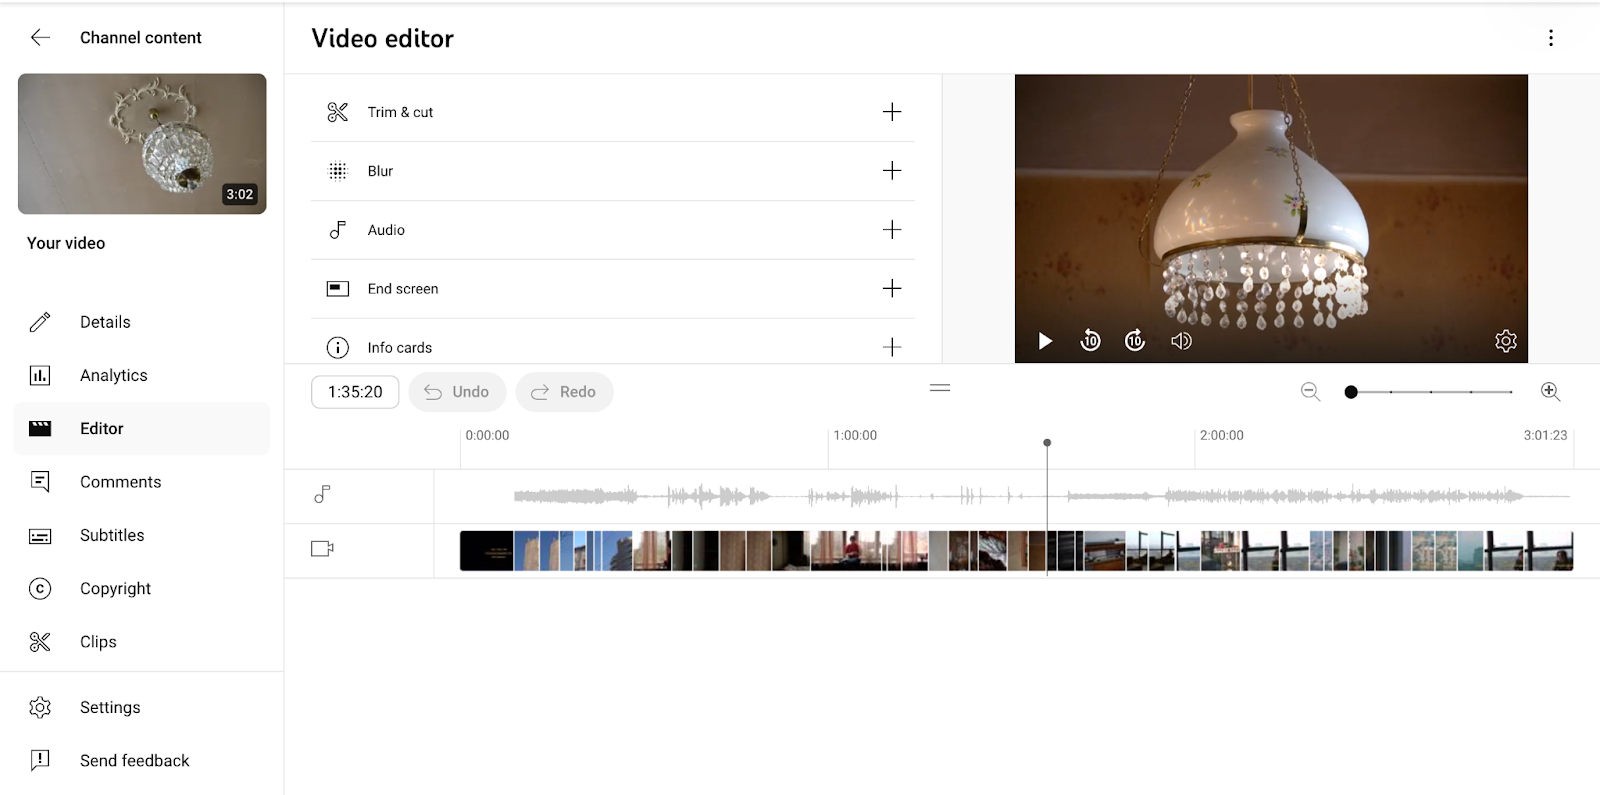
Once you’ve selected the video that needs to be edited, click on the Editor located on the left panel of your screen, right below your video. You’ll be forwarded to the YouTube video editor that gives you access to the basic trim and cut editing tools, blur, audio editing, and an end screen/CTA integration.
As you can see, the YouTube video editor’s functionalities are limited, but they can still greatly help when you need quick and easy tweaks.
3) Edit your video
Start editing your video by trimming and cutting it wherever necessary. Once you’ve removed the unnecessary sections, you can easily preview your changes by clicking on the Preview button in your editor.
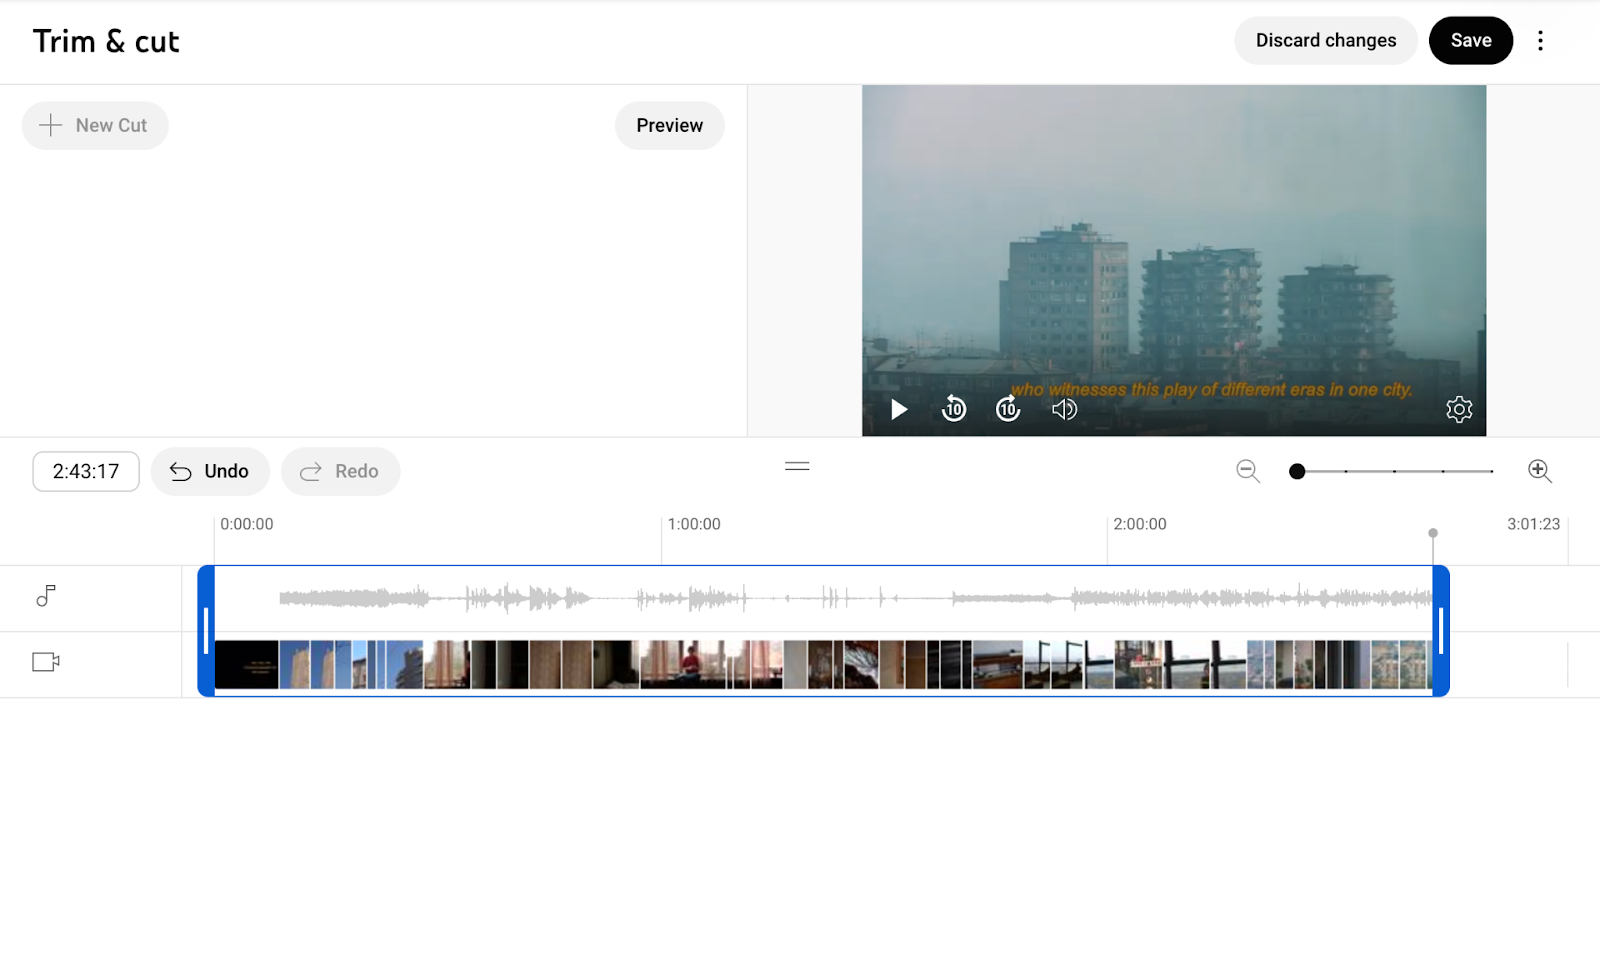
If you have any faces you’d like to blur, apply the built-in Blur effect of the editor: you can choose from Face blur and Custom blur. YouTube also allows you to add audio to your video by uploading your audio or choosing one from your library.
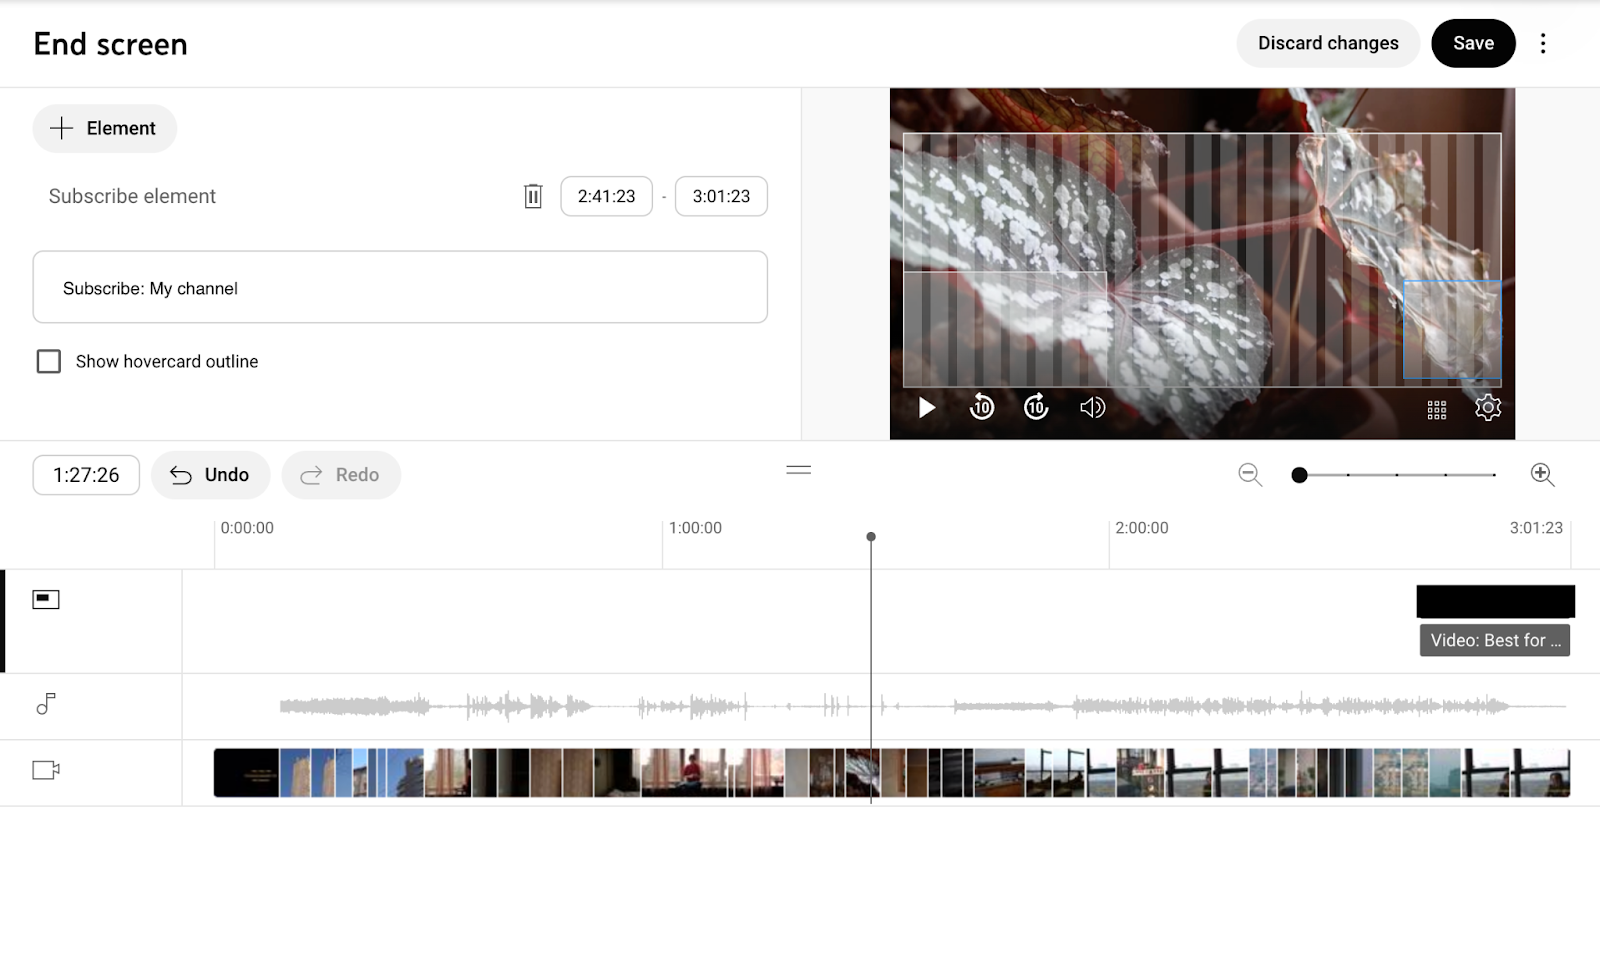
Probably one of the most useful features of the editor is the integration of the CTA. Click on the End Screen tool and pick the format you want your end car to appear in at the end of your video.
4) Save changes
That’s pretty much it. Once you’ve finalized your edits, just click Save, and your editing will be applied to your existing YouTube video.
How to edit a YouTube video with Podcastle
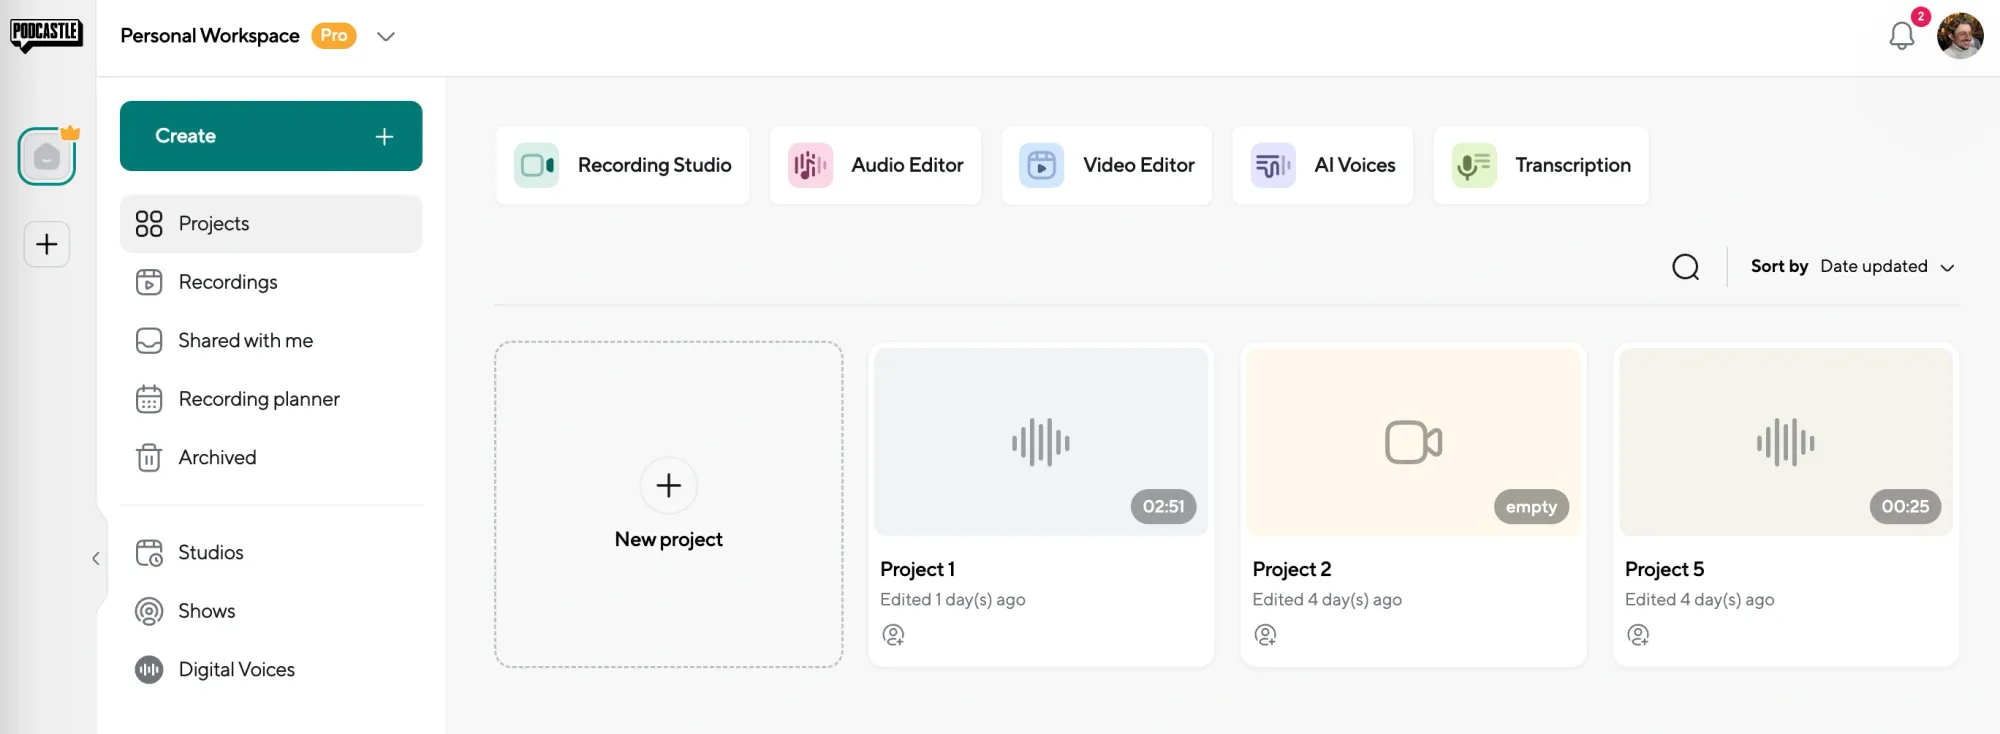
If you need more editing capabilities but still want to keep it simple and easy, we suggest recording and editing your YouTube content through Podcastle.
Here’s how you can edit YouTube videos using Podcastle’s video editor.
1) Open up Video Editor
To get started, log into Podcastle and go to the Video Editor. Here, you will want to drag and drop any footage you've recorded, which you will then be able to edit immediately, as it's being uploaded.
2) Enhance your video quality
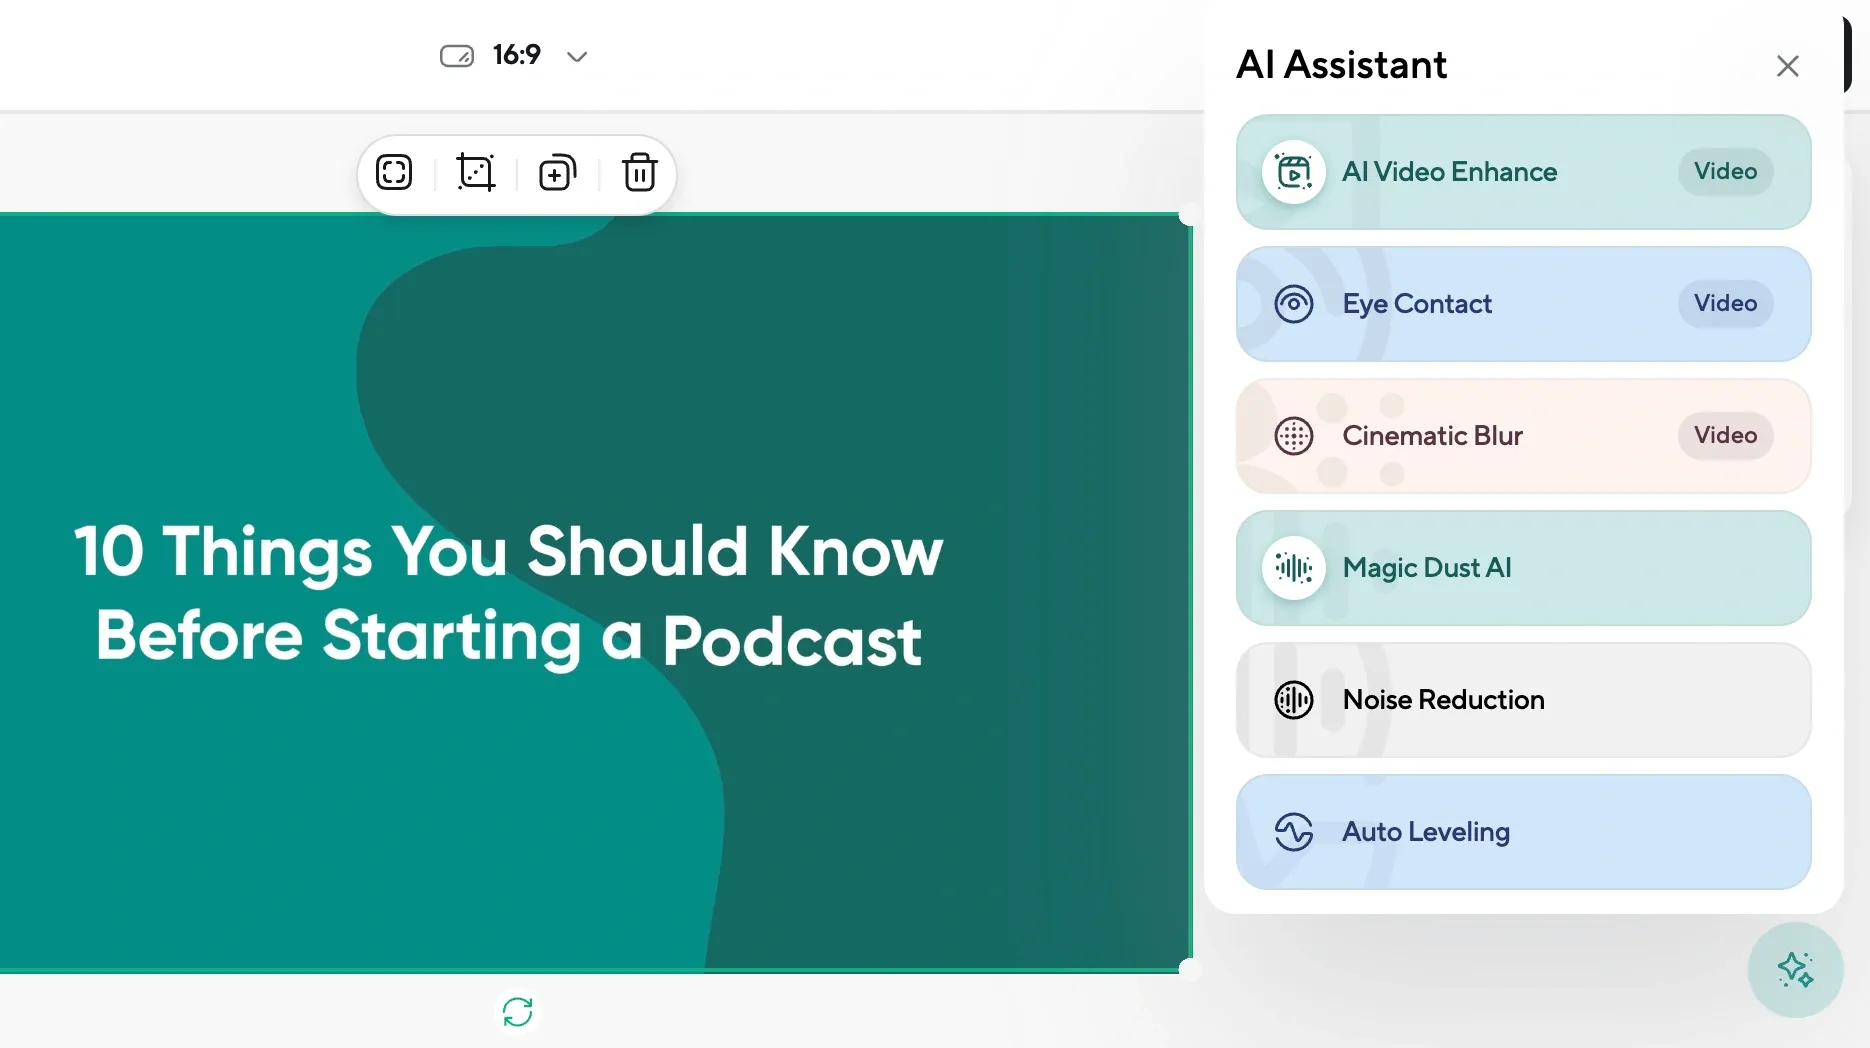
Once your video is ready, it’s time to boost the quality. Use Podcastle’s video enhancer to improve brightness, contrast, and overall clarity. This is a great way to make your content shine and look professional without much hassle.
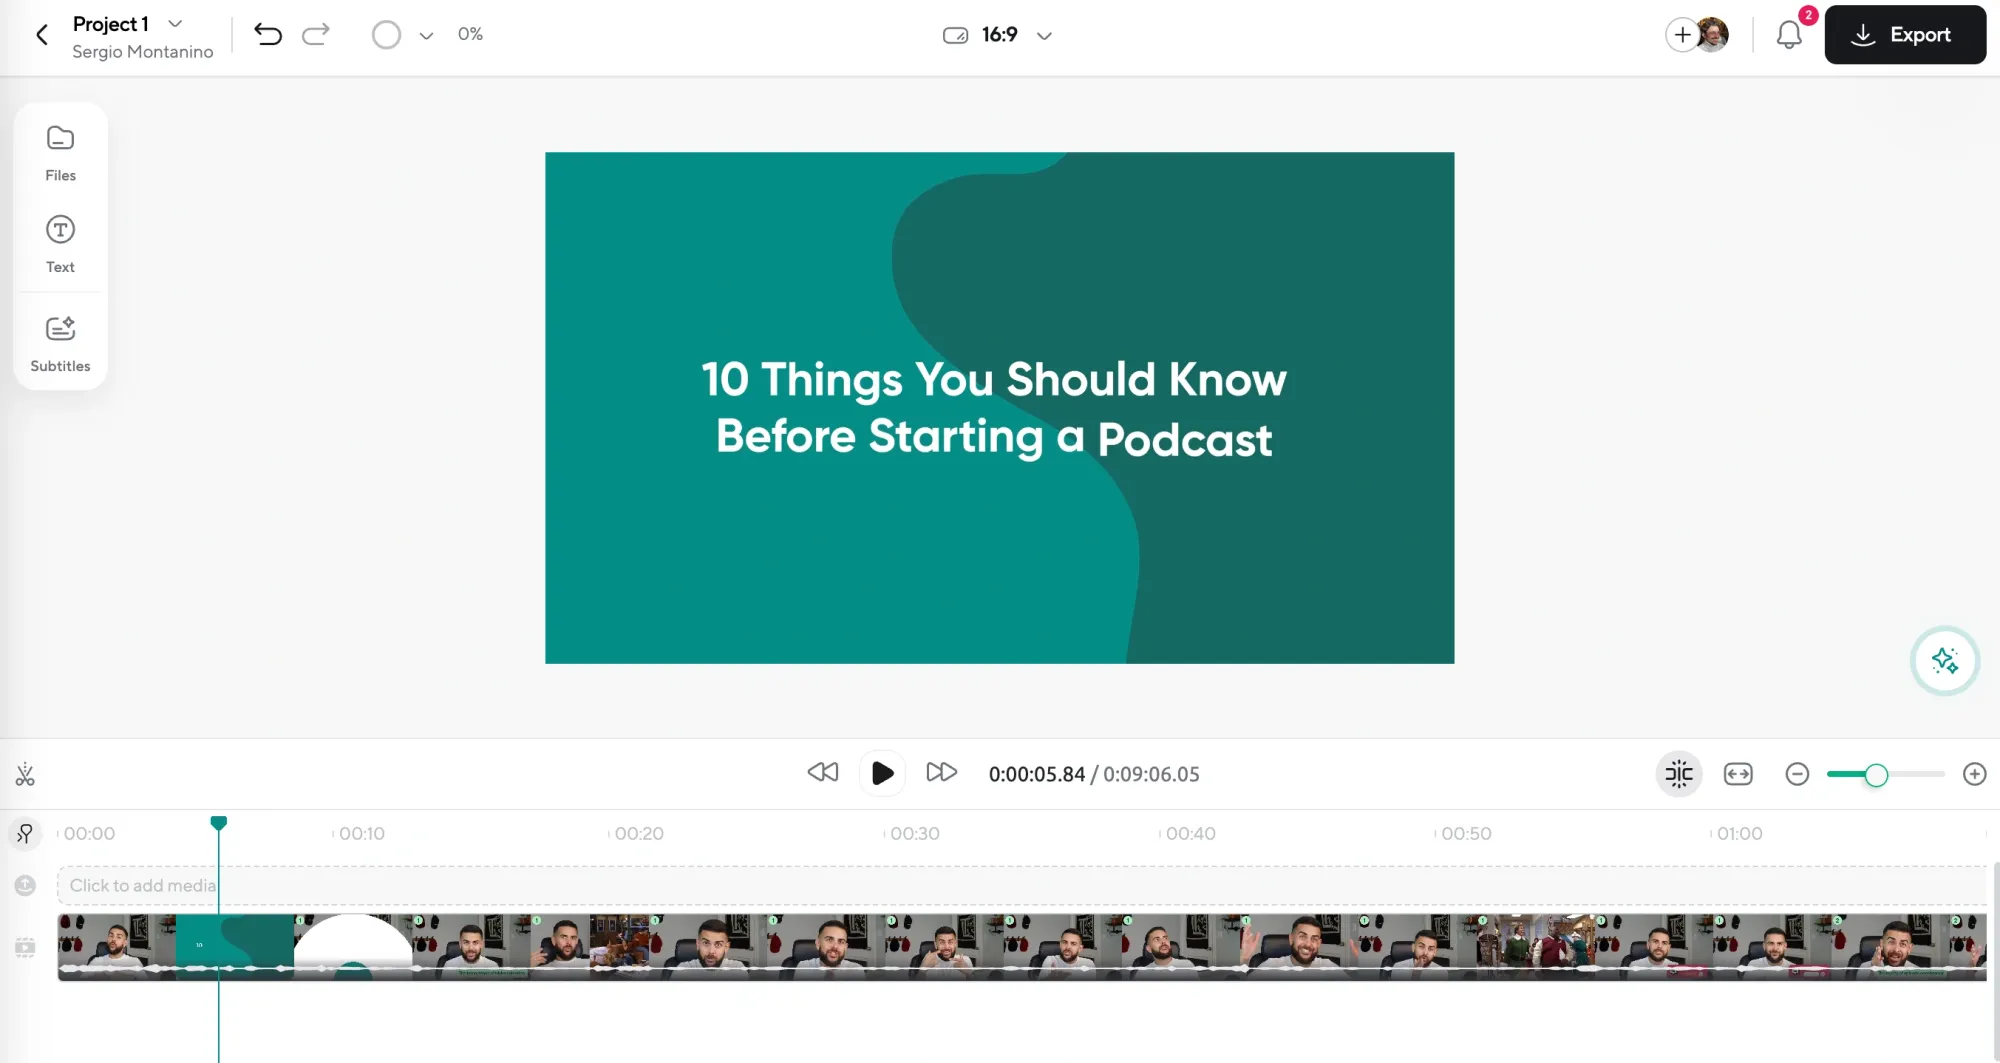
3) Change your video size and layout
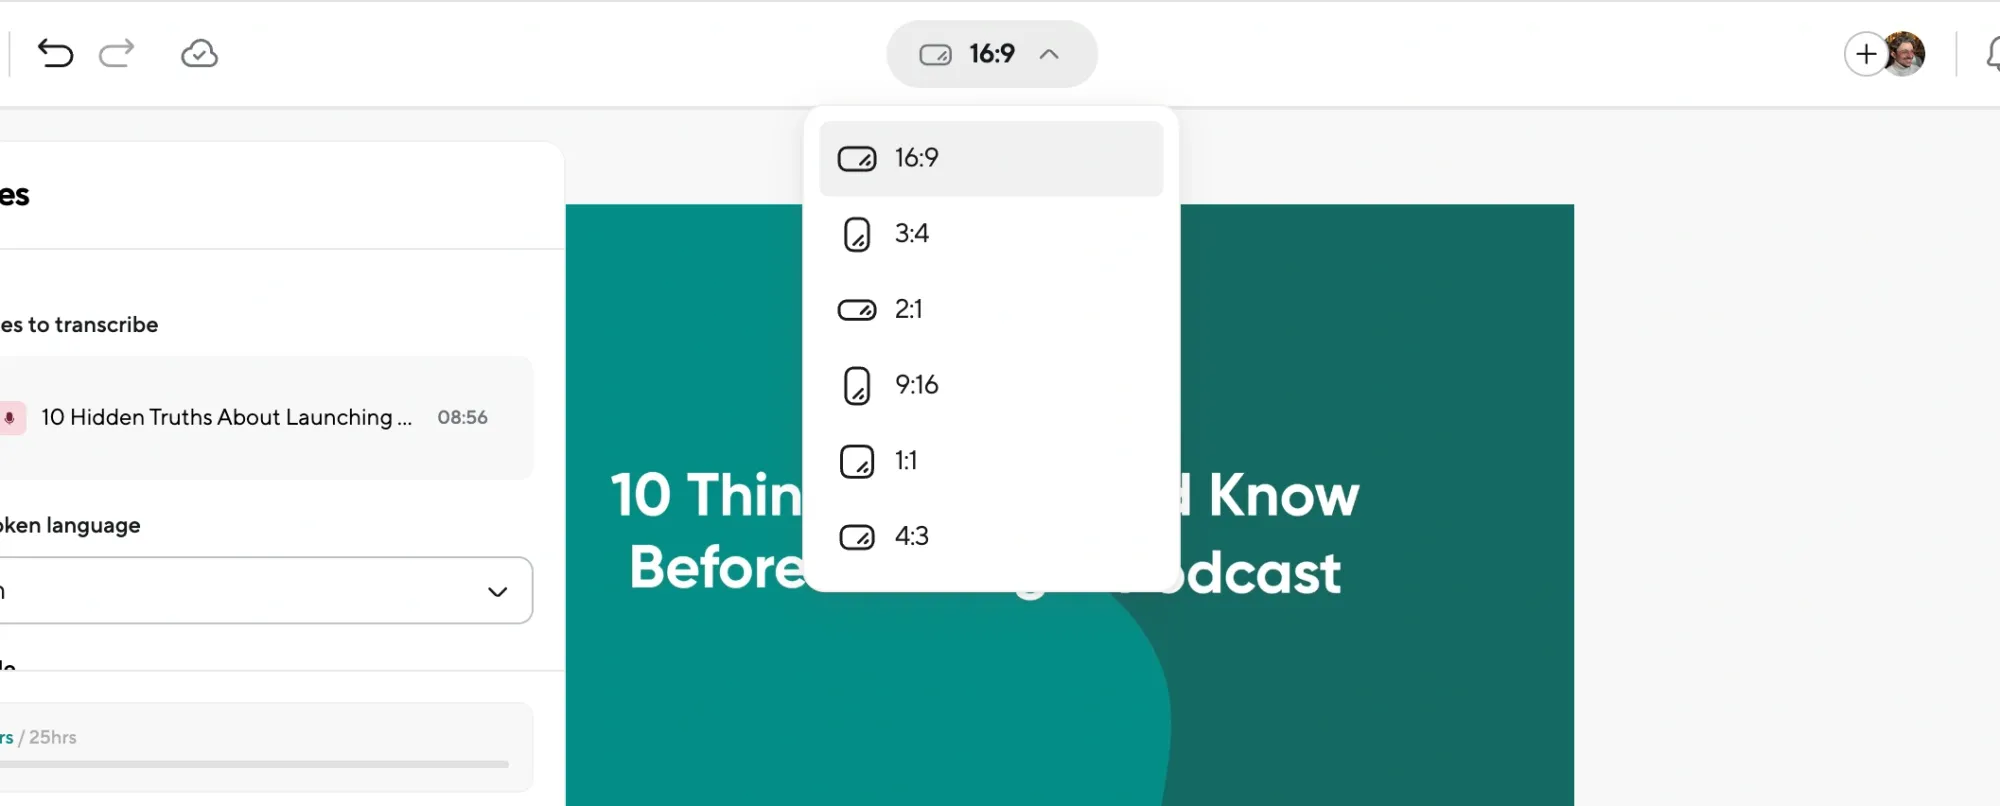
Next up, decide how you want your final video to look like. Podcastle lets you choose from different aspect ratios, like 16:9 for YouTube or 9:16 for social media. You can also customize the layout by adjusting the position of any additional video elements or your webcam feed if you’re using one.
4) Add text, subtitles, and more
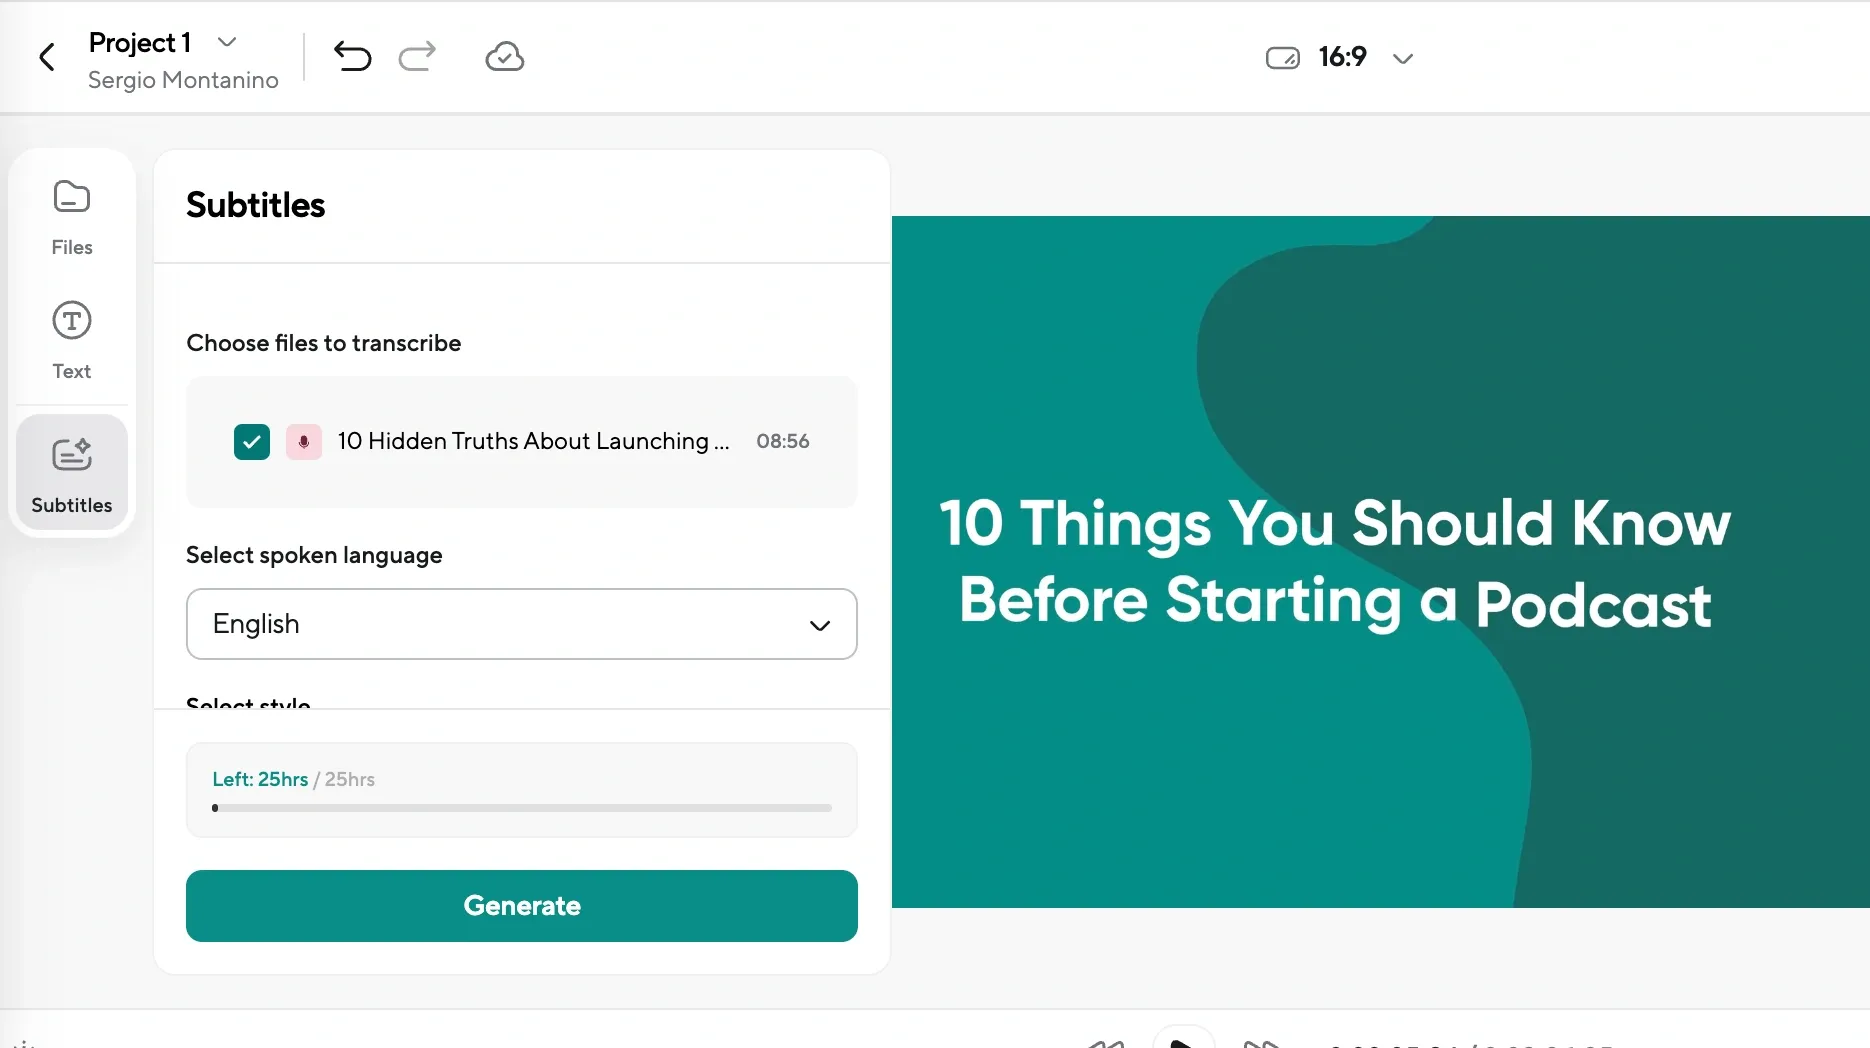
Now it’s time to get creative! Podcastle allows you to add text, captions, and even your branding elements like a logo. You can also automatically transcribe your video for subtitles, making it accessible to a wider audience. Feel free to split, cut, and rearrange your video clips to get everything just right.
5) Export your video
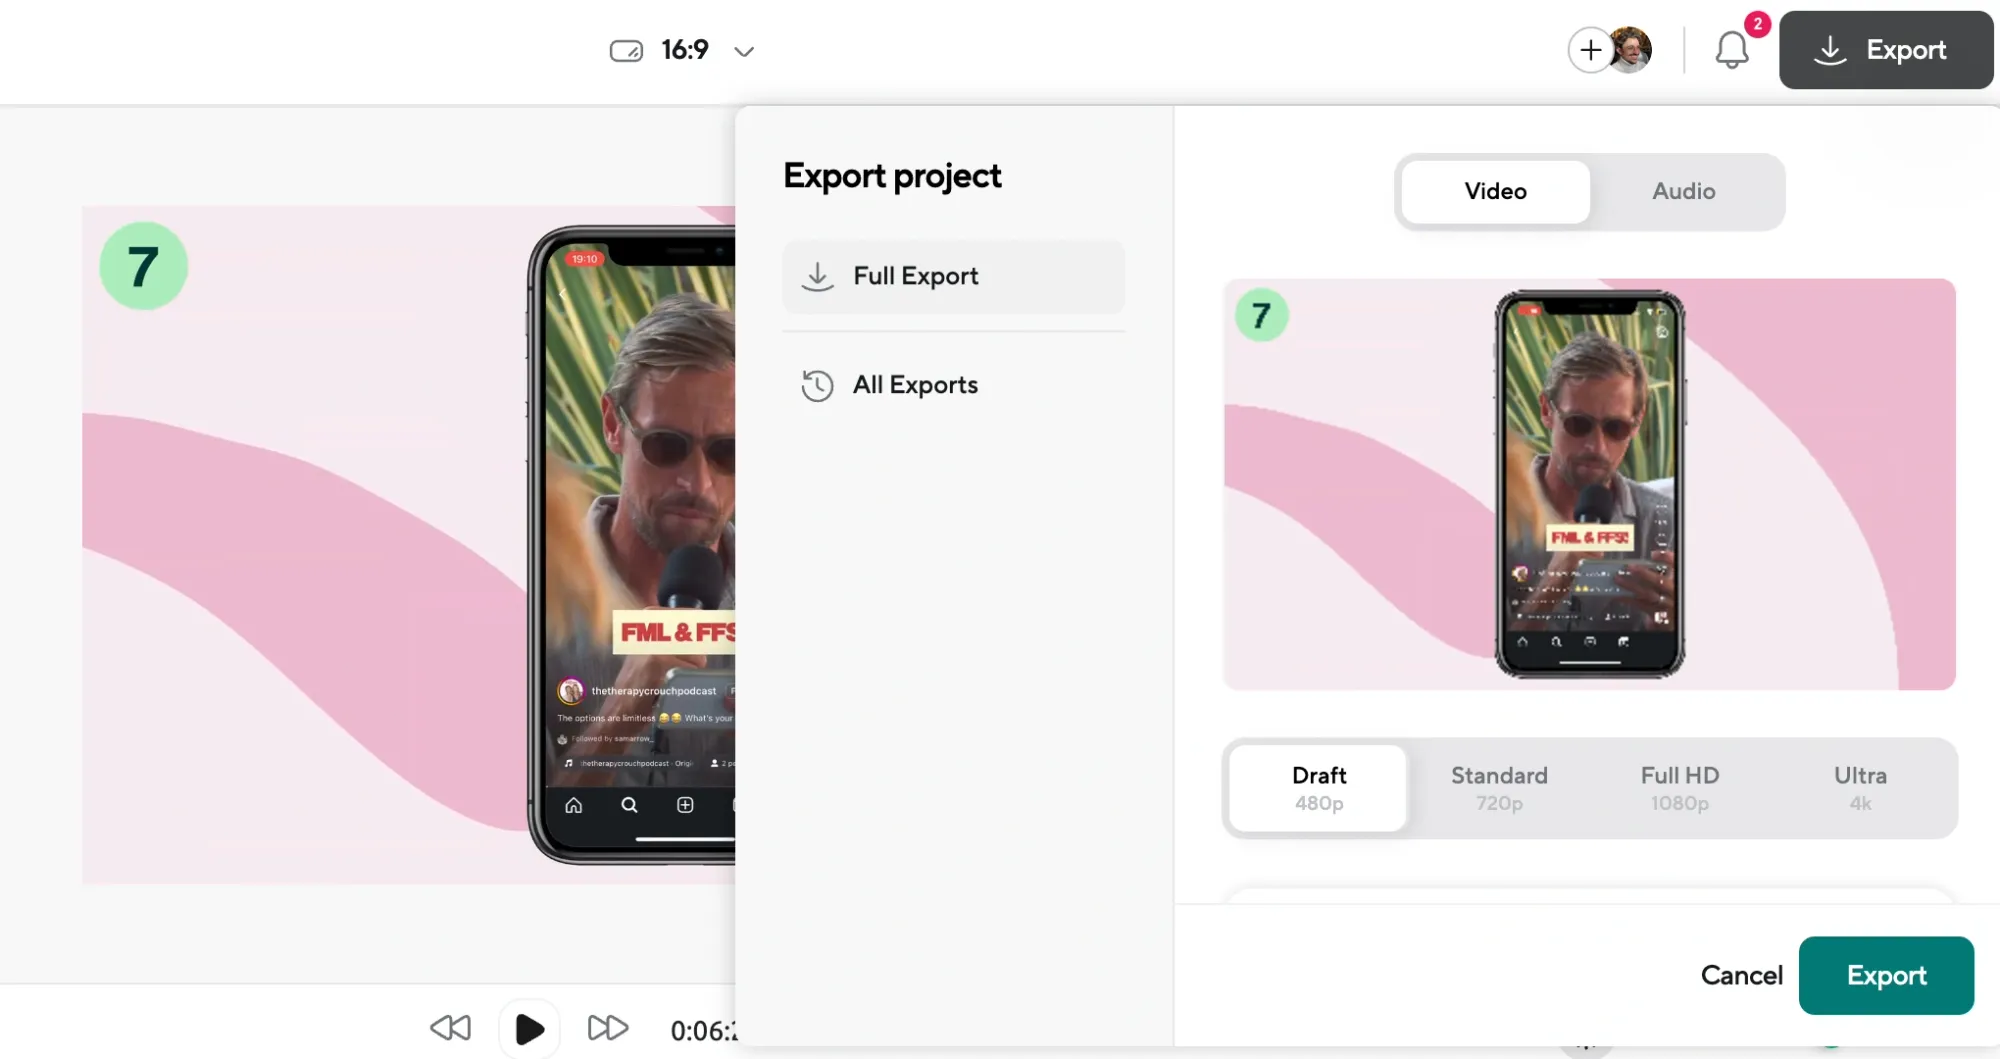
Once you’re happy with your edits, hit the export button to save your final video. Podcastle makes it easy to download your edited video and share it on YouTube or any other platform you choose.
That’s pretty much it! With Podcastle, editing videos for YouTube is simple and you’ll see why it’s one of the best ways to edit YouTube videos. Just remember, you can only edit the videos that you've recorded with Podcastle, so be sure to record first before jumping into the editing process.
Best practices when editing YouTube videos
Editing your YouTube videos can be both fun and a bit overwhelming. That’s why we’ve compiled a list of tips that will help you refine your editing skills and create videos that stand out.
1) Keep it concise
Your viewers’ attention span is most likely short. Aim to keep your videos concise and focused on the main message. Viewers are more likely to stick around if you get to the point quickly and eliminate any unnecessary fluff.
When editing, review your footage and cut out any long pauses or off-topic discussions. A tight edit not only holds the audience's attention but also conveys professionalism. Remember, every second counts, so trim those fat sections and keep your content lean and mean!
2) Use engaging thumbnails
While this may seem like a small detail, your video thumbnail is often the first impression viewers get of your content. A compelling thumbnail can make a significant difference in your click-through rate.
When creating thumbnails, choose eye-catching visuals and bold text that reflect the essence of your video. Experiment with colors and designs that stand out but still fit your channel’s overall branding. A well-designed thumbnail can intrigue potential viewers and encourage them to click on your video, leading to more views and engagement.
3) Add background music
Music sets the mood and can greatly enhance the viewing experience. Using background music can make your videos feel more polished and professional. Just make sure to choose tracks that fit the vibe of your content.
When adding music, be mindful of the volume levels. You don’t want the music to overshadow your voice or important audio elements. Adjust the audio levels so that your narration is clear and the music serves as a subtle enhancement. This balance can transform a good video into a great one!
4) Incorporate text and captions
Adding text overlays and captions can help reinforce your message and make your content more accessible. Text can highlight key points, provide context, or even add a bit of humor to your video.
Consider using captions to make your videos inclusive for viewers who may be deaf or hard of hearing. Plus, captions can also help with viewer retention since many people watch videos without sound. A well-placed caption can emphasize your points and keep your audience engaged throughout your video.
5) End with a call to action
Don’t forget to include a call to action (CTA) at the end of your video! This is your chance to encourage viewers to take the next step, whether that’s subscribing to your channel, watching another video, or visiting your website.
When editing, ensure your CTA is clear and compelling. You can use text overlays, visual elements, or even a verbal prompt to guide your audience. A strong CTA can lead to higher engagement and help build a loyal community around your channel. Plus, it keeps the conversation going even after your video ends!
A CTA is essential in all types of content, and our blog is no exception. So here’s your last reminder: give Podcastle a try; it’s truly worth it. And good luck with your YouTube content. Whatever your goals are for your channel, we hope you achieve them!
Final Thoughts
A major hurdle for many content creators is the time-consuming process of editing. It often eats up hours that could be better spent on boosting your views and making your content shine.
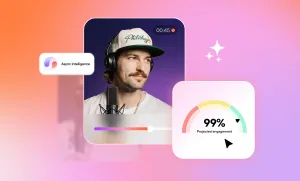
With Podcastle’s AI-powered tools, the editing process becomes a breeze. Whether you need to polish audio to studio quality, enhance poor video footage, eliminate background noise, or automatically generate transcriptions, captions, and subtitles, Podcastle has it covered—all with just a few clicks.
Stop letting editing dominate your time and start focusing on growing your audience!