Ever watched a video or scrolled past a photo that just felt off, even though you couldn’t put your finger on why? Maybe the subject looked awkwardly placed, or the shot felt flat and lifeless. That’s the power of composition at work: the way elements are arranged within a frame to guide your eyes and create balance. Get it right, and your visuals feel natural and engaging. Get it wrong, and even great content can fall flat.
In this article, we’ll break down one of the simplest and most effective composition techniques: the rule of thirds. You’ll learn what it is, why it matters, how it shows up in video, film, and design, and finally, how to apply it step by step.
Key Takeaways
- The rule of thirds helps create balanced, natural-looking visuals across video, film, and design.
- Placing subjects along the grid’s lines or intersections draws the viewer’s eye more effectively.
- Using the rule of thirds prevents awkward or flat-looking compositions.
- The technique works across mediums, from photography to YouTube videos to graphic design.
- Tools like Podcastle’s Video Editor make it easy to apply the rule of thirds in practice.
What is the rule of thirds?
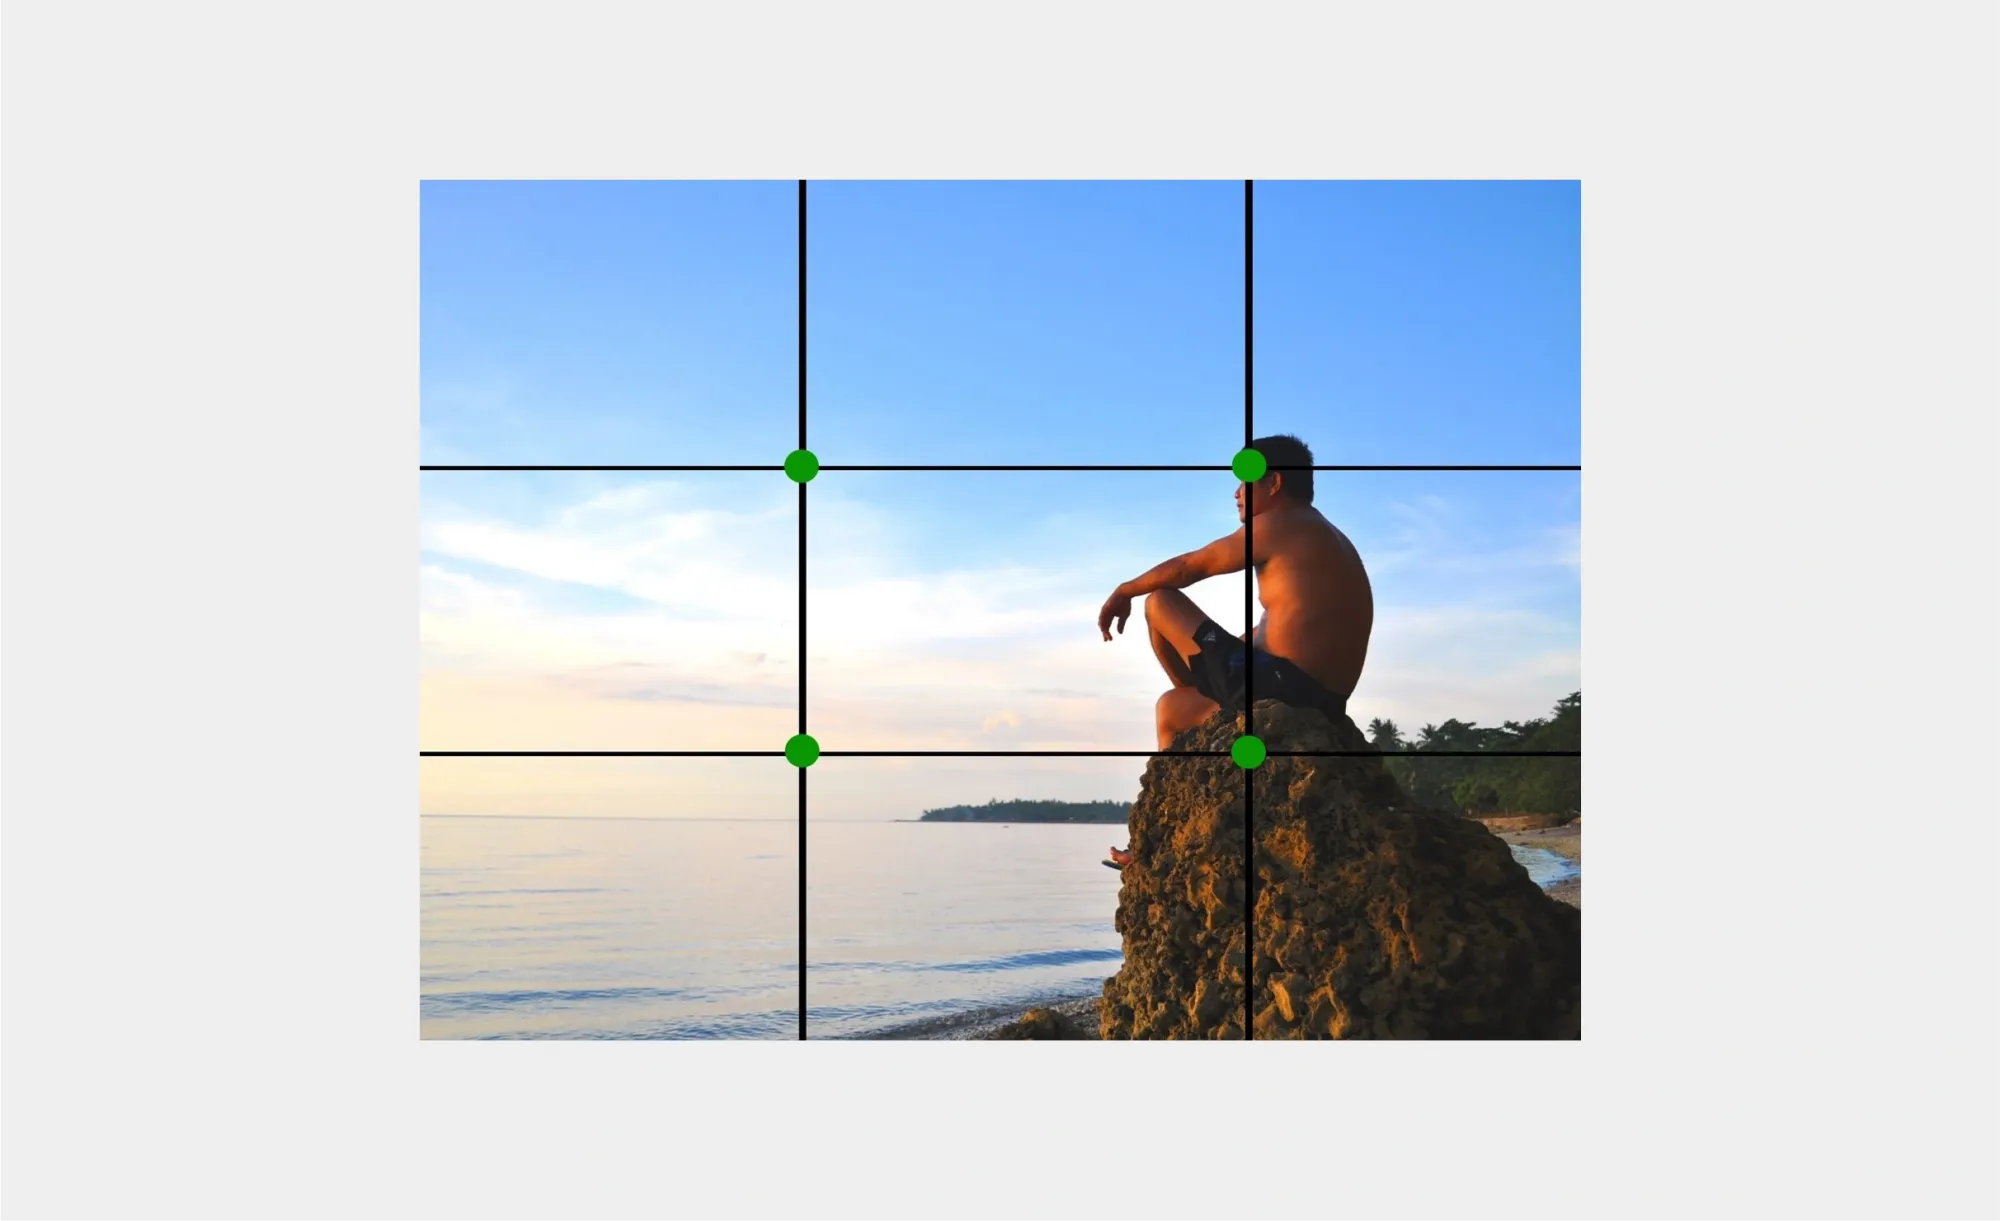
If you’re into photography or videography, you’ve probably come across the term “rule of thirds.” It’s one of the core principles of visual composition. To understand it, imagine a 3x3 grid placed over your screen or canvas. Instead of positioning your subject right in the center, you align key elements along the grid lines or at their intersections. This creates a natural sense of balance and guides the viewer’s eye exactly where you want it to go. In short, if you want your subject to feel more dynamic and visually appealing, the rule of thirds is a simple yet efficient technique.
Overall, the rule of thirds is widely used in photography, film, and design to make visuals more engaging.
Let’s explore how it works across different visual storytelling formats:
The rule of thirds in video production
When you’re shooting a video, it’s tempting to center everything: your subject, the action, even the background. But here’s the thing: centering often makes your frame feel flat. By using the rule of thirds, you’re instantly adding depth and intention. Imagine placing a person’s eyes right along the top horizontal line of the grid, and suddenly your shot feels more natural, almost like what our eyes are used to in real life.
Think about interviews or vlogs. When the speaker is aligned slightly to the left or right, with some background detail filling the empty space, the whole frame becomes more engaging. It’s a subtle shift that changes the entire mood of the video. Viewers won’t consciously think “Ah, the rule of thirds!” but they’ll feel that the shot looks polished and professional.
The rule of thirds in film
Film directors have been playing with the rule of thirds long before we started posting videos online. Why? Because cinema is all about guiding attention. If a character is placed on one side of the frame, it can create tension, especially if the empty space on the other side hints at something about to happen. Hitchcock loved this trick, and honestly, so do modern filmmakers.
Even sweeping landscape shots benefit from this principle. Place the horizon line along the top or bottom third instead of slicing your screen in half, and you instantly create drama. The audience might not know why they’re glued to the screen, but you do: it’s the rule of thirds doing its job in the background.
The rule of thirds in design
Design isn’t just about making things “pretty,” it’s about communication. The rule of thirds helps you decide where your viewer’s eye will go first. If you’re working on a website layout, a poster, or even a social media graphic, try placing your key elements, like headlines, call-to-action buttons, or product images, right on those grid intersections.
This makes your design feel balanced and intentional rather than chaotic. It’s almost like giving your audience a gentle nudge: “Hey, look here first, then here.” Whether it’s a bold image or a block of text, aligning it with the rule of thirds can help you tell your story more effectively without overwhelming the viewer.
Rule of thirds grid: what it looks like (and how to use it)
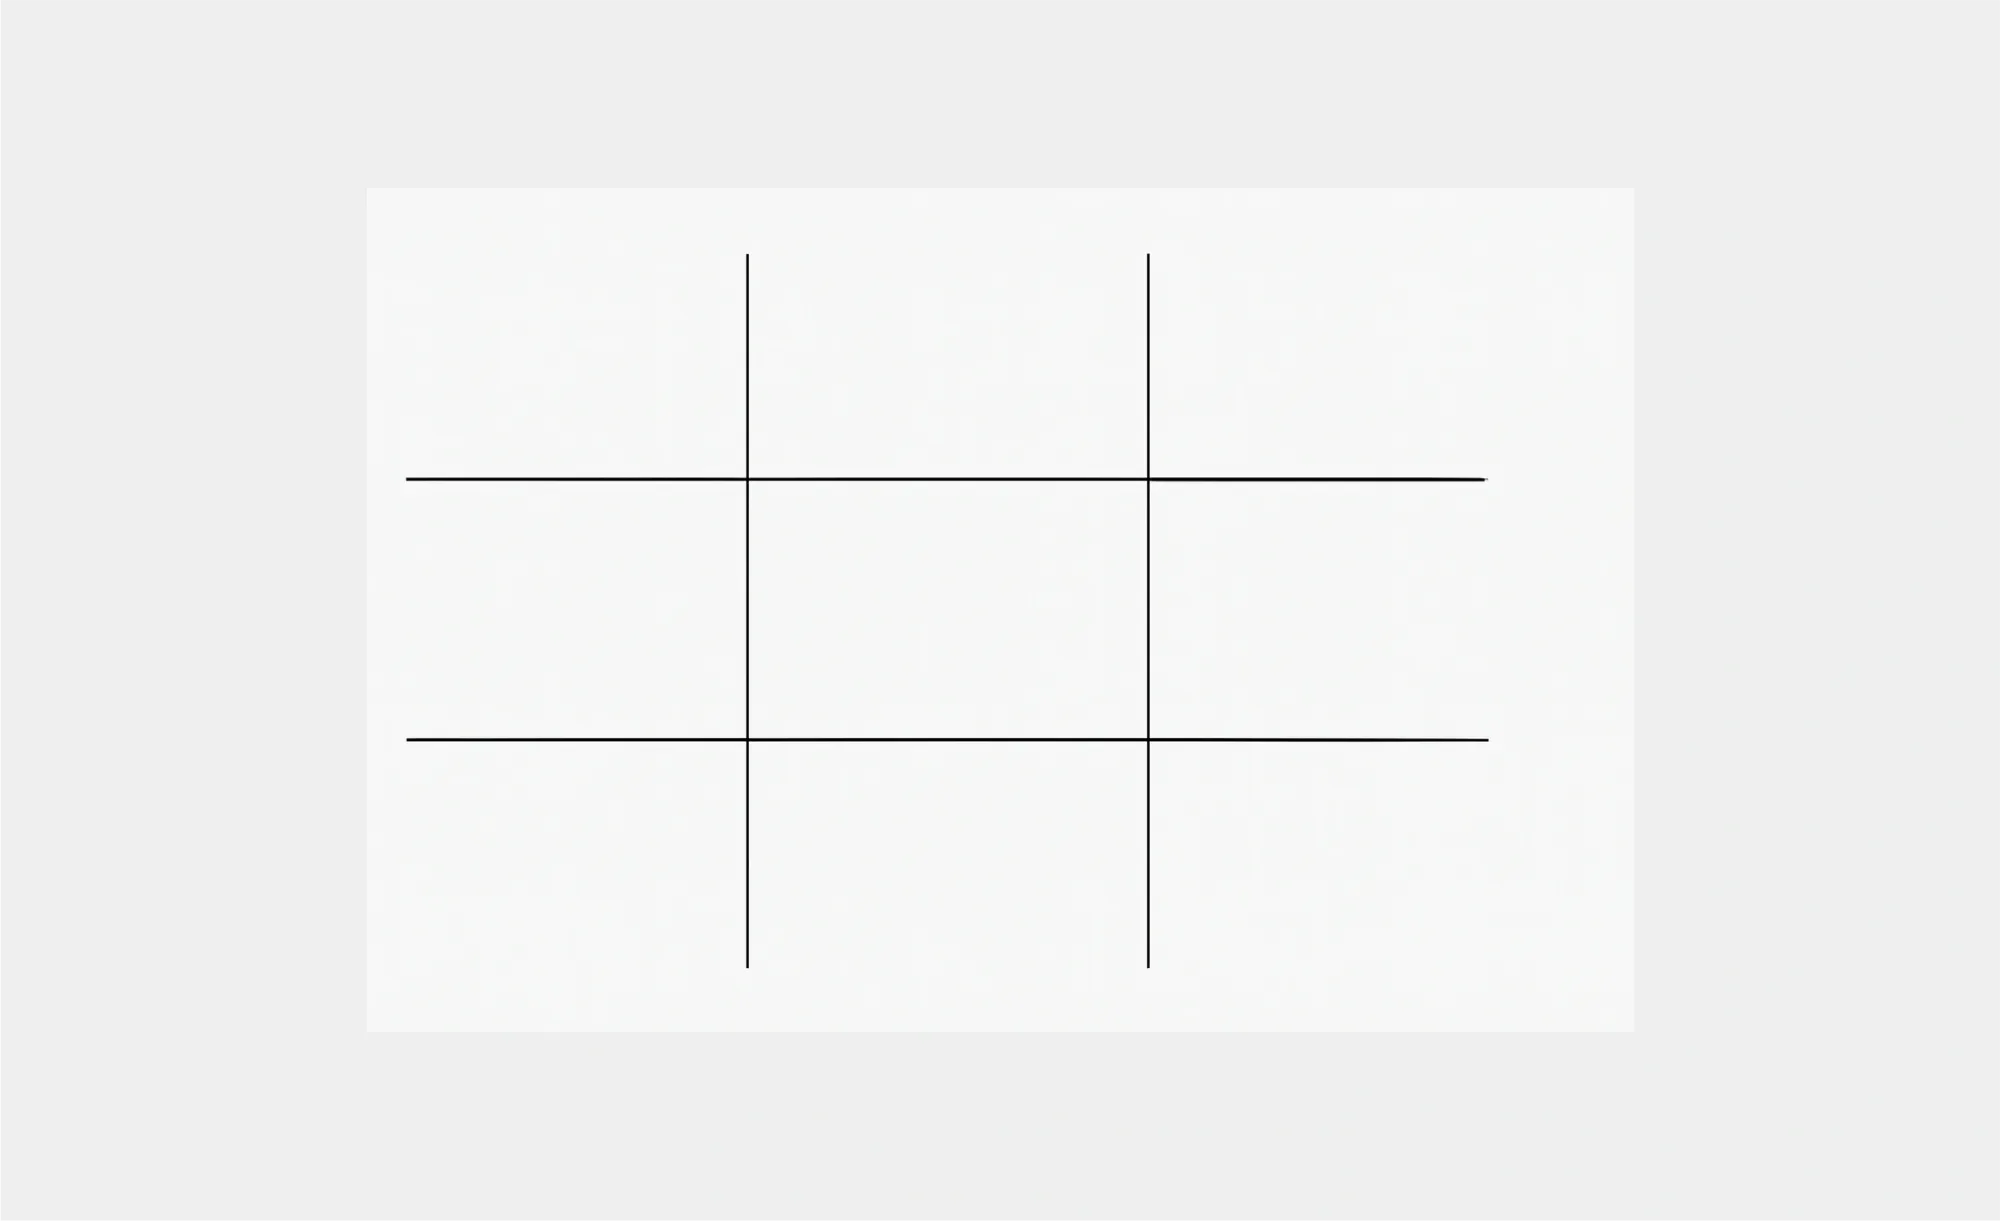
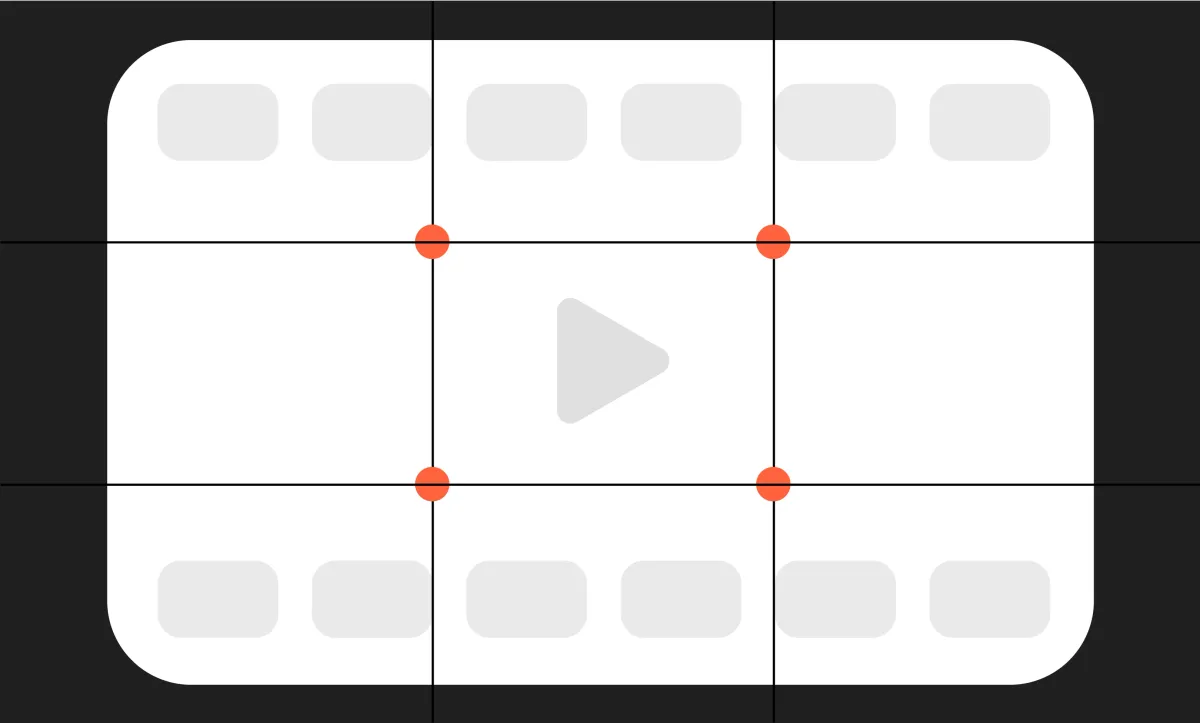
A rule of thirds grid is basically a tic-tac-toe board laid over your screen. The magic happens where the lines intersect, and those four points are your sweet spots. Place your subject or focal point there, and your composition will almost always look more dynamic.
Using it is simple. Whenever you’re framing a shot, just imagine (or use an actual overlay) of this grid. Keep important elements aligned to the lines or intersections, and avoid putting everything dead-center. That’s it, easy, right?
Rule of thirds composition
So, how do you actually compose with the rule of thirds? Think of it like storytelling within the frame. The grid gives you four intersections, and these are your hotspots. Placing your subject on one of them creates a sense of balance without making the shot feel static.
For portraits, that usually means putting someone’s eyes along the top line. For landscapes, it often means aligning the horizon with the bottom or top third instead of cutting the frame in half.
What’s powerful here is how much control you get over mood. A subject placed to the right can feel like they’re looking into open space, suggesting possibility. The same subject on the left might feel like they’ve just left something behind.
These tiny shifts change the emotional weight of the shot, all thanks to that simple tic-tac-toe grid.
Rule of thirds examples
Let’s bring this down to earth. Imagine you’re filming a cooking tutorial. If the chef stands dead center, it feels stiff. Shift them slightly to the left, with their counter or stove filling the right side, and suddenly the frame feels alive and practical; you know where to look, but you also take in the environment.
Or picture a movie scene on a beach. Instead of splitting the frame in half with sky and sand, the director places the horizon on the bottom third. The sky dominates, creating a sense of openness or even loneliness.
Same shot, different placement, completely different emotional impact. That’s the rule of thirds at work in everyday visuals; it’s simple, invisible, and incredibly effective.
How to use the rule of thirds with Podcastle
Now that you know what the rule of thirds is and why it matters, let’s put it into practice using Podcastle’s Video Editor. Whether you’re creating a YouTube video, a short for social media, or even a polished interview clip, Podcastle gives you all the tools you need to apply this technique easily. Here’s a step-by-step guide to help you get started.
Step 1: Upload your video
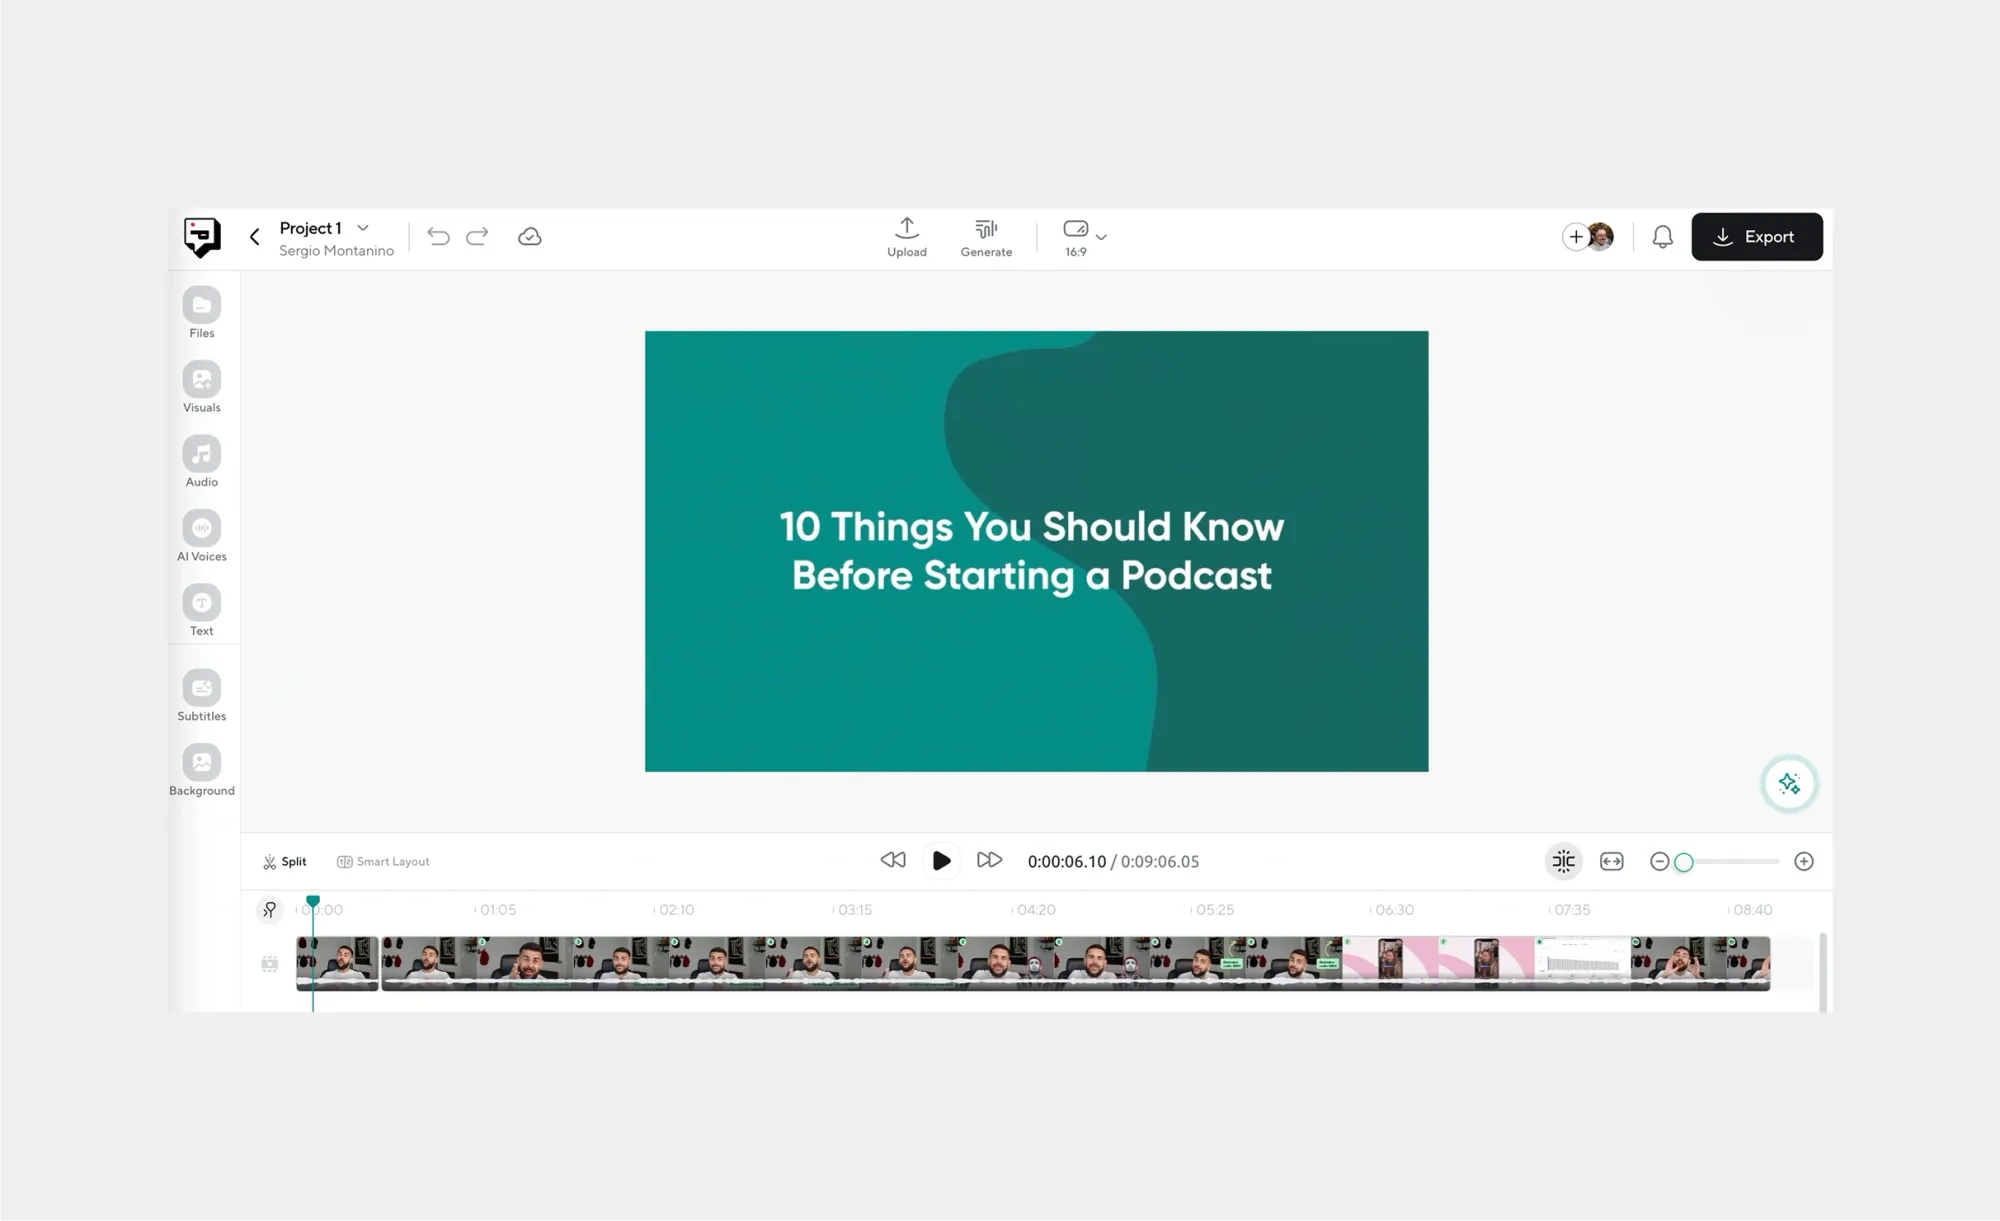
First things first, open the Podcastle platform and head to the Video Editor. Upload the video you’d like to work on by dragging and dropping it into the project window. This will be your base file: the canvas you’ll be applying the rule of thirds to.
Once it’s uploaded, take a moment to preview your video. This helps you identify the key moments or frames where the rule of thirds will make the biggest difference, like when a person is speaking on camera or when you’re showcasing a product.
Step 2: Add a grid overlay
Next, you’ll want to visualize the rule of thirds directly on your video. The easiest way is to add a grid overlay that matches your video’s aspect ratio (most likely 16:9). You can do this by uploading a simple grid image and layering it on top of your video track in Podcastle.
Don’t worry: this grid won’t show up in your final export. It’s just there to guide your eye during editing. Think of it like training wheels: once you’re comfortable spotting those intersections, you’ll naturally start framing better without even needing the lines.
Step 3: Check your composition
With the grid in place, look at how your subject aligns with those key lines and intersections. Are the speaker’s eyes along the top horizontal line? Does the product you’re highlighting sit neatly at one of the four “power points”?
If not, no problem. Podcastle makes it easy to crop, reposition, or adjust your framing so that your composition feels balanced. Even small tweaks, like shifting a subject slightly to the left, can create a more professional-looking shot.
Step 4: Refine with AI tools and enhancements
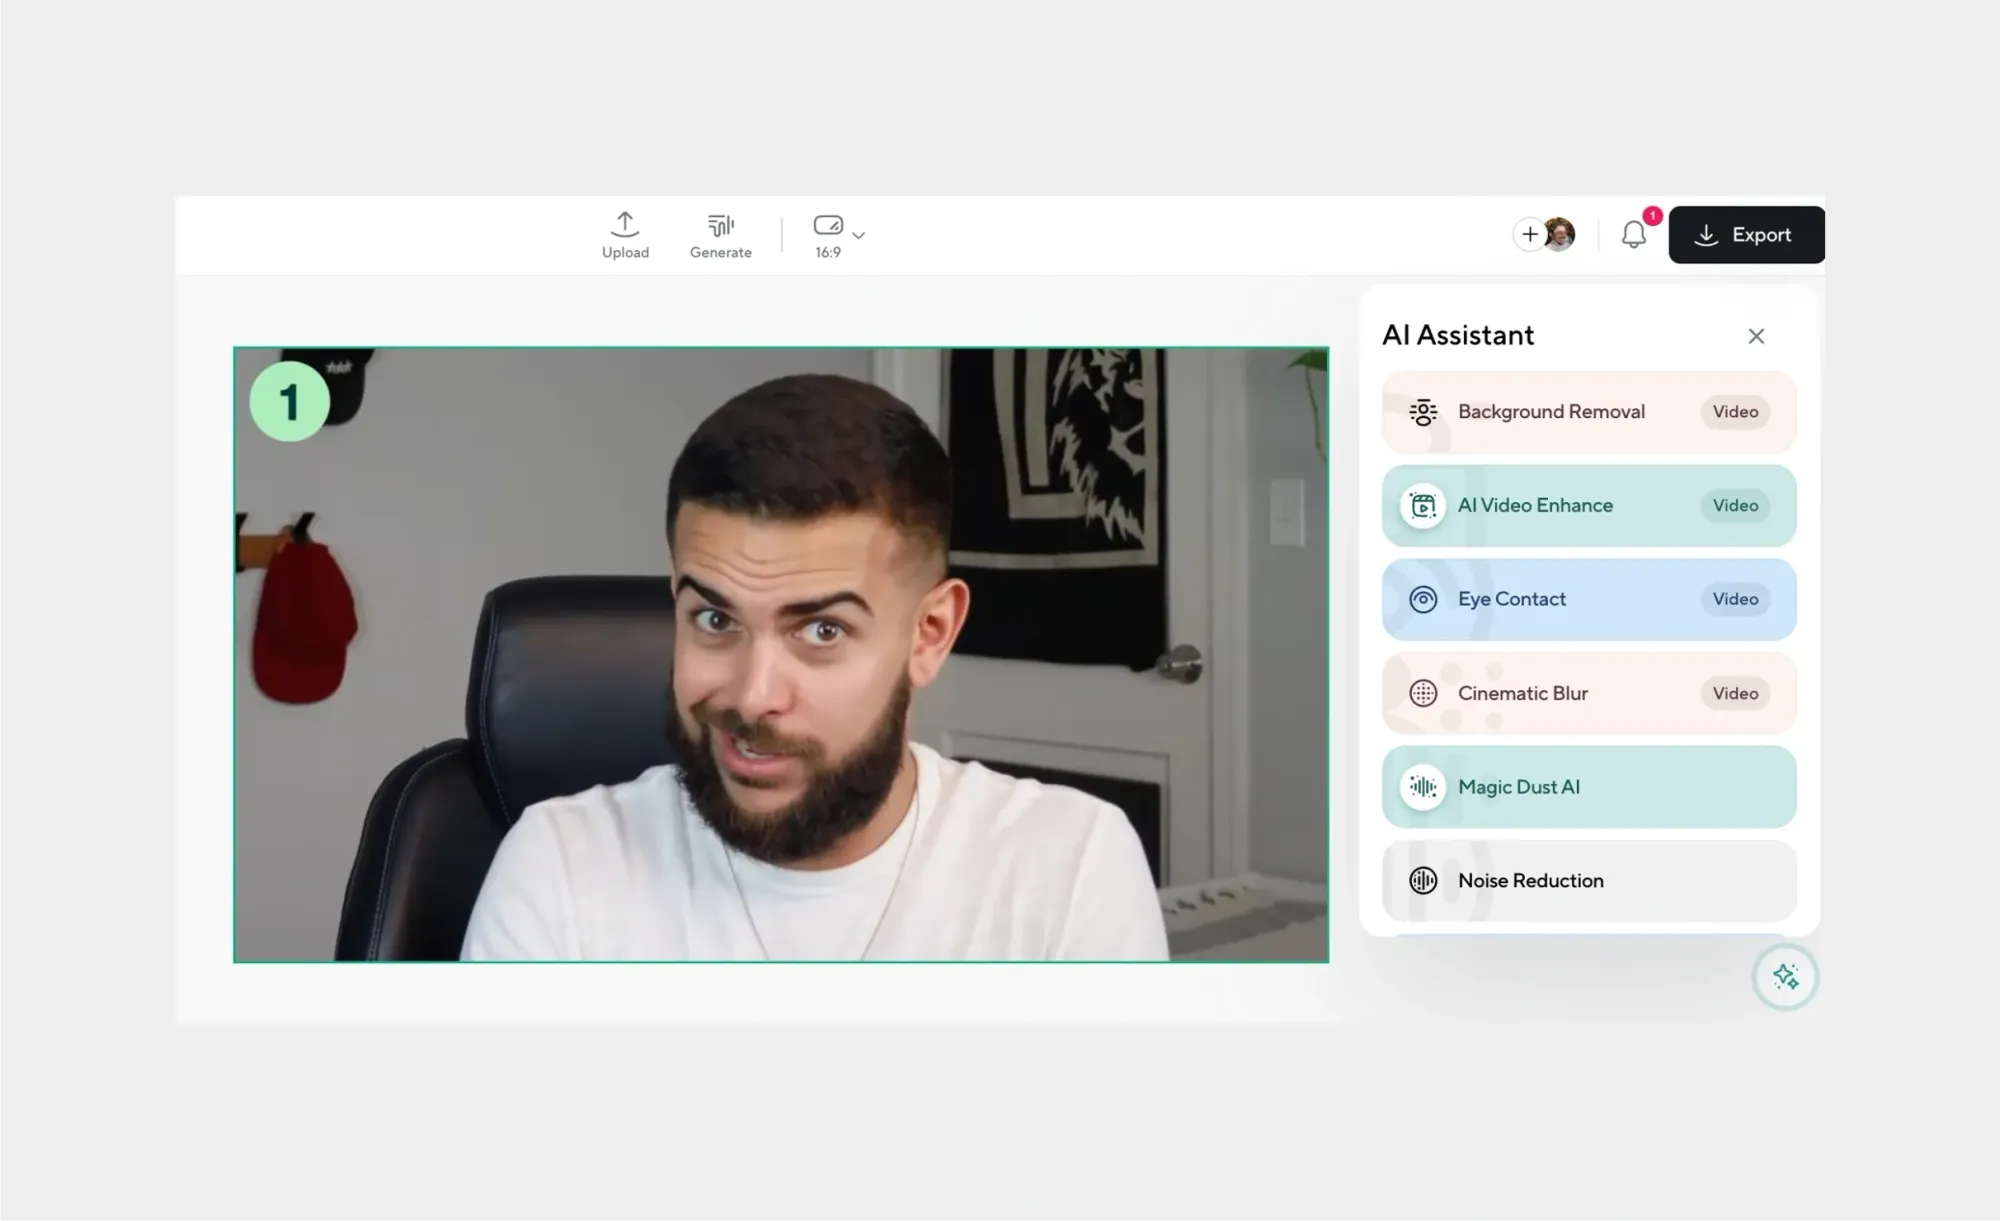
Once your framing looks good, it’s time to polish the rest of your video. This is where Podcastle’s AI-powered editing tools come in handy. You can clean up audio so dialogue sounds crisp, add background music from the built-in stock library, or even include b-roll footage that complements your main video.
These enhancements work hand-in-hand with the rule of thirds. For example, if you place a speaker on the left intersection, you can fill the right side of the screen with relevant stock footage, graphics, or text overlays. This not only keeps your composition balanced but also keeps your audience engaged.
You can also add a voiceover to your footage, using one of our AI voice skins in a couple of seconds, just by typing your script and turning it into audio in no time.
Step 5: Export your finished project
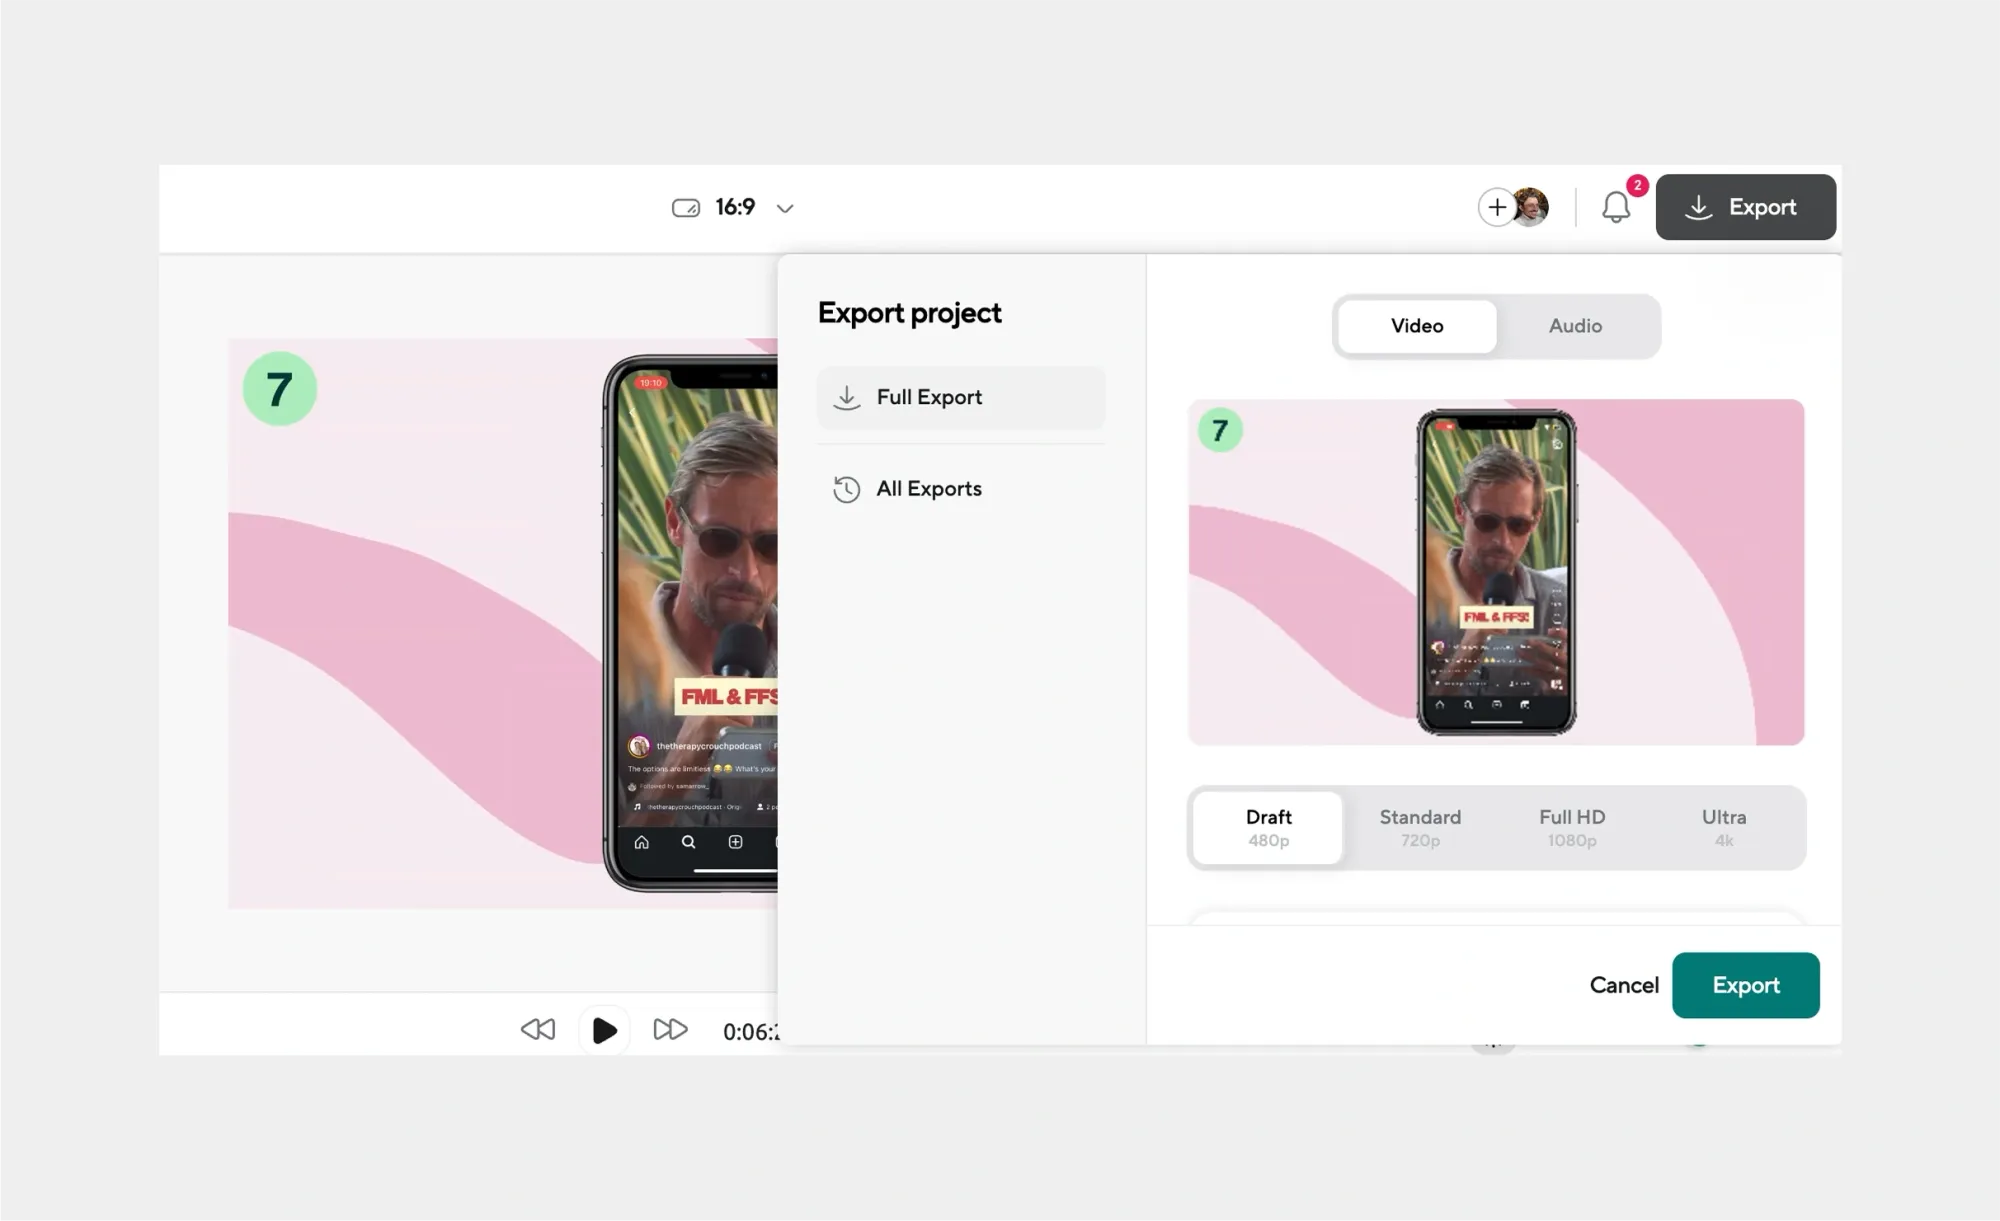
Finally, once everything looks polished, remove the grid overlay (if you used one), and hit Export. Podcastle lets you choose from multiple resolutions and formats depending on where your video will live, whether that’s YouTube, TikTok, or a client presentation.
By now, your video should feel more intentional, balanced, and visually engaging, thanks to the rule of thirds. And the best part? You did it all without needing advanced film school knowledge, just a smart composition trick and the right editing tool.
Pro Tip: The more you practice with the rule of thirds in Podcastle, the more natural it becomes. Eventually, you’ll start framing your shots with the grid in mind before you even hit record, which saves time in editing and makes your raw footage look better from the start.
Create perfect videos with Podcatle
You understand the rule of thirds now, the simple grid that can turn an ordinary frame into one that feels balanced, intentional, and visually striking. The next step is putting that knowledge into practice and crafting videos that hold attention from start to finish. With Podcastle, you can move from raw ideas to polished visual stories without needing a whole production team.
Here are 5 features that make Podcastle's AI video editor ideal for creators who care about composition and storytelling:
- 1000+ realistic AI voices to give your visuals narration that fits the tone you’re aiming for.
- AI-powered video and audio enhancement to keep your shots clean, sharp, and distraction-free.
- A built-in library of royalty-free music and sound effects to strengthen the rhythm and emotion behind your frames.
- High-quality stock footage and images that help you illustrate your message when you can’t capture the shot yourself.
- An intuitive Video Editor where you can trim, layer, add subtitles, and assemble your project into a professional final cut.
Start applying the rule of thirds in your own videos with Podcastle, and watch your ideas take on the balance, clarity, and polish they deserve.