Branded video content is one of the strongest ways to build recognition and trust online. When people scroll past your video, they should know it belongs to you before you even say a word. That happens through consistency: your logo, your colors, your fonts, and the overall look of your video should match the identity you’ve worked hard to build.
The challenge is that putting this into practice often feels messy. Creators end up digging through folders, resizing logos, or trying to remember which shade of blue is the “official” one.
That’s where Podcastle’s Brand Kit comes in. It keeps every brand element in one space and makes it easy to apply them to your videos.
In this guide, we’ll walk through how to set up your Brand Kit, record branded videos, edit them to match your identity, and share some tips to keep everything looking polished.
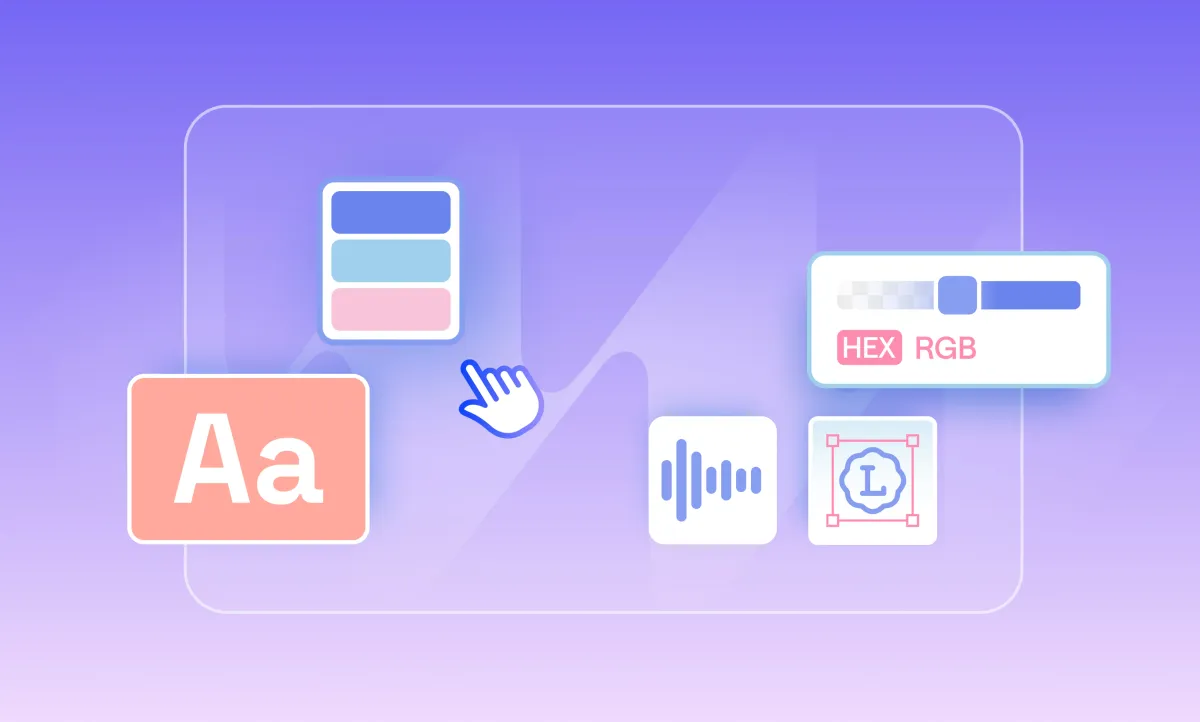
Add branded visuals with Podcastle's Brand Kit
Before recording or editing, you’ll want your brand assets organized. Brand Kit is like a home base for everything visual that represents you. Once you’ve set it up, those assets are always a click away whenever you start a new project.
1. Click on "Brand Kit"
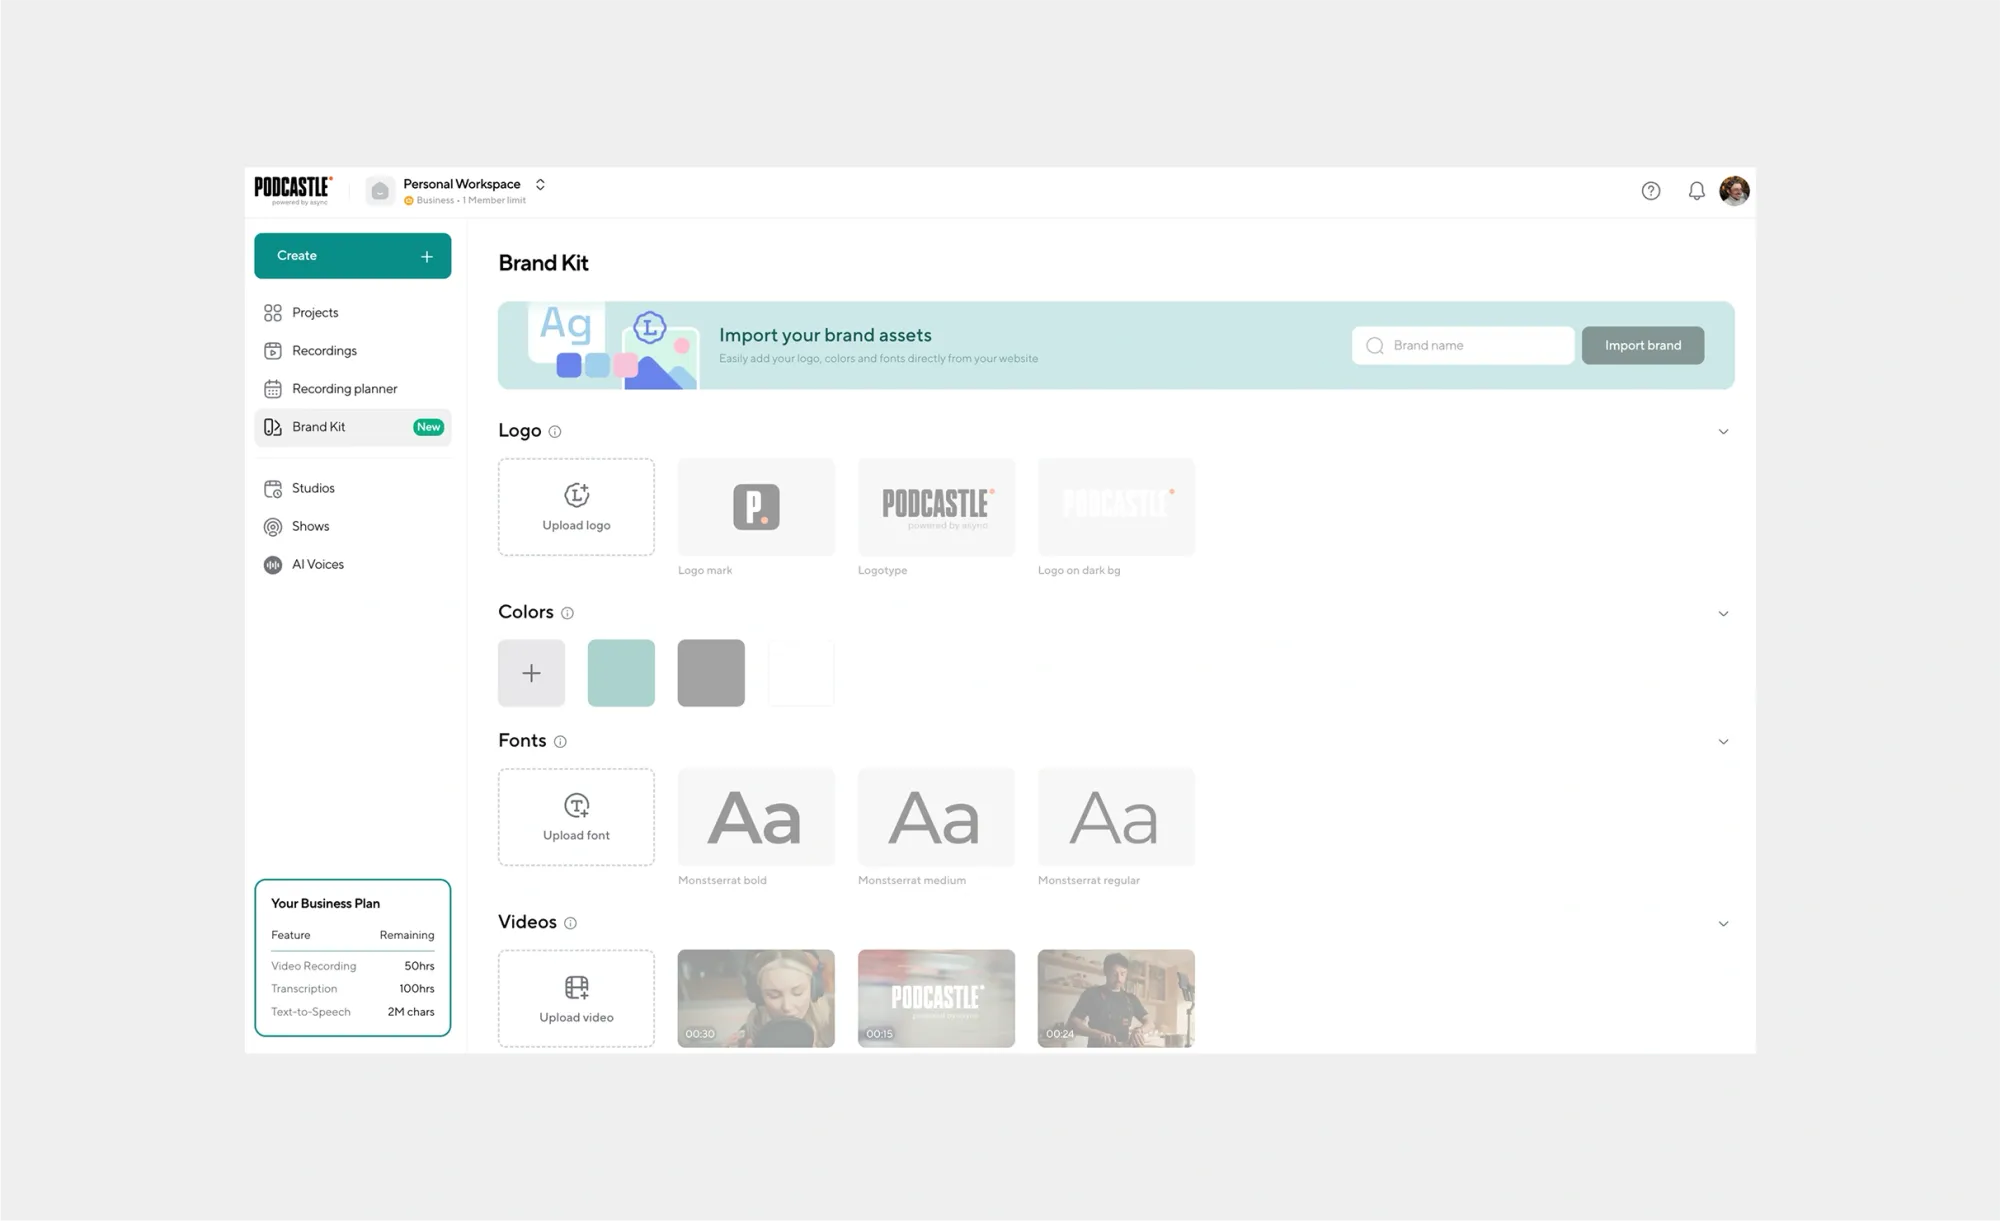
Open Brand Kit from your Podcastle dashboard. This takes you to the hub where your logos, colors, fonts, and other assets live.
2. Type your brand or company in the search bar
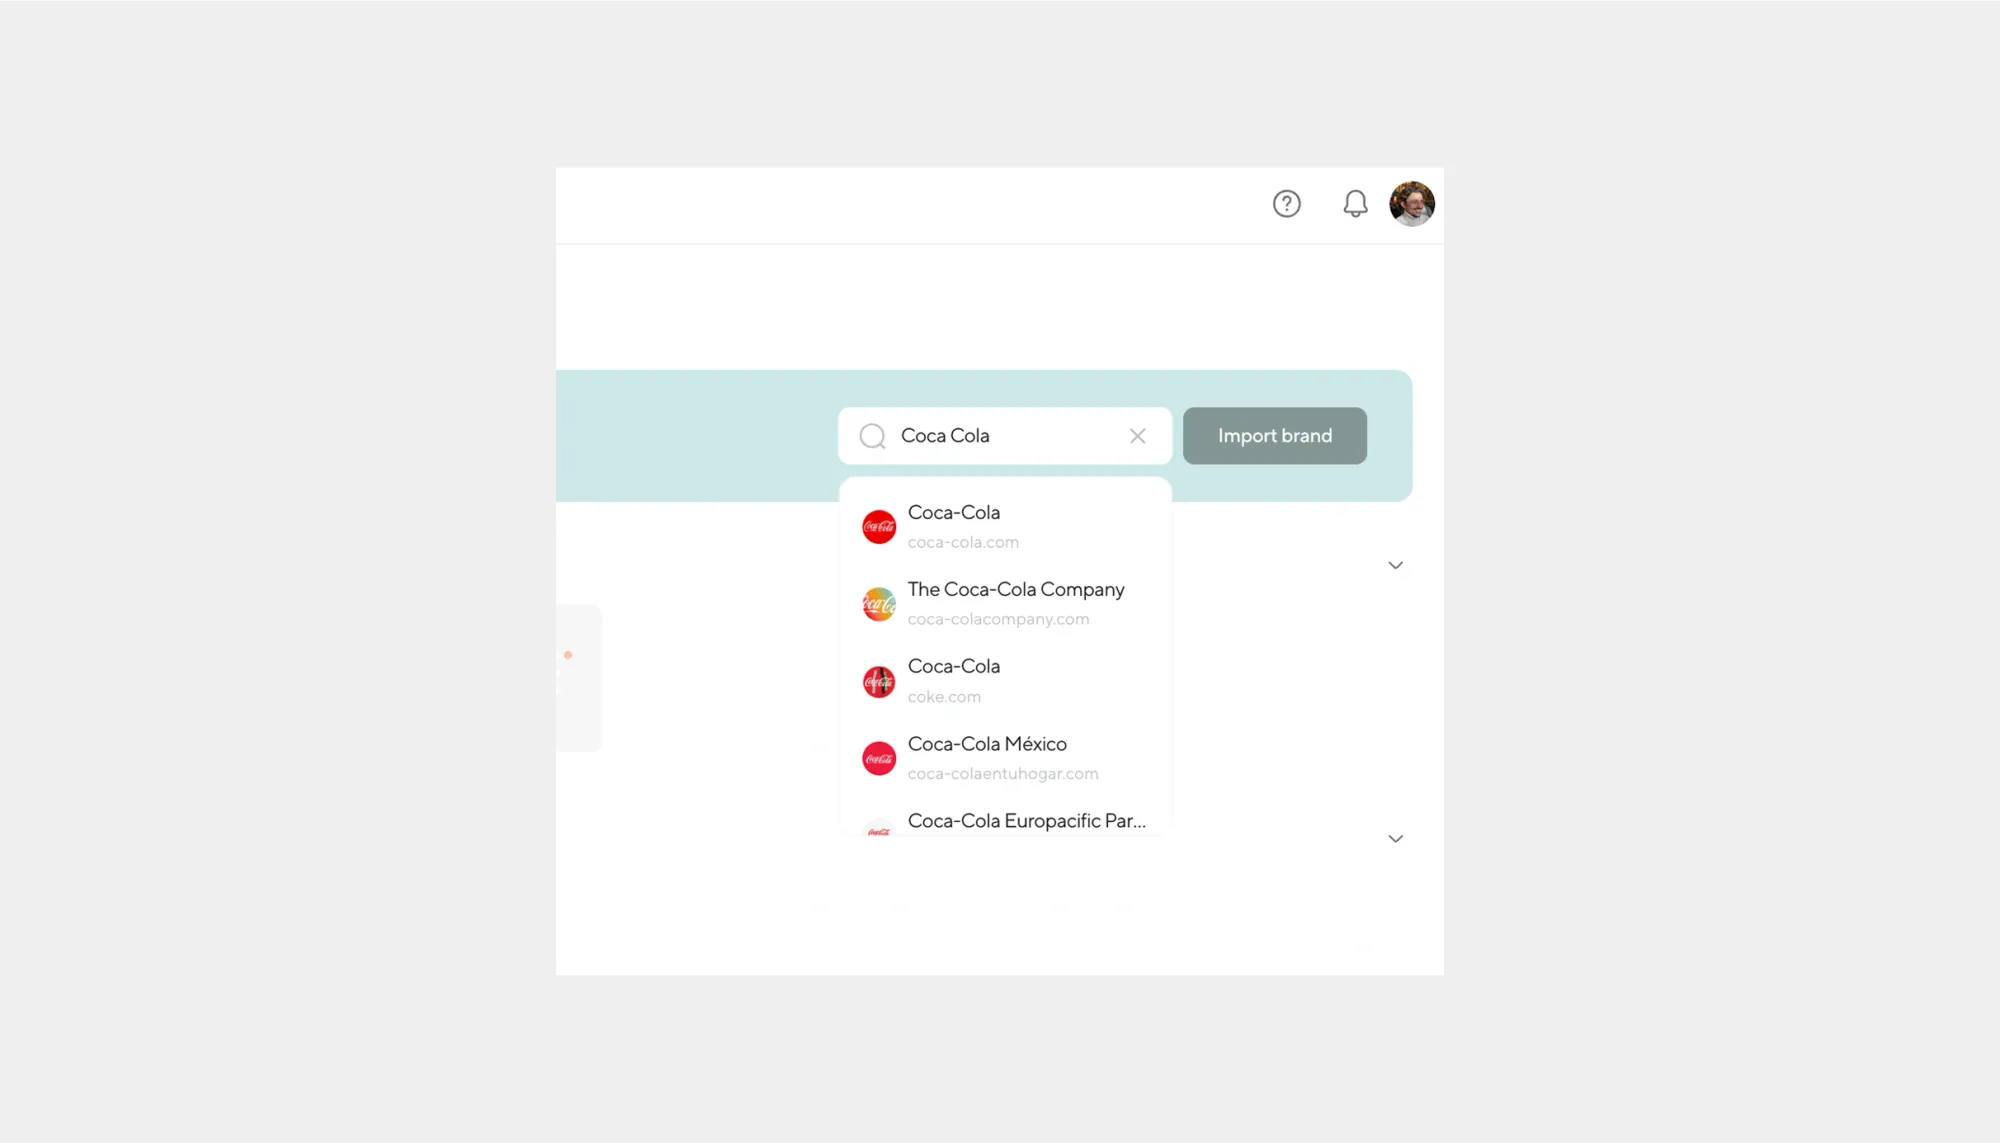
Easily search for your brand and Podcastle will pull up all its assets straight from the web (p.s. if nothing appears, you can build the kit from scratch.)
3. Double check it's the right elements and add to brand kit
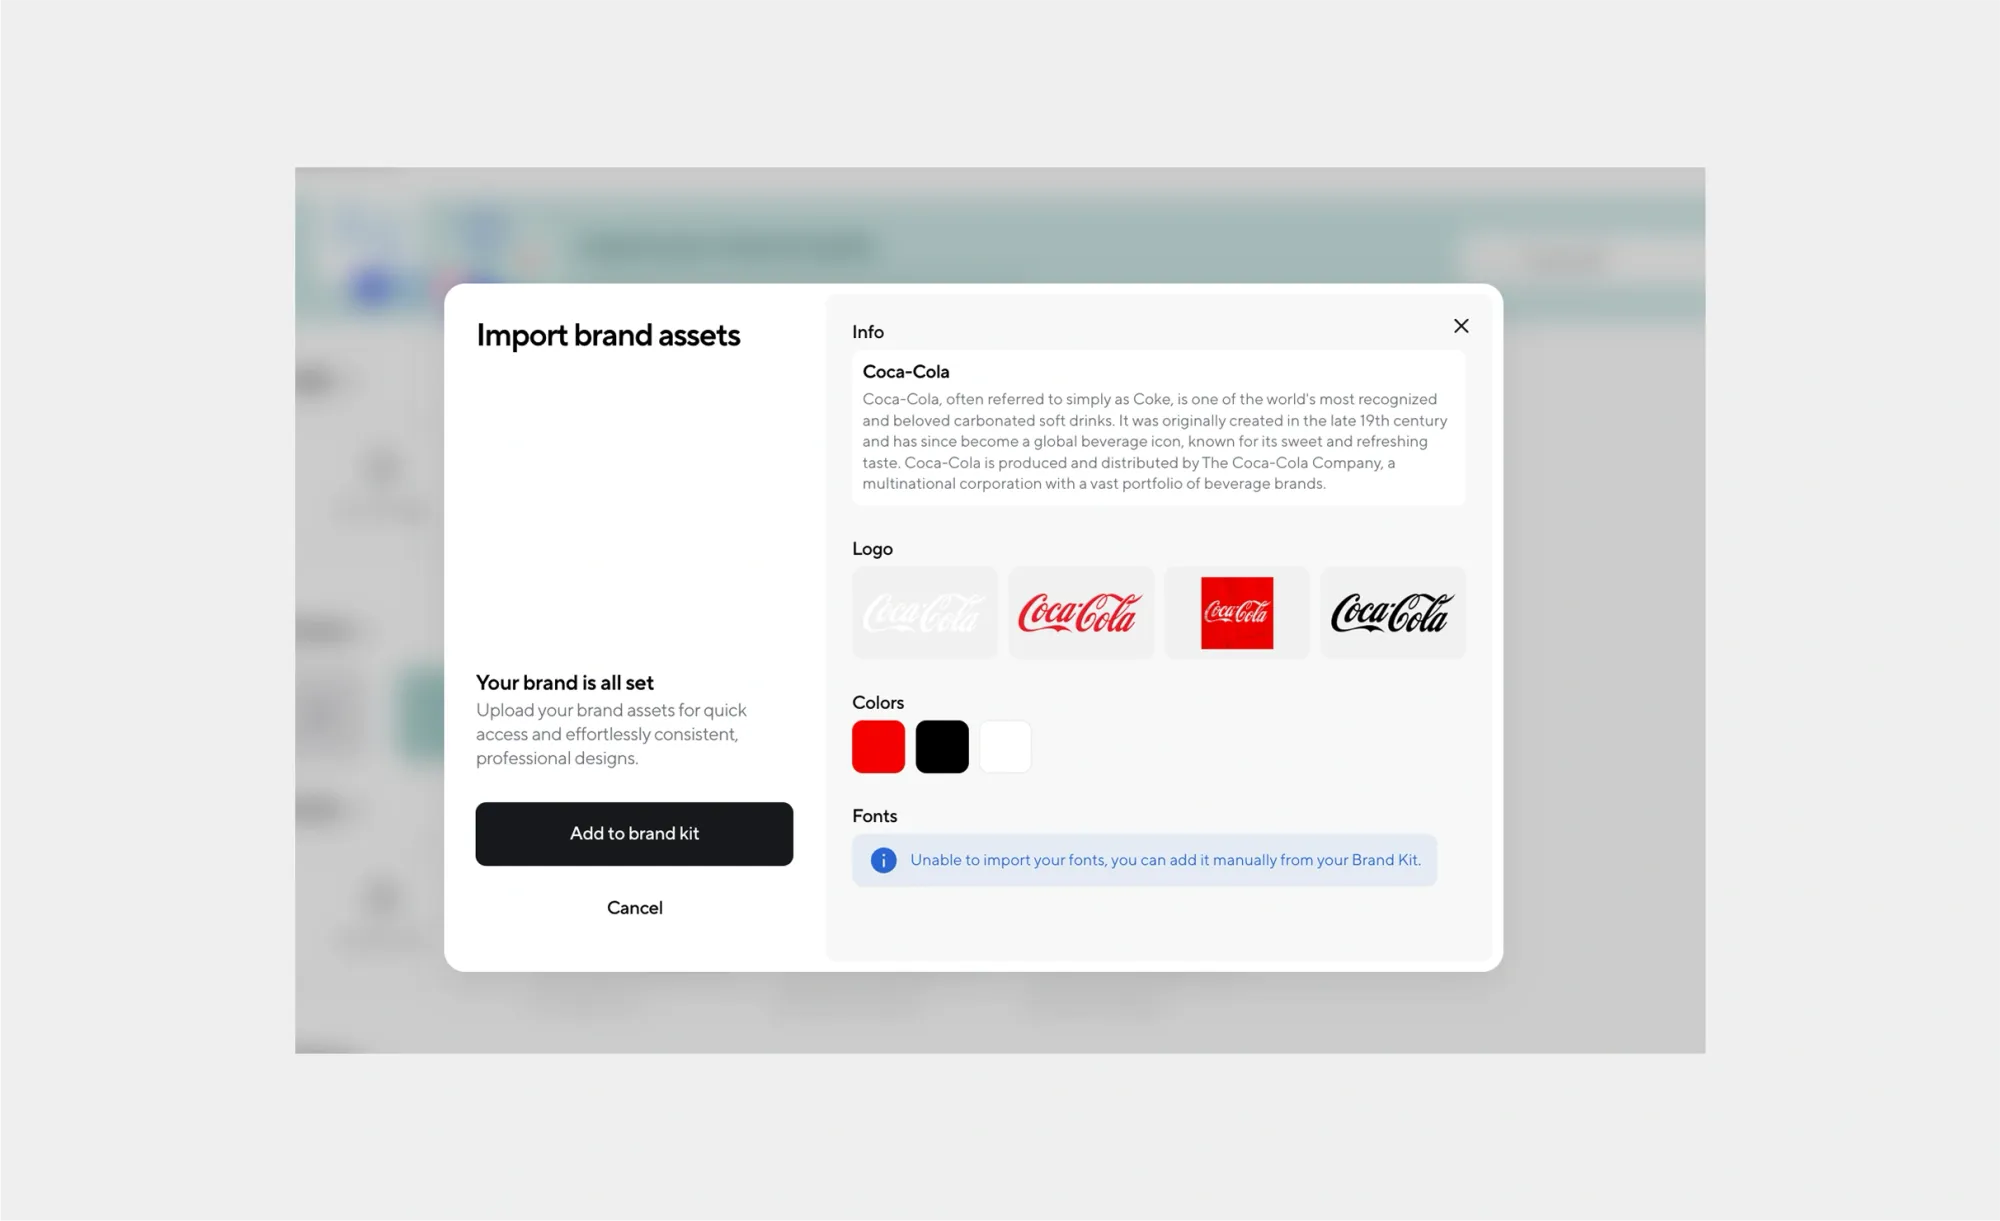
Confirm logo variations, colors, and font names match your brand guidelines, then add them to your brand kit.
4. Add more brand assets as needed
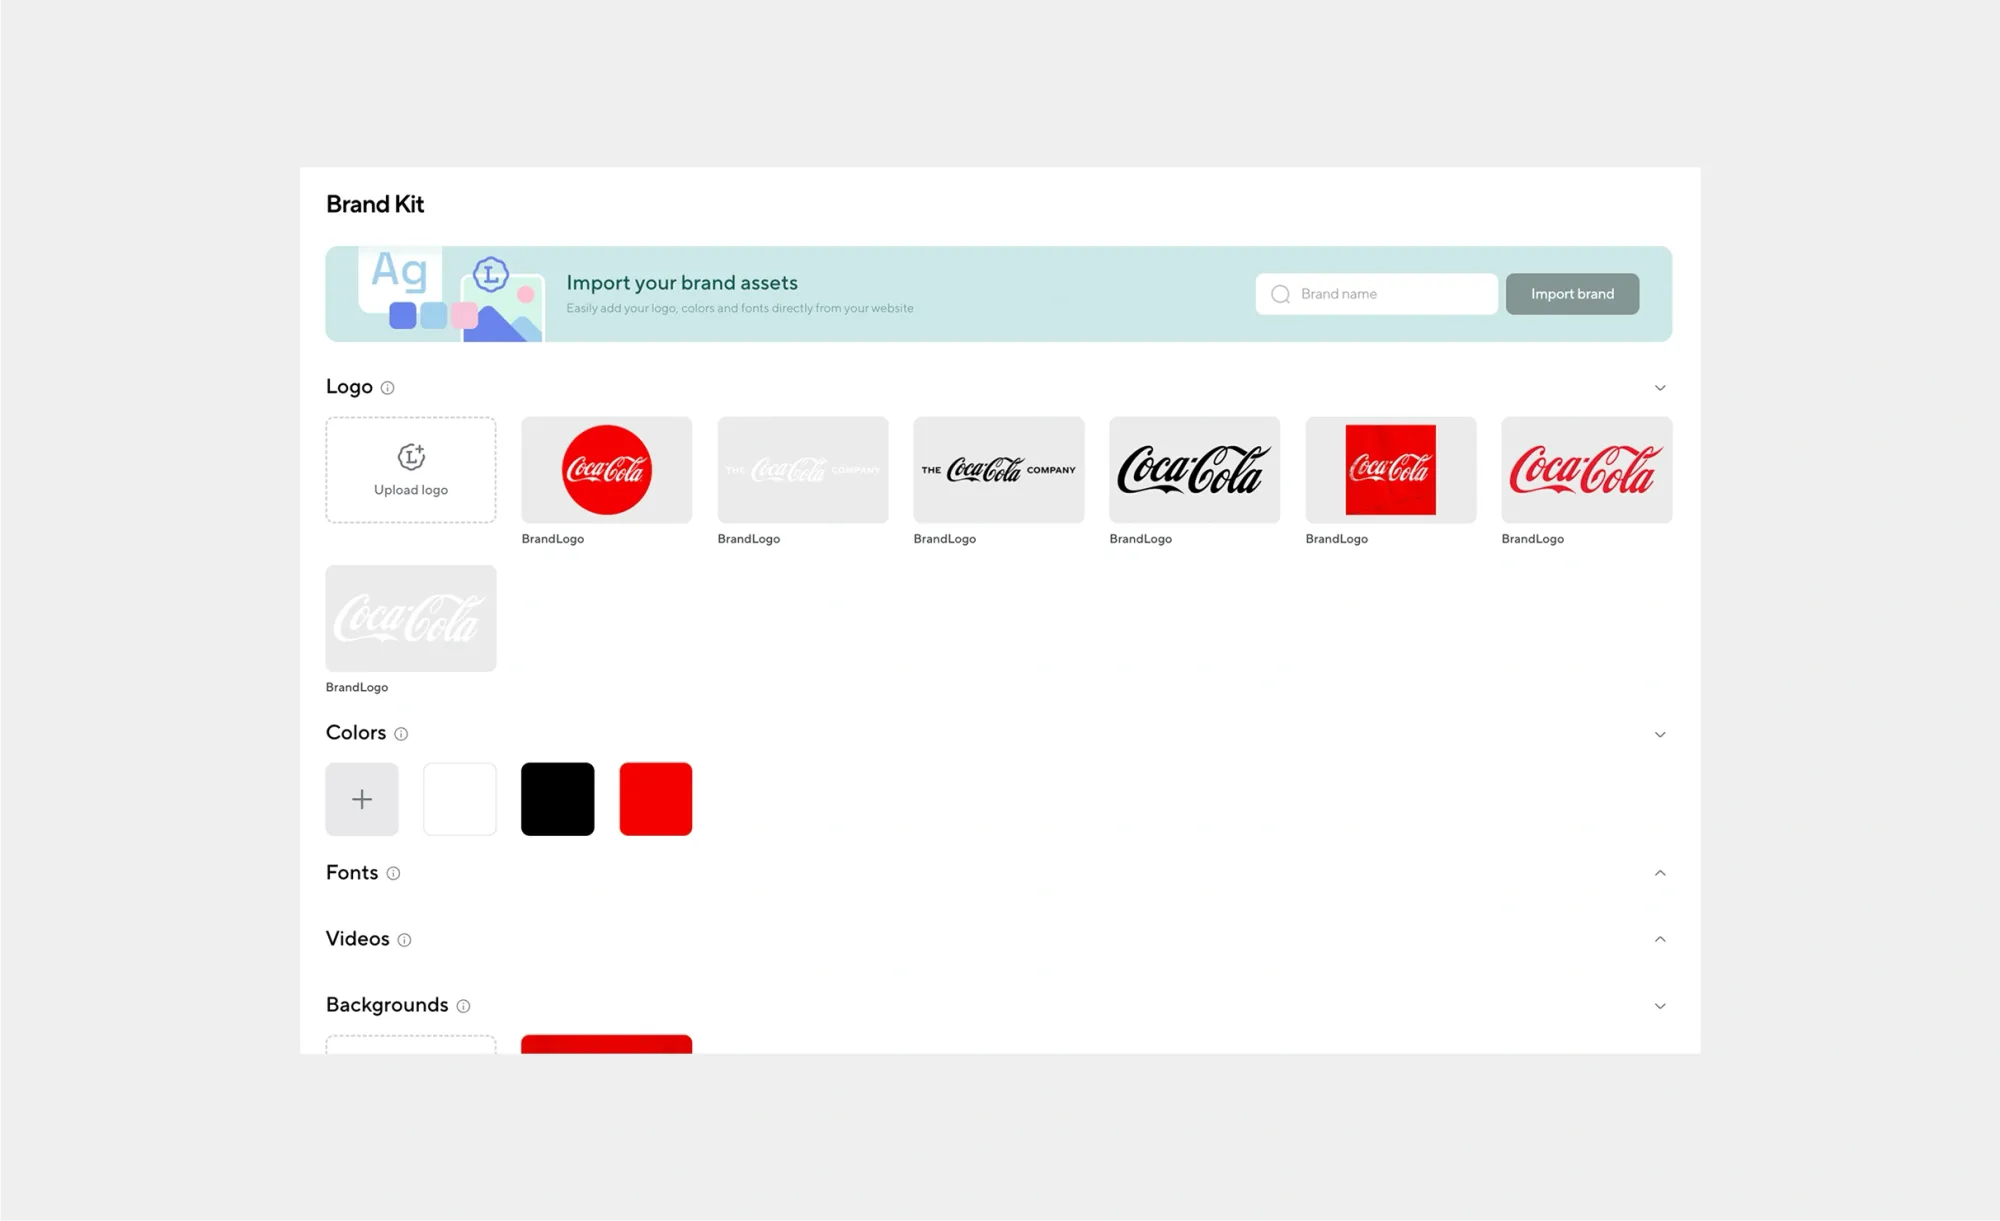
Upload alternate logos, background images, intro and outro slates, music stings, and any approved imagery. Use clear file names so teammates know which version to use.
How to record a branded video
Once you've got everything ready to go under your brand kit, the next step is letting it shine in your content. Here's how you can apply your identity to recordings.
1. Head on over to "Recording"
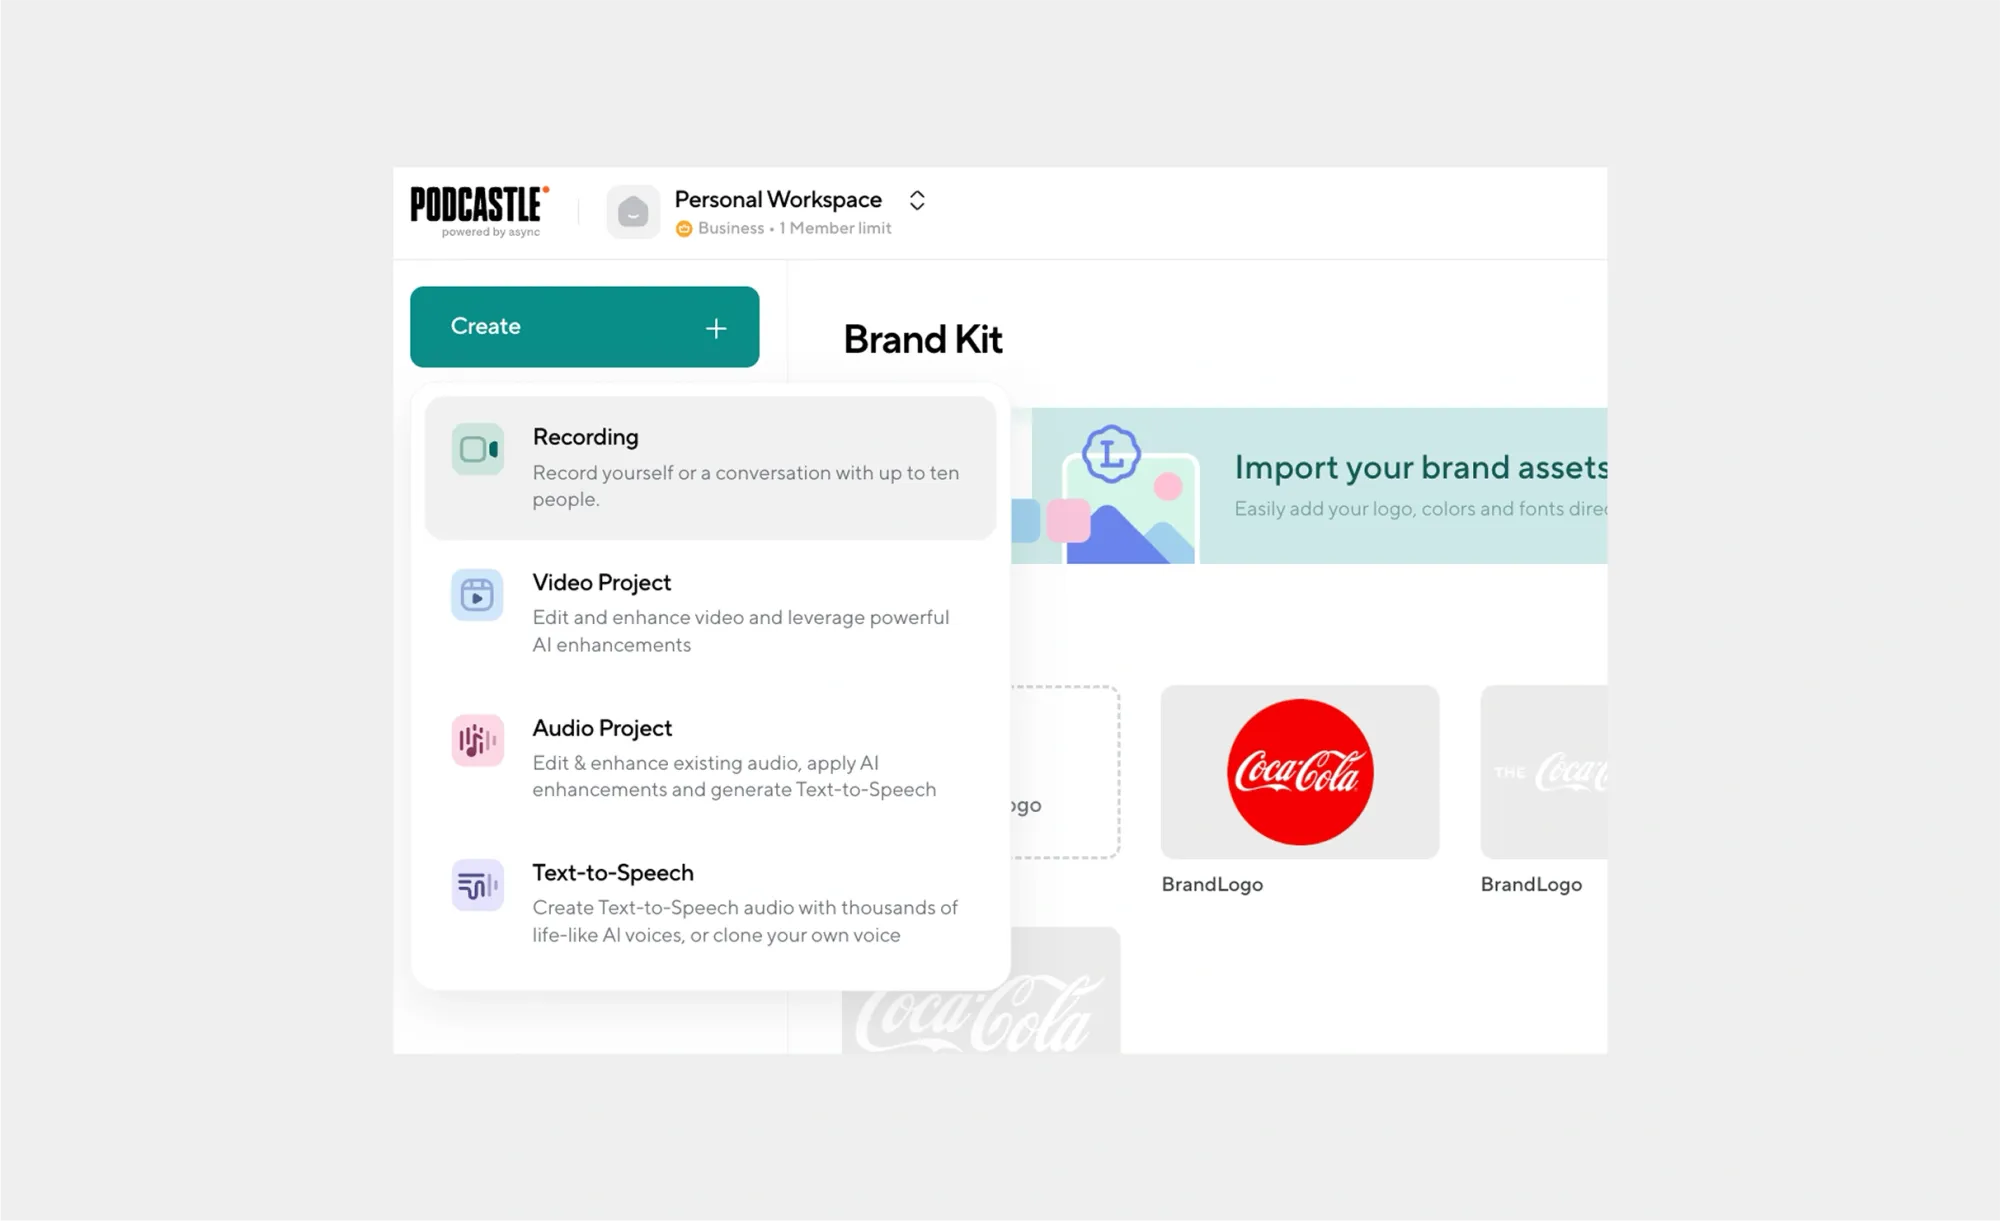
Here is where you'll enter your recording studio and find all your branded video elements, ready to be applied to your remote recordings.
2. Click on "Customize"
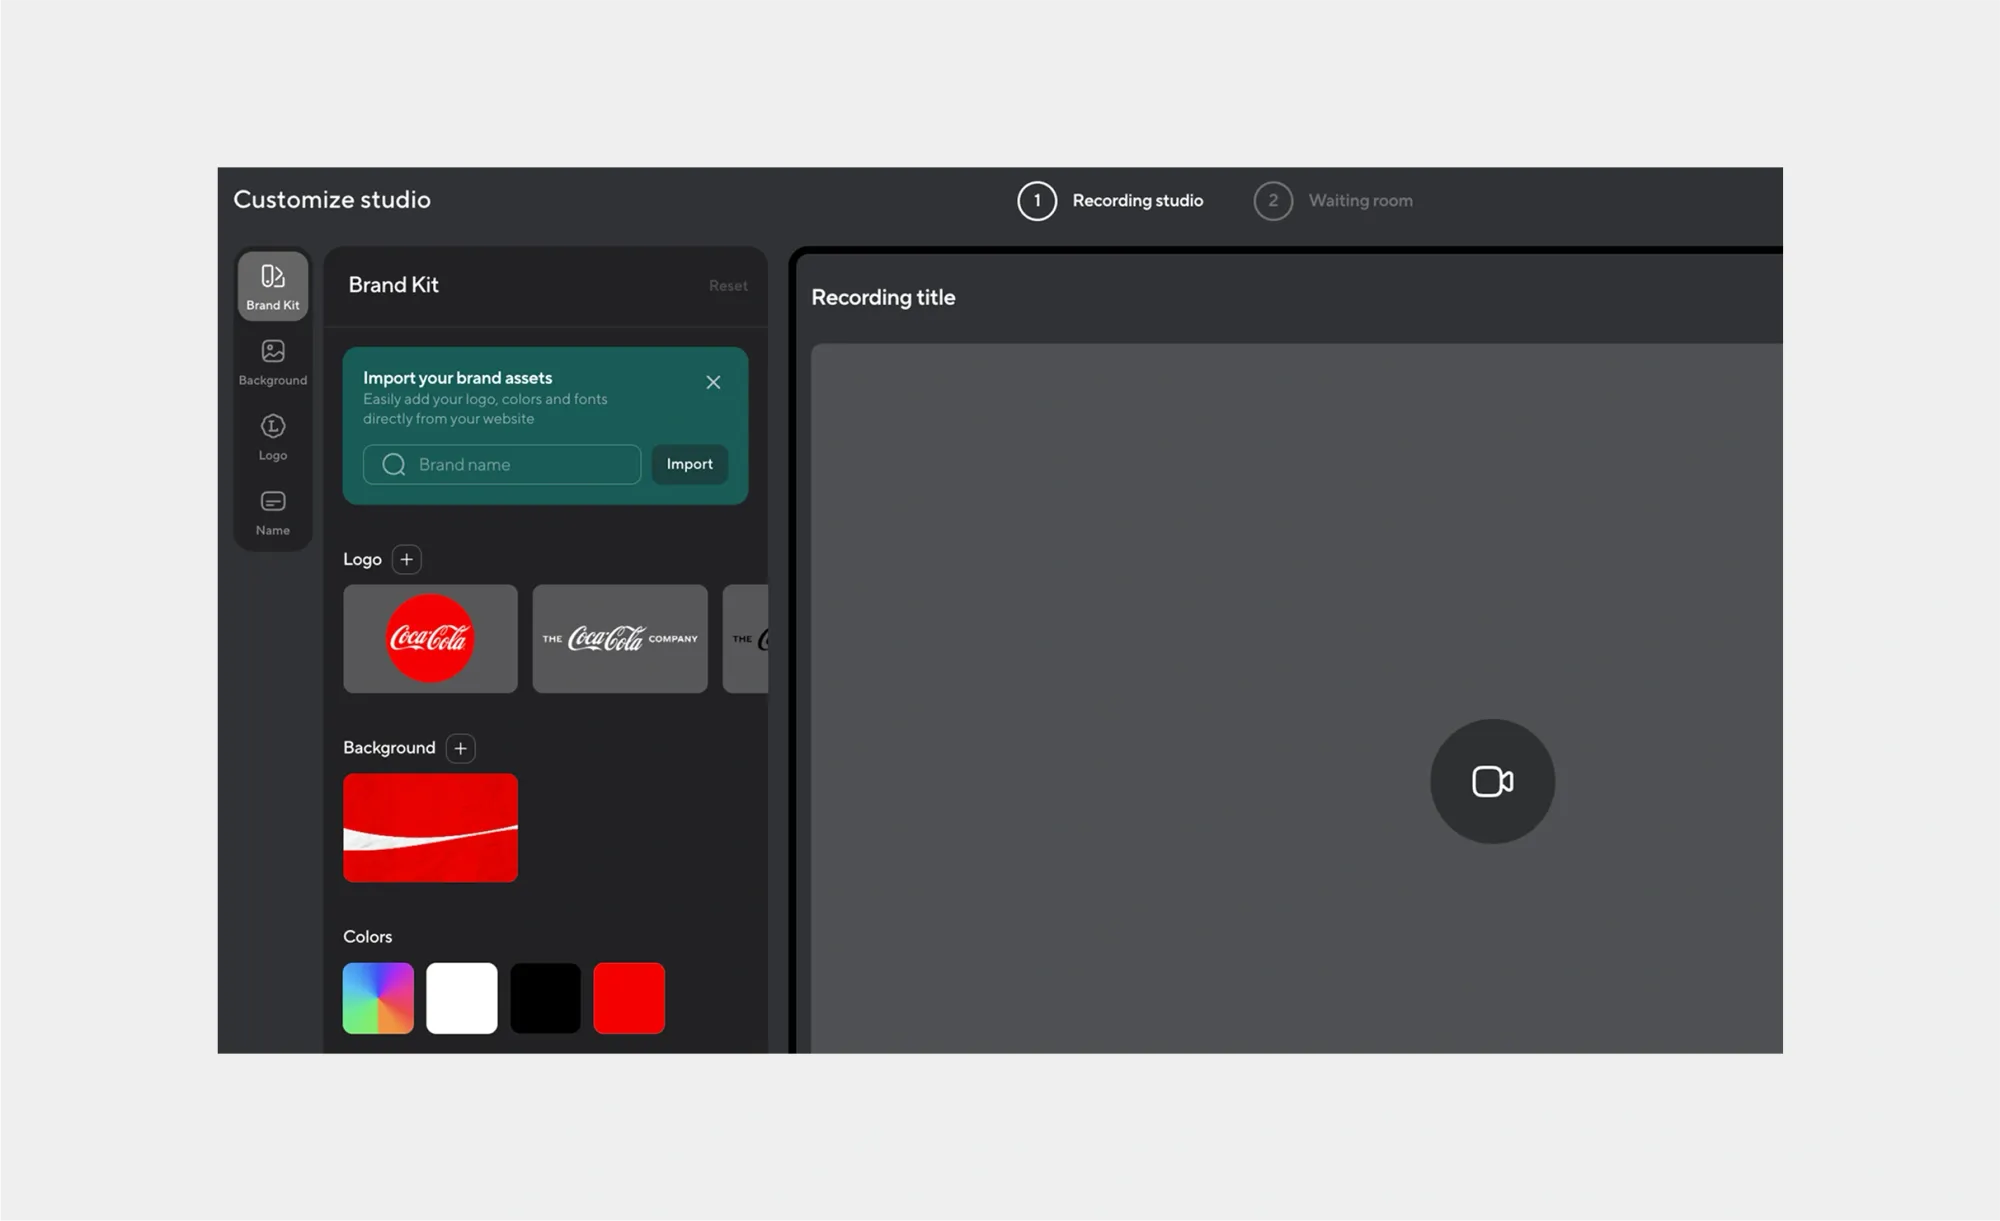
Under "customize", you'll be able to see a complete overview of your brand kit, change your background, add your logo, and more.
3. Create your branded recording and waiting room
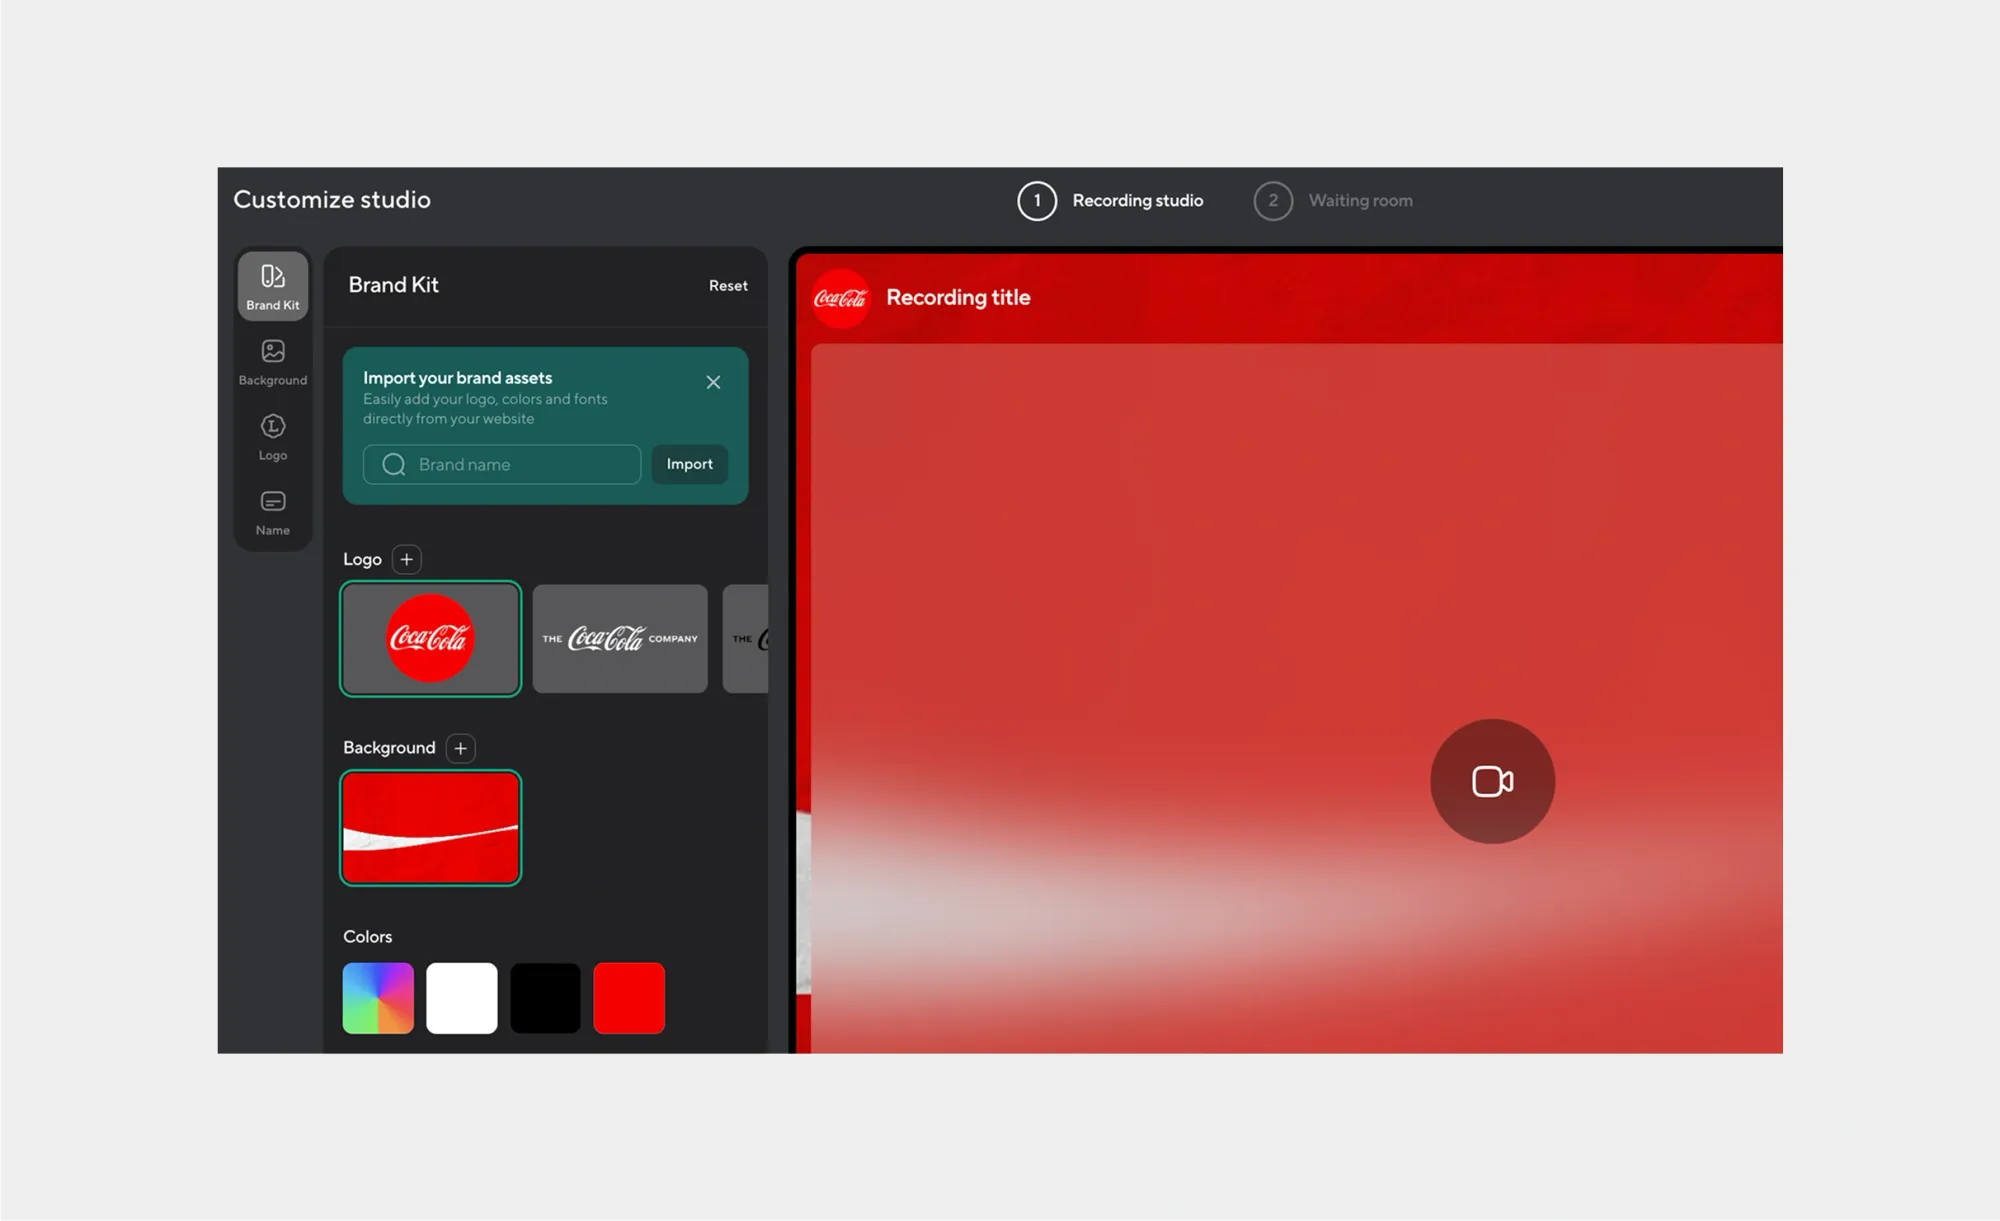
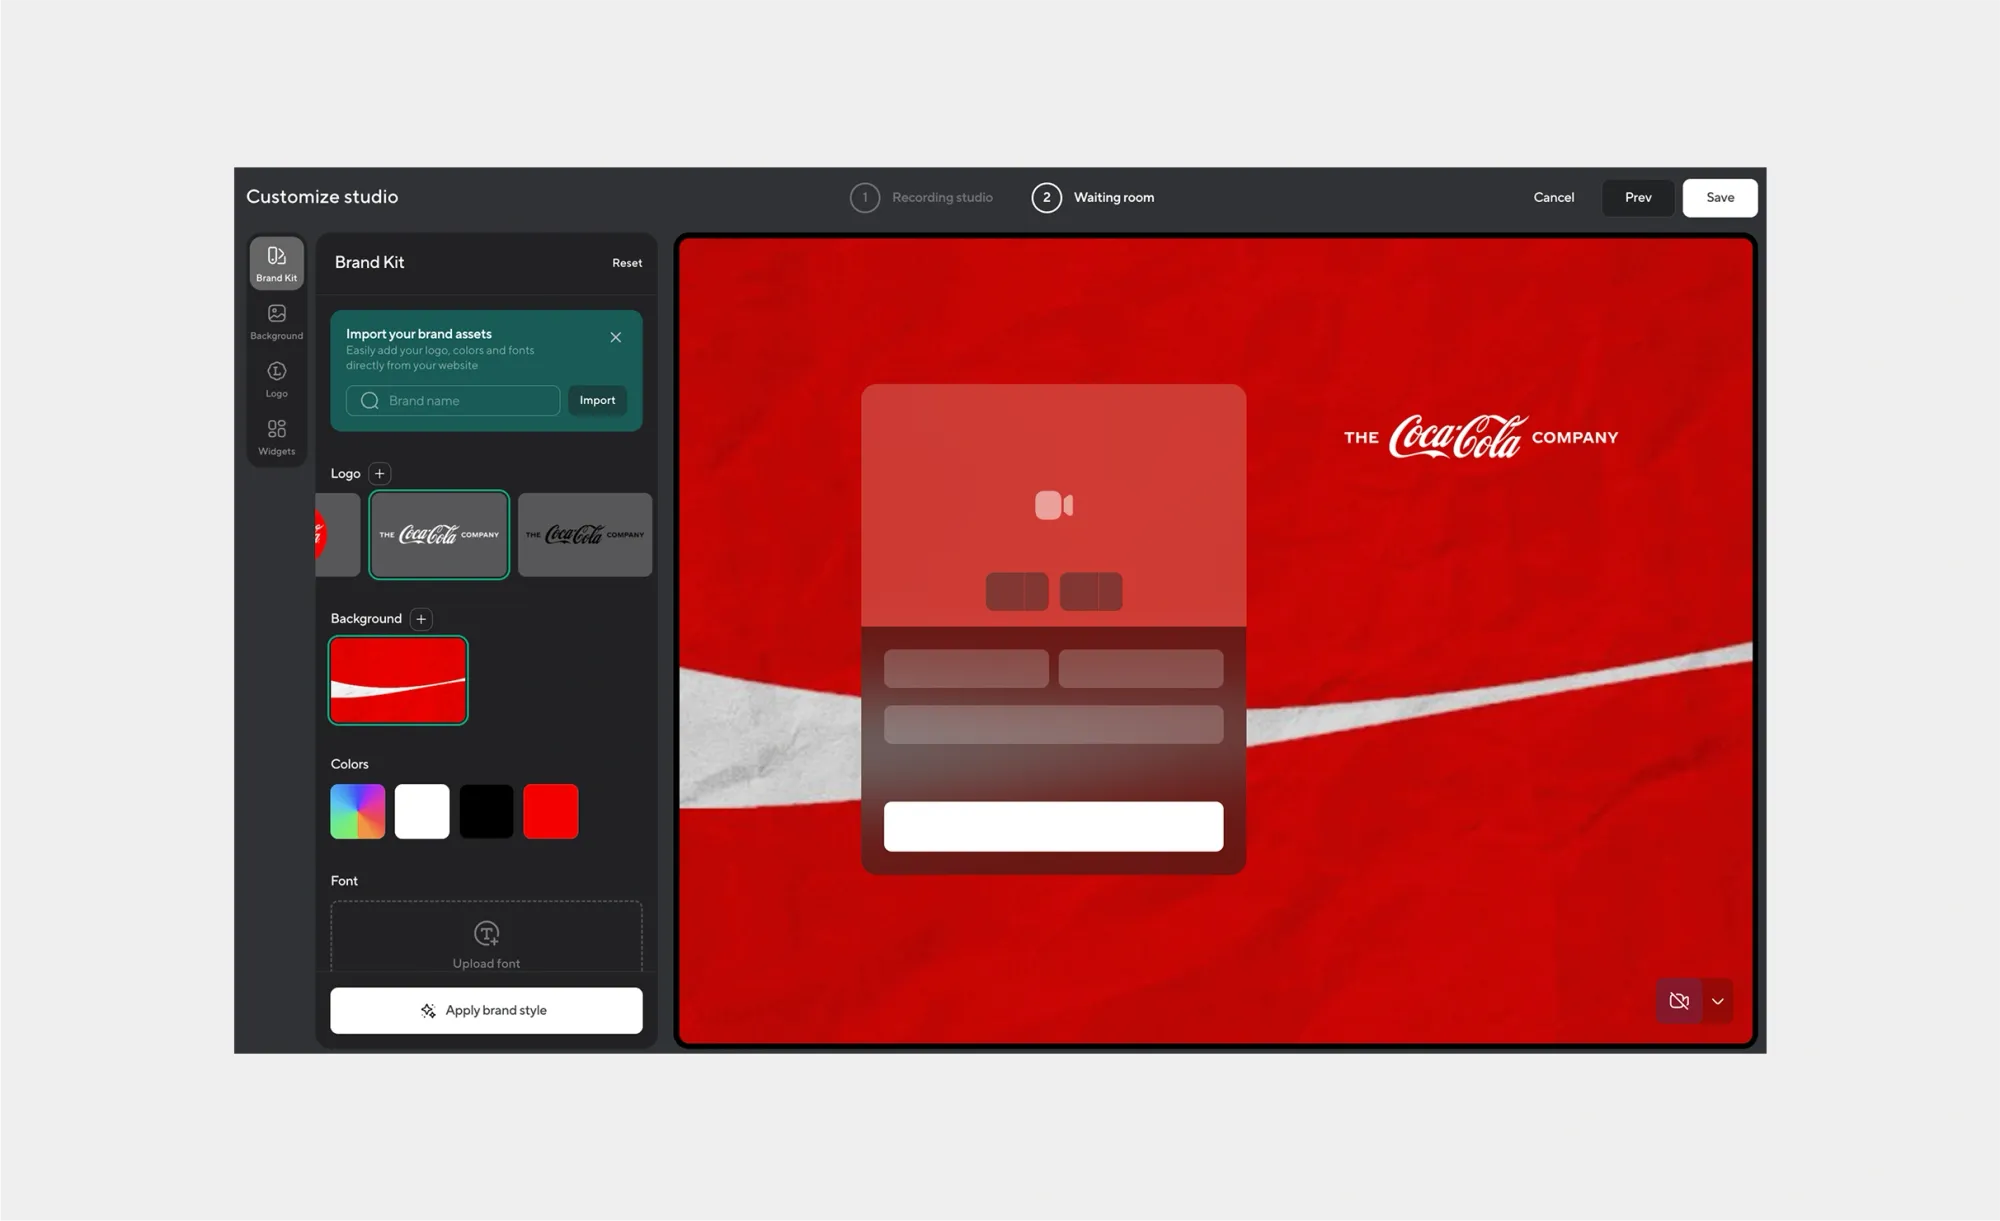
Click on whichever combination of background and logo you'd like, along with any final touches, and there you have it! A completely branded video ready to be made.
How to edit a branded video
Once you've got your recordings done, they'll be safely stored in Podcastle for you to edit later. That said, if you forgot to add branded elements to your video during the recording phase, or you're thinking of adding branded assets to other videos, here's how you can get that done inside the video editor.
1. Head on over to "Video Project"

Whether it's to work on the branded videos from your recording studio, or another video project entirely, you can edit it all from here.
2. Open "Brand Kit" on the left-hand toolbar
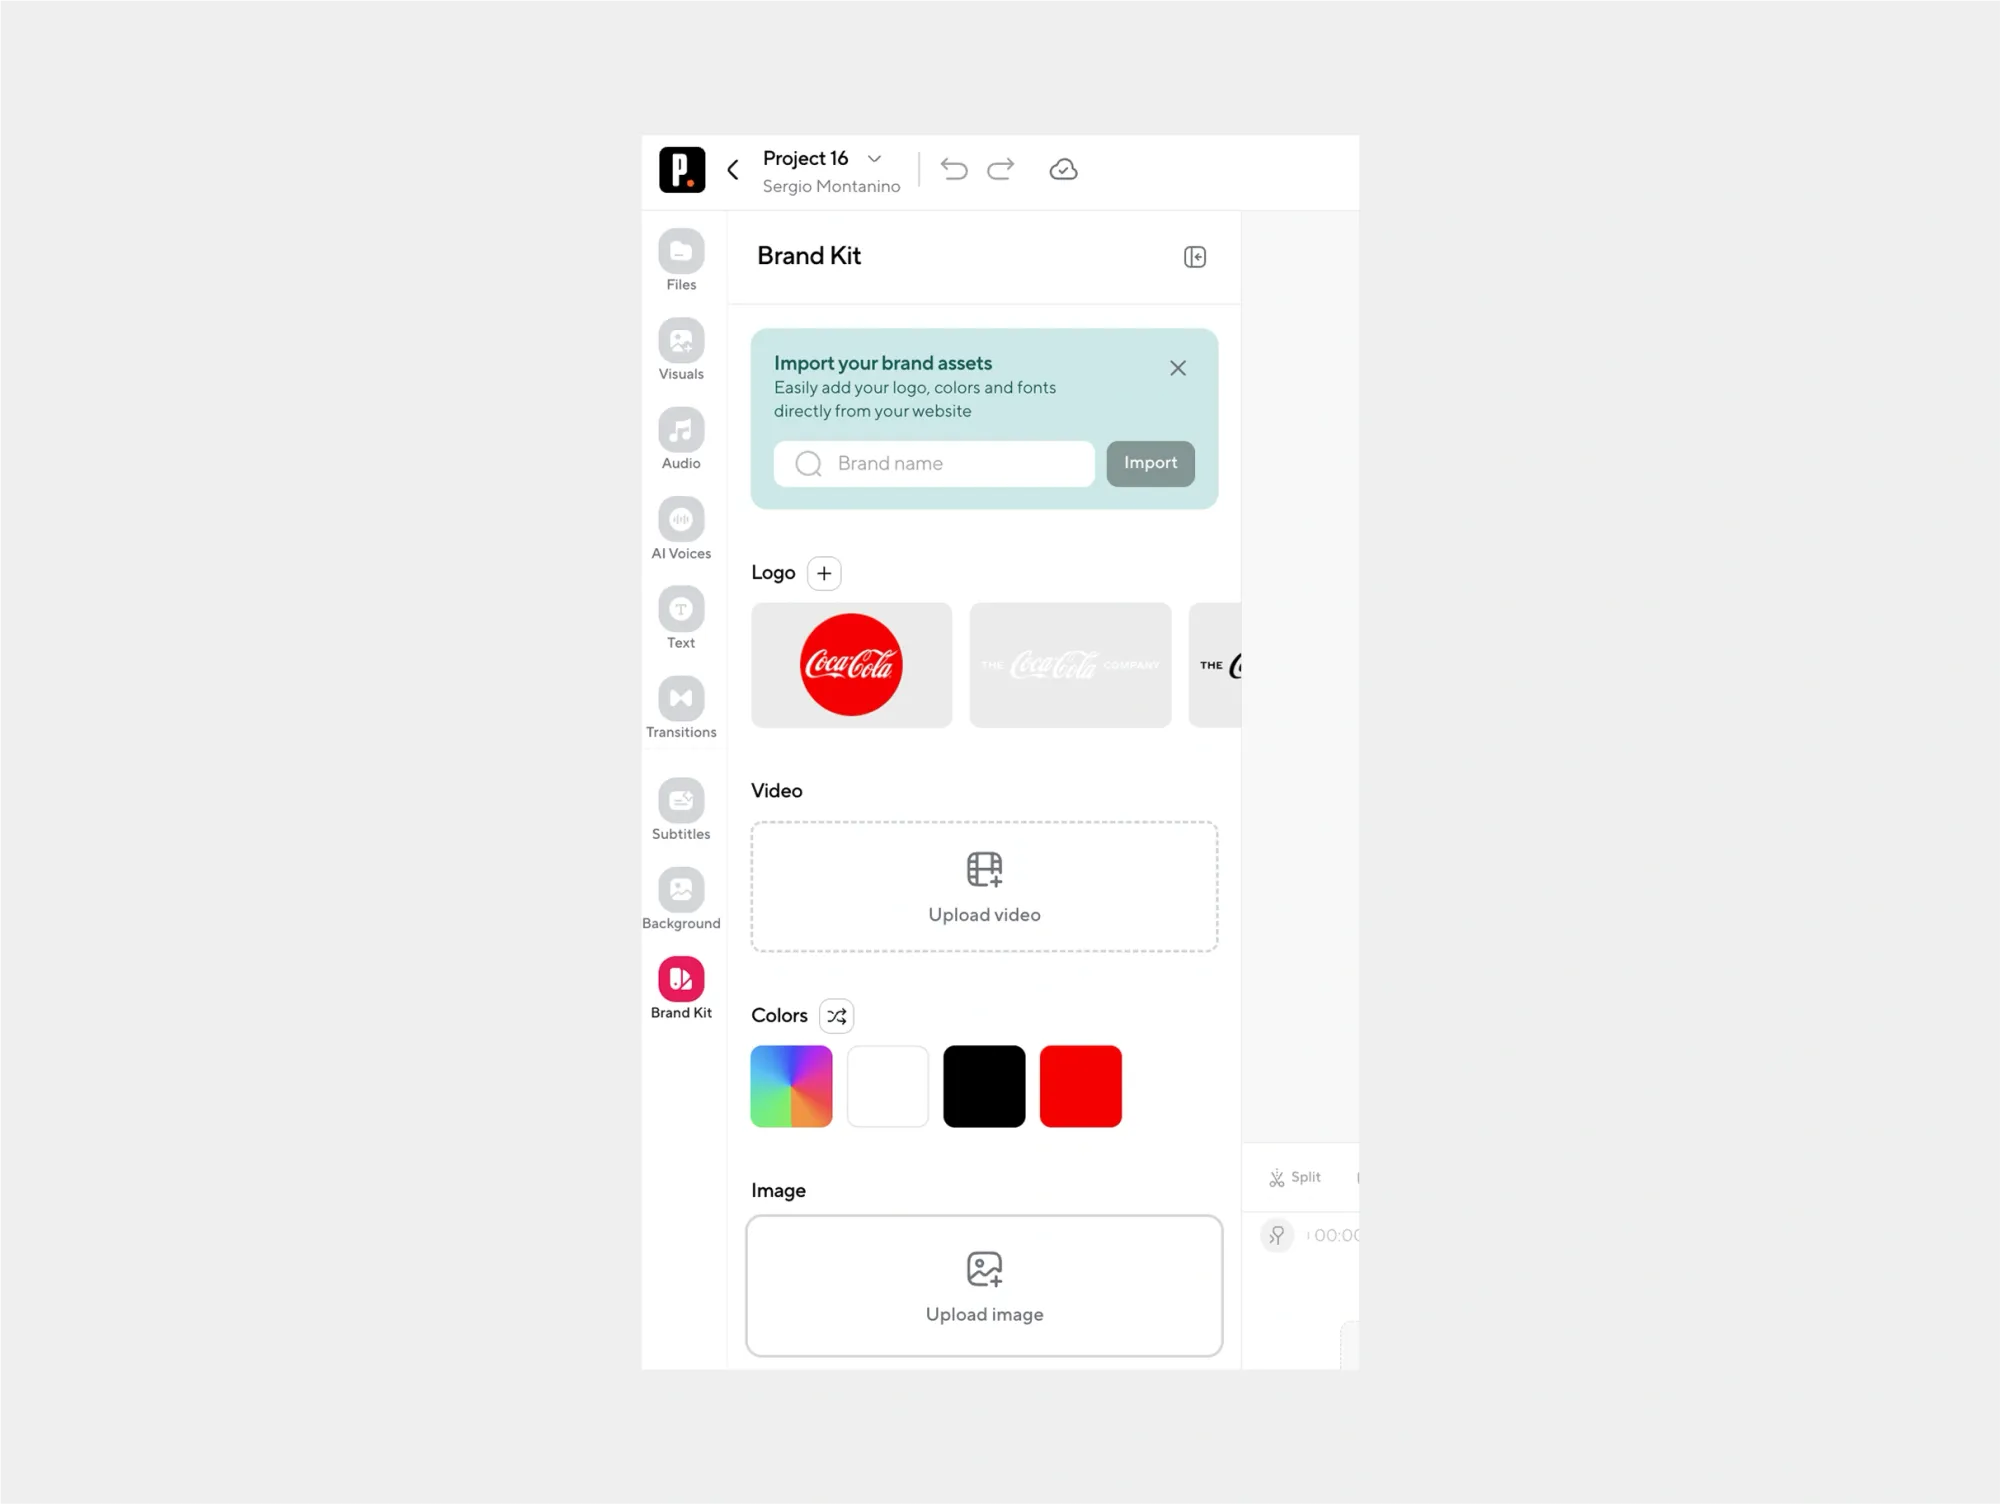
This reveals your approved assets and style presets. Everything is ready to add into the timeline.
3. Add your brand elements to your video
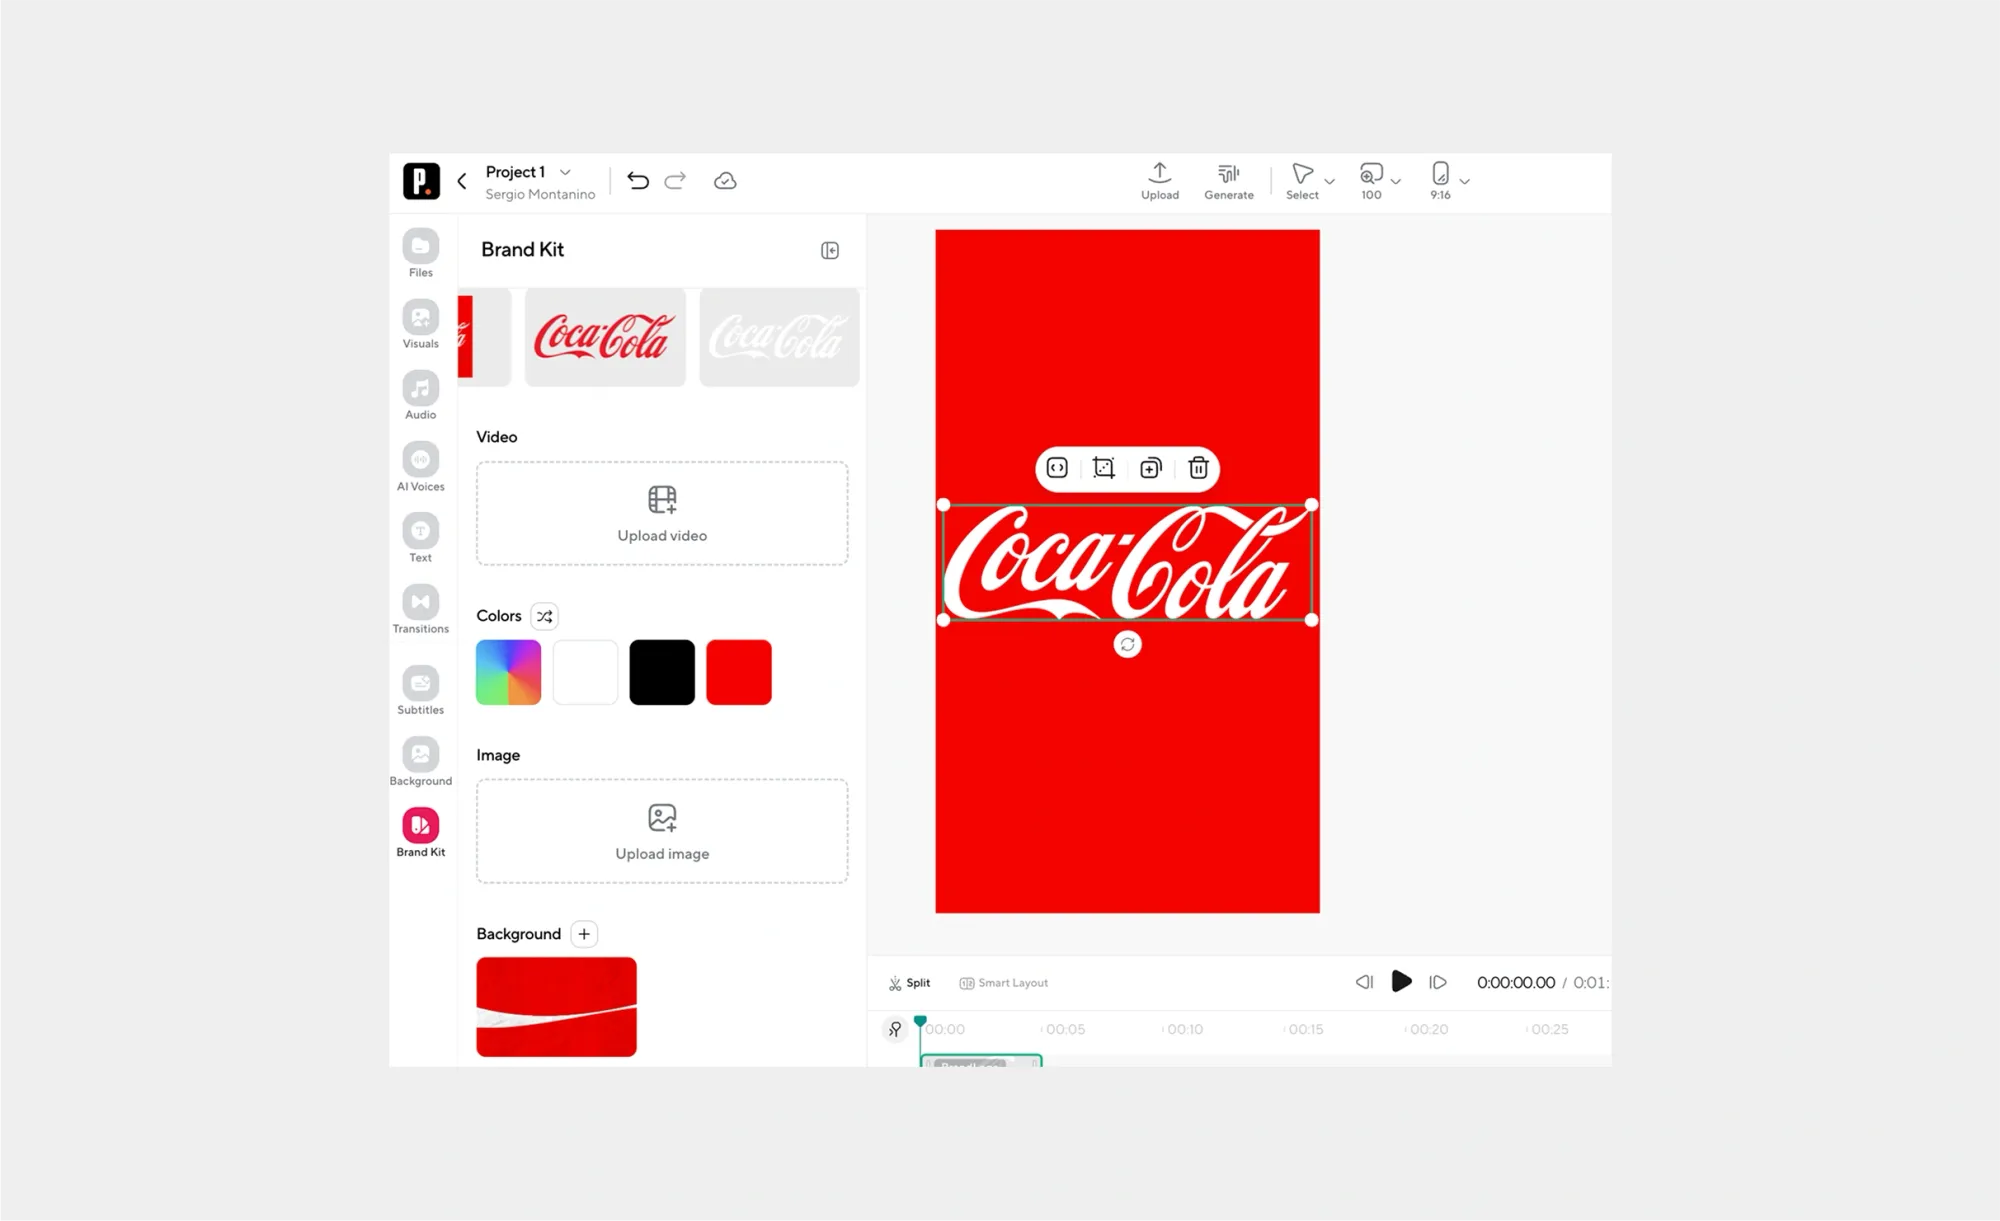
Place your logo in an appropriate spot, apply your color palette to the background, and switch subtitle fonts to your approved type.
Tips when creating branded videos
Good branding feels natural. It supports the story and helps viewers identify you without calling attention to itself. The sections below give you practical habits you can use right away.
- Color and contrast. Use your primary colors for key accents and keep backgrounds neutral to maintain focus on faces and products. Check contrast on subtitles and lower thirds so text reads clearly on bright and dark footage.
- Typography that reads well. Pick one headline font and one body font from your Brand Kit. Use consistent sizes for titles, captions, and callouts across every video so the rhythm feels familiar.
- Captions that match your voice. Choose a subtitle style that suits your content. Keep line length short, use sentence case, and avoid heavy effects that make reading harder on small screens.
- Lower thirds with purpose. Lower thirds should introduce people or sections, not fight the frame. Use a single animation style and stick with it so the motion language feels intentional.
- Logos that stay subtle. Place the logo in a corner with safe margins away from edges. Keep opacity solid for short videos and consider a lighter watermark for long-form content.
- Motion that feels consistent. Adopt a small set of transitions and use them across projects. Reserve punchy cuts for energetic content and smoother moves for interviews or demos.
- B-roll that supports the brand. Match b-roll to your color world and tone. If your palette is cool and clean, avoid clips that skew warm and gritty unless there is a clear reason.
- Sound that sounds like you. Pick music that reflects your brand energy. Keep voice and dialogue clear, and set music to sit under speech so viewers never strain to hear.
- Platform-ready framing. Plan layouts for 16:9, 1:1, and 9:16 from the start. Keep important text and faces inside safe zones so nothing gets cropped on mobile.
- Templates that save time. Create templates for intros, outros, and lower thirds inside the editor. Reusing them speeds up production and locks in consistency.
Try Podcastle's Brand Kit
A consistent look should be easy. Brand Kit gives you a single place for logos, colors, fonts, and media so you can apply them in seconds while you record and edit. Build your kit once, create faster every time after.
Ready to make your videos recognizable at a glance? Try Podcastle’s Brand Kit and ship your next project with a clean, consistent look.