A YouTube channel that pulls in views, makes money, and grows fast, all without ever showing your face? It sounds almost too good to be true.
But faceless channels are proving that you don’t need a camera, a fancy setup, or even much of an on-screen personality to succeed on YouTube.
Some of these channels rack up millions of views every month. One example, 10x INCOME, even hit 260,000 subscribers in just five months. That’s the kind of growth creators dream about.
But if it’s so effective, why isn’t everyone doing it?
Because getting one off the ground is harder than it looks. Building a successful faceless channel takes time, research, and editing skills. And without the right approach, it’s easy to get stuck before even uploading your first video.
Let's break down exactly how to start a faceless YouTube channel the easy way and with just one app.
Psst... Want to Listen to This Blog?
Prefer listening over reading? Hit play below to hear this blog, brought to life using our AI Voices:
How to Become a Faceless YouTuber
Step 1: Pick a Viral Topic
Every successful faceless YouTube channel starts with a strong, in-demand topic. This choice matters because it determines how easy or difficult it will be to gain traction.
A good topic checks three boxes:
- It has a proven audience: If similar videos in the niche are already pulling in views, that’s a good sign.
- It’s interesting enough to research: Since faceless videos rely on strong information, you’ll need to spend time gathering facts, and that process is much easier when you actually care about the subject.
- It can be made engaging through visuals: Because you’re not appearing on camera, the content needs to be visually dynamic. Some topics naturally lend themselves to this, while others fall flat.
Best Niches for Faceless Channels
Educational content, sports, gaming, and list-style videos work extremely well. These topics allow you to pair narration with stock footage, animations, and text overlays, making the final product visually engaging.
For example, an educational channel about personal finance can use graphs, statistics, and simple animations to explain complex ideas. A sports history video can incorporate game footage, highlights, and player interviews to keep viewers interested. A gaming channel can rely on screen recordings, gameplay clips, and voiceovers to tell a compelling story.
Topics That Don’t Work as Well
Some formats struggle (or are simply impossible) without a face on-screen. Lifestyle vlogs, travel diaries, and reaction videos are some that fall into this category. These rely heavily on personality and emotional connection, which are difficult to create without appearing in the video.
If a niche depends on facial expressions, real-time interactions, or charisma, it’s usually a bad fit for a faceless channel.
Once you’ve settled on a niche, the next step is choosing a name for your channel.
Step 2: Pick a Channel Name
A great channel name is short, clear, and memorable. Before a single video goes live, the name is the first thing people see. If it doesn’t give a clear idea of what the content is about, you’re already making things harder.
Think about the faceless finance channel mentioned earlier. The name instantly tells viewers it’s about money. That’s exactly what you want—a name that matches the niche, leaving no room for confusion.
How to Choose the Right Name
Start by listing words related to your topic. If your niche is education, focus on terms that suggest learning, knowledge, or curiosity. If it’s sports, look at words tied to action, competition, or legendary moments. The name doesn’t need to be flashy or overly creative. It just needs to be relevant and easy to remember.
Some of the biggest faceless channels keep their names incredibly simple. That’s because clarity wins. A name that’s too vague or complicated makes it harder for viewers to connect with your content.
What to Avoid
- Long, clunky names: If it’s hard to say, spell, or remember, it’s working against you.
- Random branding that means nothing: If someone sees the name without context and has no idea what it’s about, it’s not strong enough.
- Unnecessary words: Keep it clean. Every extra word adds friction.
Once you’ve got a name that makes sense, check if it’s available on YouTube, social media, and custom domains. Even if you’re only planning to use YouTube for now, it helps to have the option to expand later.
Step 3: Brainstorm Video Ideas and Check Trends
With your channel name in place, it’s time to plan your first videos. Picking the right ideas can make a huge difference in how quickly your channel gains momentum. Instead of randomly uploading content and hoping something sticks, a little research can stack the odds in your favor.
Start With a List of 10 Strong Video Ideas
A great way to begin is by listing at least 10 solid video ideas related to your niche. This helps in two ways. First, it keeps you from running out of ideas after your first few uploads. Second, it forces you to think about what kind of content fits your niche best.
Not every idea will be a winner. Some topics might seem interesting but don’t have enough demand. That’s why checking trends is the next step.
Use Google Trends to Test Demand
Google Trends is one of the simplest tools to figure out if a video idea has an audience. Type in keywords related to your niche and see how often people search for them. The higher the search volume, the better the chances your video will get attention.
The goal is to focus on topics that are already being searched a lot. If a subject has low interest, it’s better to refine the idea or pivot to something that has more traction.
Study Successful Videos in Your Niche
Once you have a list of ideas with strong potential, analyze what’s already working. Go to YouTube, search for videos on similar topics, and see which ones performed best.
Look at:
– Titles: How are they structured? Do they create curiosity?
– Thumbnails: What kind of visuals make people click?
– Video format: Are they short and to the point, or more in-depth?
The goal here isn’t to copy. It’s to understand why certain videos succeed and figure out ways to improve on them. A small tweak in title phrasing, pacing, or visuals can make your version even better.
Start With the Title
A lot of creators come up with a title after making their video, but starting with one upfront helps give the video a clear direction. If the title is strong, the video structure will naturally follow.
With video ideas mapped out and tested for demand, the next step is scripting your content.
Step 4: Writing a Video Script
A strong video script makes editing easier, keeps the pacing tight, and helps keep viewers engaged. Whether you’re recording your own voice or using an AI-generated voiceover, the script determines how natural and compelling your video feels.
Using AI for Video Scriptwriting
If you’re recording the voiceover yourself, writing a full script from scratch can take time. A quick way to speed things up is by creating a simple outline with bullet points for each key idea. Once that’s done, you can use AI tools like ChatGPT to generate a first draft.
Even though AI can create full scripts, it’s still important to personalize the content. Add your own phrasing, adjust awkward sections, and tweak anything that feels robotic. AI-generated scripts are getting better, but they still need a human touch to sound engaging.
Writing for an AI Voiceover
If you’re using an AI-generated voice instead of recording your own, the script needs to be written differently. AI voices can sound flat if the script isn’t structured correctly. Small details like punctuation, sentence length, and word choice all affect how natural the final result sounds.
Here’s what helps:
– Shorter sentences: AI voices handle them better.
– Clear punctuation: This helps control the rhythm.
– Conversational phrasing: Keeps the tone engaging.
An AI-generated voice won’t add personality on its own, so the script has to compensate. If the words flow naturally, the voiceover will sound more human.
Starting With a Simple Structure
If you’ve never written a script before, the easiest way to start is by breaking it into clear sections. Use bullet points to map out the flow of the video:
– Intro: Hook the audience immediately.
– Main points: List the key ideas in order.
– Closing statement: Wrap it up in a way that encourages engagement.
Once the script is finalized, it’s time to gather the visuals and audio assets to bring the video to life.
Step 5: Collecting Visuals and Audio Assets
Once the script is ready, it’s time to gather the visuals and audio that will shape the final video. Faceless channels rely heavily on visuals to keep viewers engaged, so this step is just as important as scripting and editing.
Finding the Right Visuals
The goal is to match compelling visuals with the voiceover. This could be stock footage, images, animations, or even text-based elements that enhance the content.
There are paid platforms like Storyblocks and Envato Elements that offer a huge selection of high-quality footage. But if you want to keep costs low, there are plenty of free alternatives. Websites like Unsplash, Pexels, and Pixabay provide stock images and videos that can work for most topics.
How to Make the Video Visually Interesting
A faceless video still needs movement and variety to hold attention. Instead of using a single static image for too long, switching visuals every few seconds keeps things dynamic. Some of the best ways to do this include:
- Using motion graphics: Animated text or simple transitions help avoid long stretches of still images.
- Overlaying key points as text: Reinforcing important phrases on screen makes them more memorable.
- Mixing different types of visuals: A combination of stock footage, charts, and screenshots keeps things fresh.
The goal is to make sure there’s always something happening on screen that adds to the message.
Choosing the Right Music and Sound Effects
Background music can make a huge difference in pacing and energy. The right track sets the tone and keeps the video engaging, especially when paired with smooth narration.
Platforms like Podcastle, YouTube’s Audio Library, Free Music Archive, and Bensound offer royalty-free music options that can be used without worrying about copyright issues.
Sound effects also help add personality and emphasis. Even small touches like subtle whooshes, clicks, or background ambiance can make the final product feel more polished.
Once all the assets are collected, it’s time to start editing the video and turning everything into a fully produced piece of content.
How to Create Video Content with Podcastle
Not every YouTube creator wants to be on camera. Some prefer to stay behind the scenes, letting their voice, visuals, or animations do the talking. But faceless videos still need to be engaging, polished, and well-edited to hold viewers’ attention.
That’s where Podcastle comes in. It’s an AI-powered platform that makes recording, editing, and enhancing faceless YouTube videos effortless. Whether you’re narrating over stock footage, using screen recordings, or crafting animated content, Podcastle gives you the tools to create high-quality videos without a complicated learning curve.
Here’s how to make a faceless YouTube video with Podcastle and set it up for success.
Step 1: Gather Your Footage (Or Create It)

Podcastle’s main workspace, offering easy access to projects, voice recordings, and editing tools.
Faceless videos can be made from stock clips, screen recordings, animated graphics, or slideshows. If you’re narrating over visuals, Podcastle lets you record crisp, studio-quality audio with its built-in AI voice tools. You can even generate voiceovers using lifelike AI voices if you don’t want to record yourself.
Once you have your footage and audio ready, drag and drop them into Podcastle’s Video Editor to start piecing everything together.
Step 2: Enhance Your Video with AI
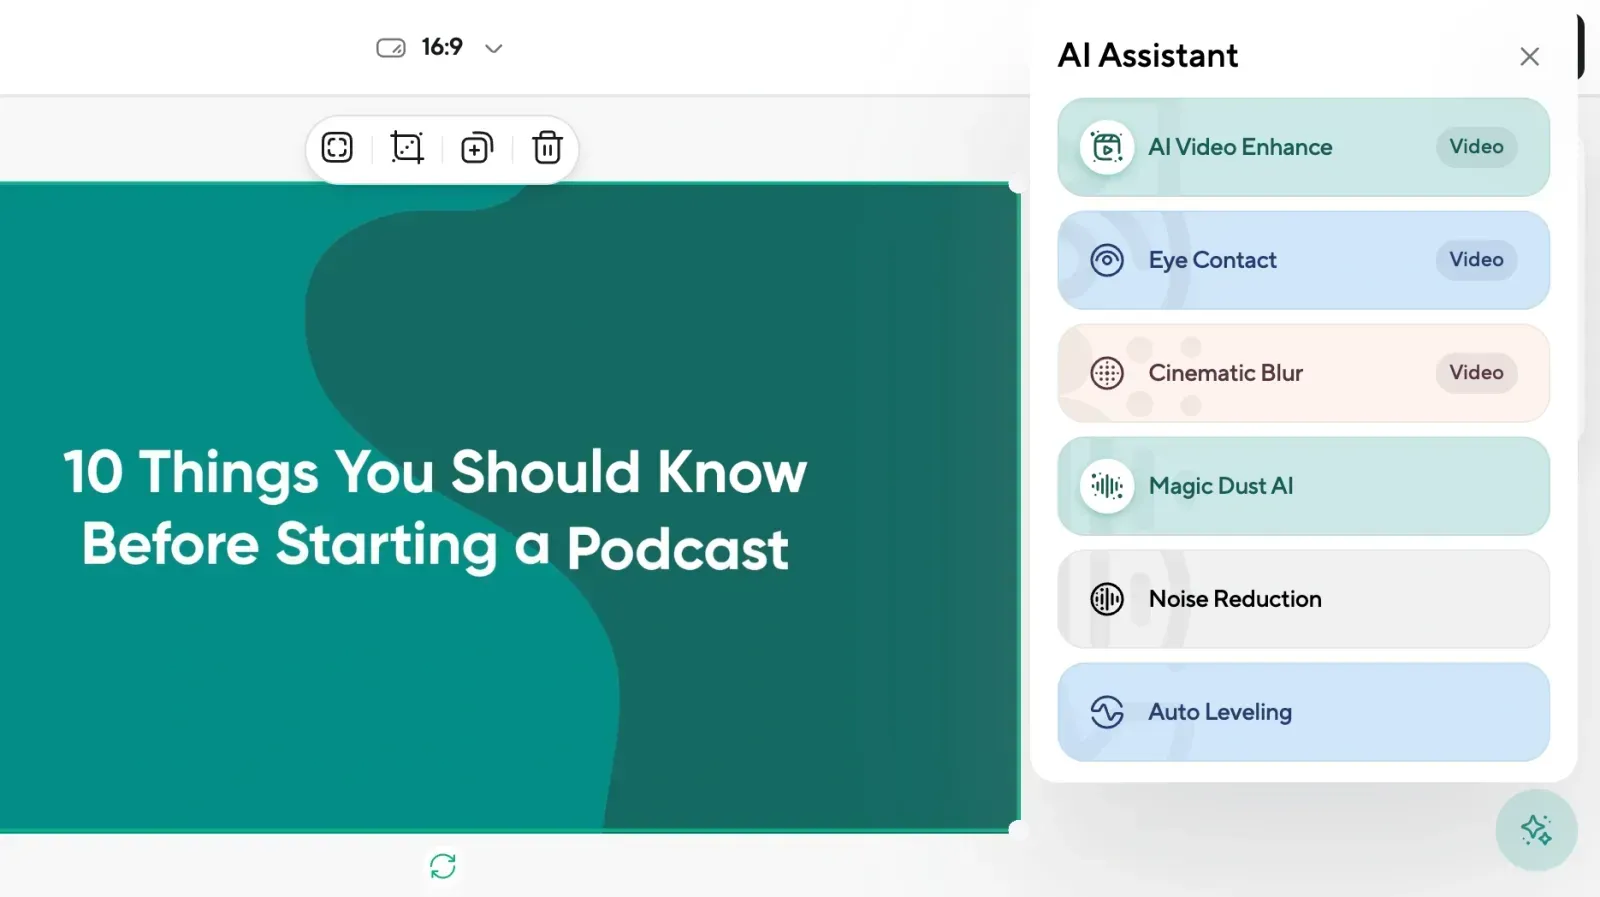
Podcastle’s AI-powered enhancement tools for video and audio clarity.
Good visuals and clear audio make a huge difference. If your footage looks dull or has background noise, Podcastle’s AI automatically enhances brightness, contrast, and sharpness while reducing unwanted noise. This is especially useful for screen recordings or stock footage that may need a quality boost.
With one click, your video will look more professional, keeping viewers engaged longer.
Step 3: Resize and Optimize for YouTube
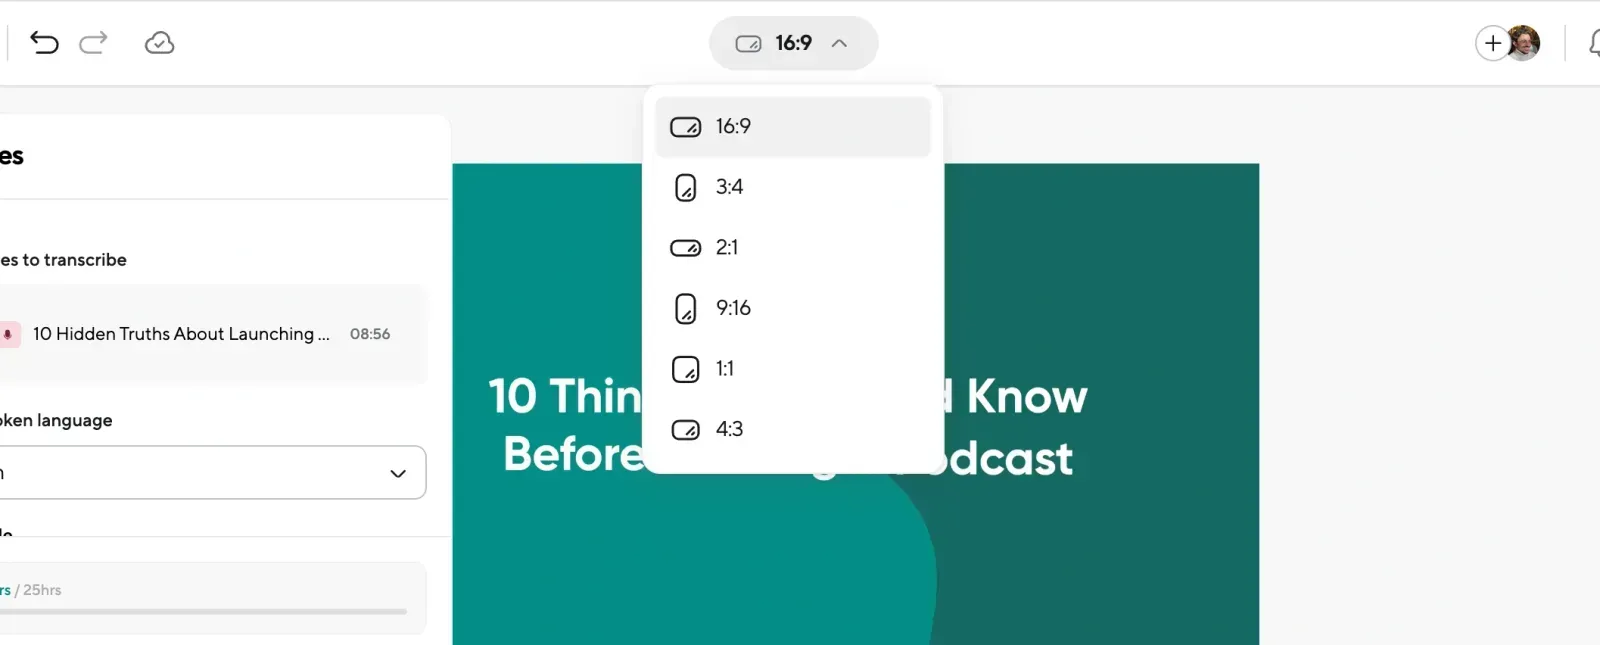
Podcastle’s resizing options for different aspect ratios, perfect for repurposing content.
Most YouTube videos are 16:9 (widescreen), but what if you want to repurpose clips for TikTok, Instagram Reels, or YouTube Shorts? Podcastle makes it easy to resize your video with a single adjustment—switch between 16:9, 9:16 (vertical), or 1:1 (square) without losing quality.
This is perfect if your faceless content includes animated graphics, text overlays, or stock footage—you can tweak layouts to fit any platform.
Step 4: Add Text, Subtitles & Visual Elements
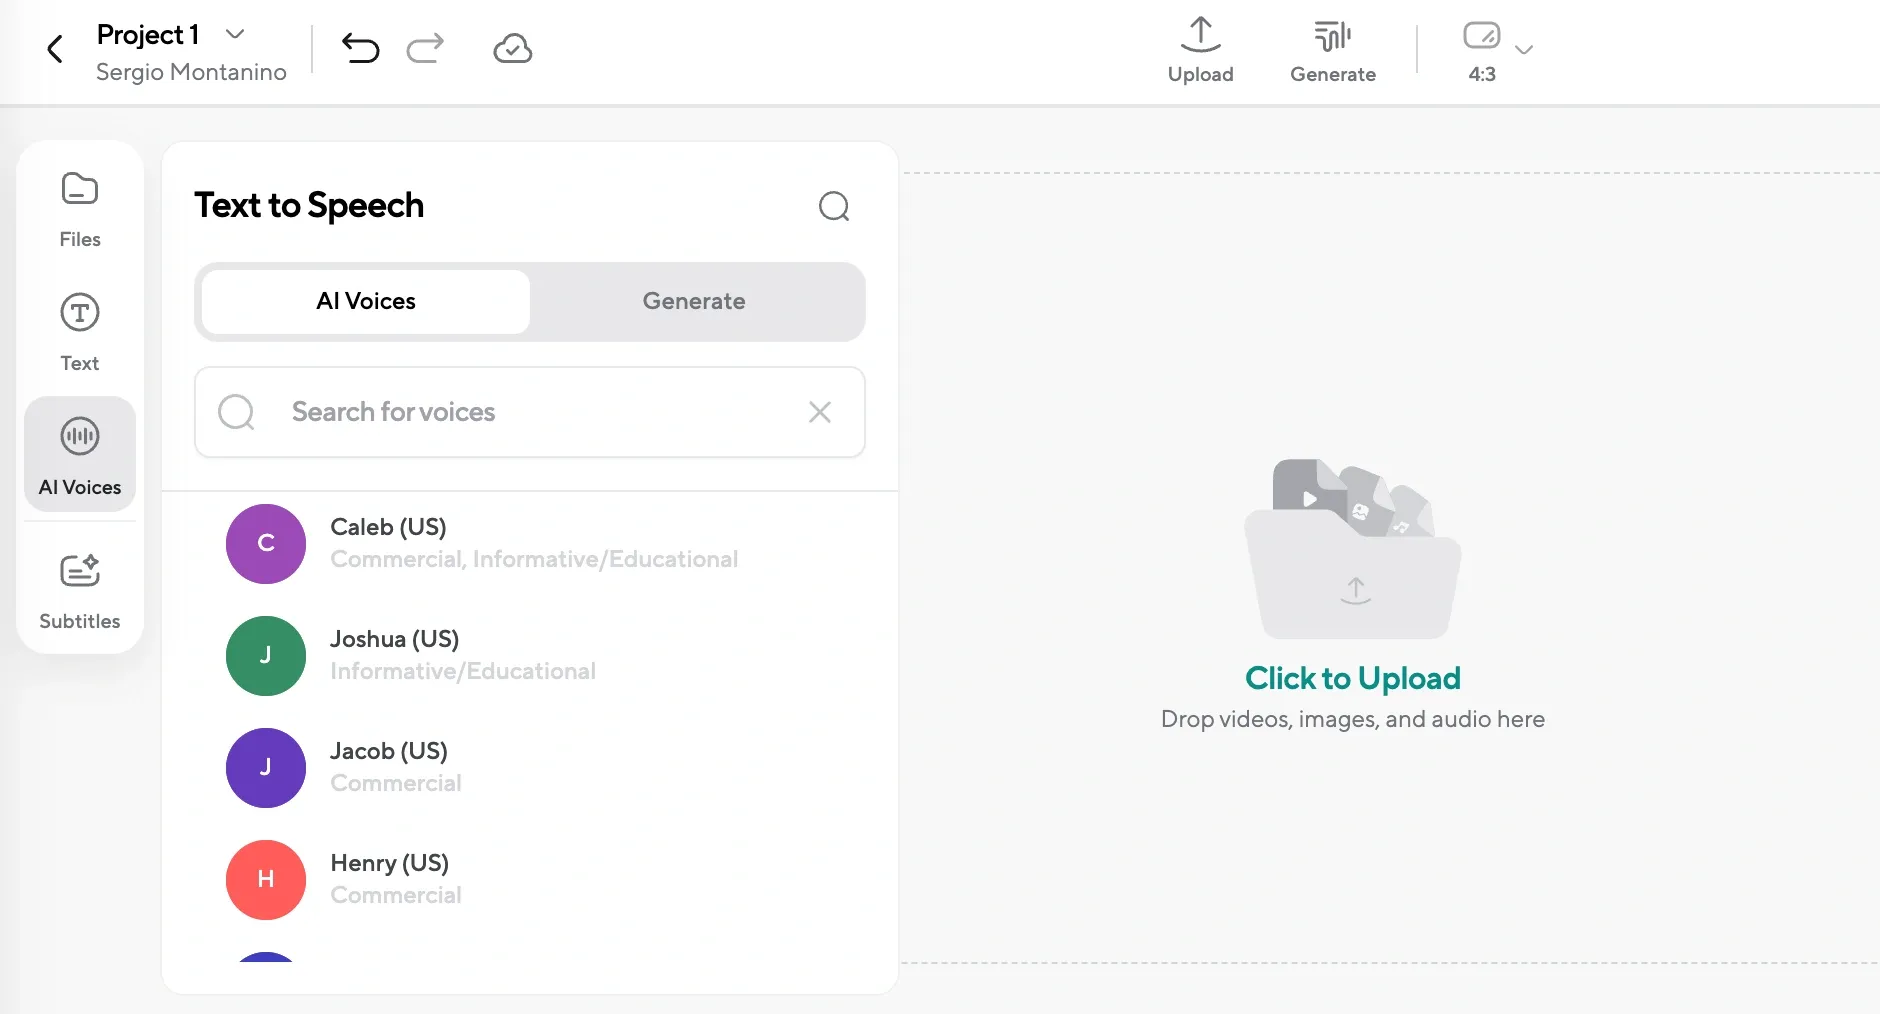
Podcastle’s AI-powered subtitles, text overlays, and text-to-speech voice generation.
Faceless YouTube videos rely on strong narration, clear visuals, and engaging text to keep viewers hooked. With Podcastle, you can:
- Generate AI voiceovers using realistic text-to-speech voices—perfect if you don’t want to record yourself.
- Auto-generate subtitles with AI for accessibility and retention.
- Insert text overlays for key points, transitions, or branding.
- Add animations, stock images, or screen recordings to make visuals more dynamic.
Whether you’re narrating over stock footage, explaining a topic with slides, or creating an animated video, Podcastle’s AI voices let you produce professional voiceovers effortlessly. Just type your script, select a voice, and let Podcastle do the rest.
Step 5: Export & Upload to YouTube
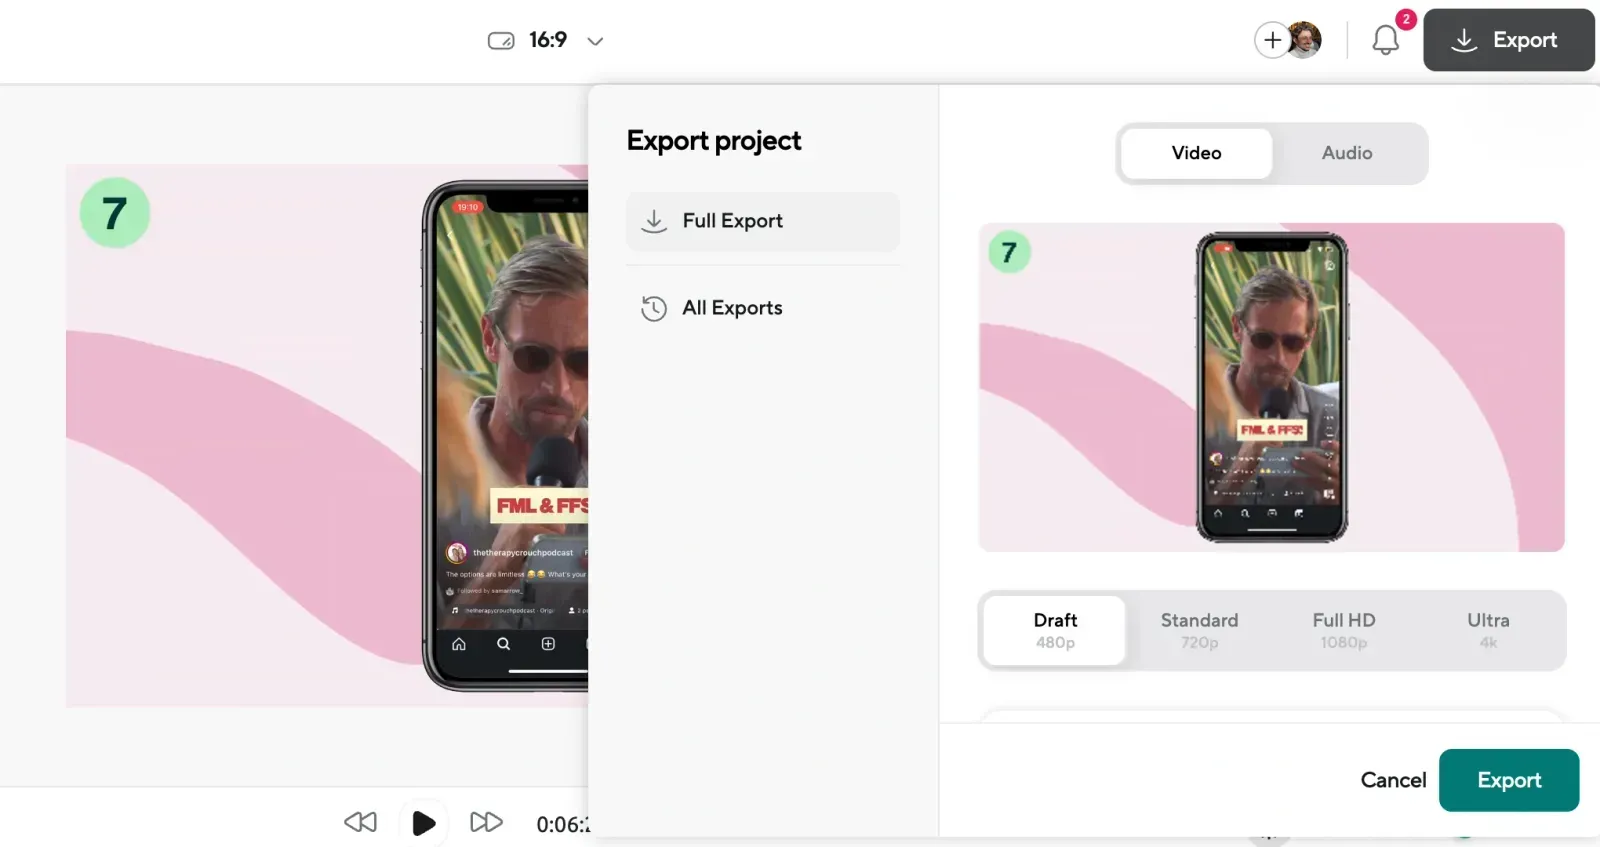
Podcastle’s export screen, offering resolutions from 480p to 4K.
Once your faceless YouTube video is polished, export it in high quality and upload it to YouTube. Then, focus on a catchy title, an eye-grabbing thumbnail, and a solid description to attract clicks.
Why Use Podcastle for Faceless YouTube Videos?
Faceless YouTube content thrives on strong audio, engaging visuals, and smooth editing, and Podcastle makes that process simple. Whether you’re creating explainer videos, tutorials, or storytelling content, it’s a one-stop platform that helps you bring your ideas to life without complicated software.
Ready to make your first faceless YouTube video? Start with Podcastle today.