If you’ve recorded hours of content and can’t find the time, or the energy, to edit it, you’re not alone.
New and seasoned YouTubers share the same story: editing takes far longer than filming, and it’s usually the step that stops people from posting consistently. Someone spends 20 hours polishing a 10-minute video. Another loses motivation halfway because the footage feels chaotic.
Many creators say the same thing: “I have so much filmed, but I don’t know where to start.”
This guide is for you if you’ve ever opened your editing software, stared at the timeline, and immediately felt overwhelmed.
The short answer
If you have hours of footage and no time to edit, simplify the process: make a fast rough cut first, use transcription to locate your best moments, delete aggressively, and work in batches instead of editing linearly.
This reduces overwhelm, speeds up your workflow, and turns long recordings into manageable, repeatable edits.
Why editing takes so long (and why it’s not your fault)
Editing becomes time-intensive for most creators because of how the process is structured, not because of a lack of skill or discipline.
When you’re managing hours of raw footage, your brain is being asked to make hundreds of small decisions without a system to support them, and that’s where the slowdown begins.
So why does editing take so long? Here’s a quick answer:
Quick answer:
Editing slows down when you try to evaluate footage, make narrative decisions, and refine visuals simultaneously. These are different cognitive tasks, and switching between them creates friction.
Separating your workflow into clear stages is one of the most effective ways to reduce time and improve quality.
A closer look at why editing feels so demanding
Video editing is one of the rare creative processes that blends analytical and intuitive thinking. When creators jump into the timeline and try to cut, assess, polish, and pace footage at the same time, the brain is forced into constant context-shifting. Research on cognitive load shows that task-switching significantly reduces efficiency because each shift requires re-orientation.
Professional editors avoid this by breaking editing into sequenced phases:
• identifying usable footage
• shaping the narrative
• refining the pacing
• polishing details
This structure removes cognitive clutter and allows each stage to move faster because the editor is focused on a single type of decision at a time.
Reviewing raw footage is its own job, and it needs a structure
Most creators instinctively start editing by watching everything they shot.
The intention is good: you want to understand what you have before you build.
But watching every minute of footage is one of the biggest contributors to slow edits.
Professional editors rarely “study” their footage. Instead, they scan quickly, mark the strongest moments, and move on.
This selective review process gives you early insight into what the video wants to become, without draining two hours just reacquainting yourself with the material. When reviewing becomes intentional rather than exhaustive, your editing speed increases dramatically.
The narrative stage requires different attention than the technical stage
Once you’ve identified the usable moments, shaping them into a coherent narrative is a completely separate cognitive task. This is the moment where you decide what the story is, in what order events unfold, and which ideas strengthen or weaken the final message.
Trying to do this while also adjusting audio levels or adding graphics is a major source of slowdown. Story-building requires uninterrupted focus, and technical adjustments interrupt that focus every few seconds.
When you isolate the narrative pass, assembling beats, trimming excess, clarifying flow, you create a cleaner spine for the video, which makes every subsequent refinement faster.
Pacing and polish belong at the end, not in the middle
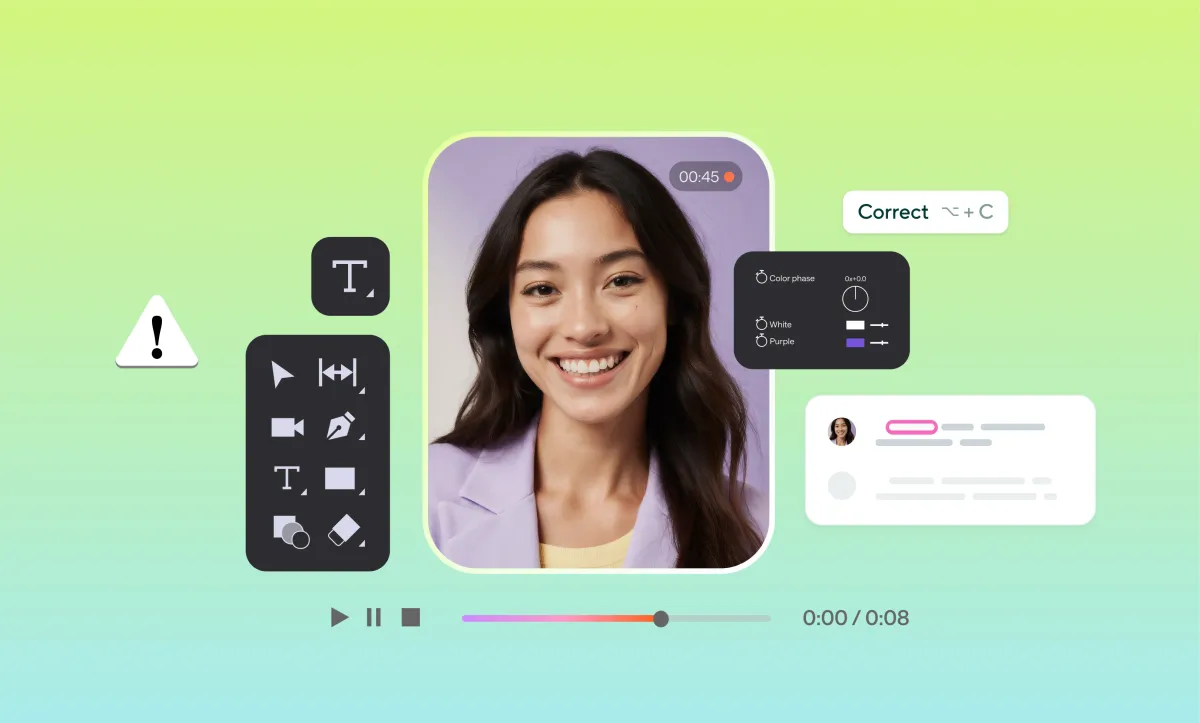
Polishing too early is one of the biggest hidden time sinks for creators. Adding transitions, stylized captions, color correction, or music before your structure is final will inevitably create rework.
When pacing changes (spoiler: it always does), every polished decision you made prematurely must be moved, adjusted, or redone.
Editors who wait until the story is fully assembled before adding aesthetic elements finish sooner and with more consistency. The video is easier to evaluate, the pacing is clearer, and you’re no longer polishing clips that might not survive the final cut.
Without a system, every edit feels like starting from zero
If each new video requires you to rethink your structure, pacing, stylistic choices, transitions, and even how you review footage, the process will always feel slow. A lack of workflow consistency forces you into repeated decision-making, which depletes mental energy and expands timelines.
Creators who build simple systems reduce both the time spent and the friction experienced in every editing session.
When the structure is stable, you can devote your creative energy to storytelling rather than reinventing your process.
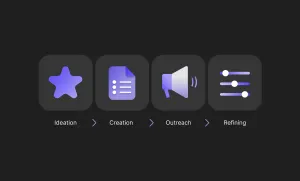
What to do when you have hours of footage and no time to edit
Use the “first 10 minutes rule” to break the overwhelm
Instead of reviewing everything, scan only the first 10 minutes of your raw footage. Make fast yes/no decisions, mark timestamps, and move on. This prevents overwhelm, speeds up your rough cut, and gives you early clarity on what the final video will become.
Here’s what happens:
As we’ve already mentioned above, creators lose the most time during the review phase. Not the editing phase, but the watching phase.
You can easily lose two hours “getting familiar” with your footage before making a single cut.
The first 10 minutes rule fixes that.
Here’s how it works:
• Watch only the first 10 minutes of your footage.
• Don’t edit yet, just mark timestamps (most editors call this “selects”).
• Make quick thumbs-up/thumbs-down decisions.
• Move forward in chunks instead of continuous watching.
By working in small segments, your brain stays sharp, your decisions stay fast, and your footage becomes easier to manage.
This is the system used by editors who regularly handle long-form videos, documentaries, podcasts, and multi-camera recordings.
Why this works:
• It reduces your decision fatigue.
• It stops your brain from getting lost in the middle.
• It creates an early structure so the story emerges faster.
• It prevents “timeline paralysis,” that feeling of being stuck before you’ve even begun.
This alone can cut 2–4 hours off an edit.
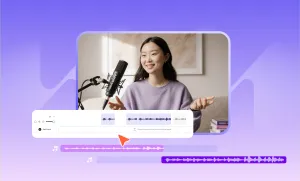
Use transcription to find your best moments instantly
Transcribing your footage turns hours of video into searchable text, letting you scan for your strongest moments instead of scrubbing through timelines.
For us, this is one of the most effective ways to edit hours of footage faster. Instead of doing it manually, you let an automatic transcription tool convert your recording into text.
Why this works so well:
• You can skim instead of rewatching.
• Strong moments jump out immediately.
• You mark the best soundbites while reading.
• You build your story before touching the timeline.
Those who constantly work with recorded footage often say this is the biggest time-saver they’ve ever implemented because it transforms a messy editing session into a clean, searchable script.
Instead of asking:
“Where did I say that one good sentence?” You simply search for the word inside the transcript.
This technique is especially useful for:
• educational videos
• talking-head content
• tutorials
• long podcasts
• interviews
It also helps eliminate filler, rambling, and off-topic moments before you start your rough cut, which speeds up the entire process.
Turn your edit into a repeatable template
One of the biggest time sinks in editing is treating every video like a brand-new project. If you’re asking yourself “how do I edit long videos faster?” every single time, you probably don’t have a repeatable structure yet. A simple video editing template for YouTube or podcasts can easily save you an hour or more per project.
Start by defining the building blocks your videos usually share:
• Hook or cold open
• Intro or context
• Main sections or chapters
• Call to action
• Outro or end screen
Then turn this into a checklist you reuse for every project. Instead of staring at an empty timeline, you’re simply filling in a structure you already trust.
Over time, this template becomes your default video editing workflow for busy creators: you know where the hook goes, where B-roll tends to land,and where graphics or text usually appear.
You’re not locking yourself into a rigid format forever. You’re giving your brain fewer decisions to make on a Tuesday night when you’re tired and still need to get a video out. That reduction in micro-decisions is where a lot of the time savings live.
Batch similar edits to move faster
If you edit start-to-finish in one pass, you’re constantly switching tasks: cutting, adding text, fixing audio, tweaking color, exporting, re-exporting. That’s why it feels like editing takes forever.
A simple fix is to batch edit YouTube videos or long-form content by doing one type of task at a time across the whole project.
Here’s what batching can look like in practice:
First pass: only rough cuts and removing obvious mistakes.
Second pass: refine pacing and tighten pauses.
Third pass: add B-roll, overlays, and text.
Fourth pass: audio cleanup and volume balancing.
Final pass: color tweaks and export presets.
By treating each pass as a single type of decision, you spend less time switching tools and more time getting into a flow. This is especially effective when you’re asking “how to edit hours of footage fast” for a series or a batch of similar videos. You can even apply the same LUT, audio preset, or title style across multiple projects in one sitting.
The result: fewer scattered sessions, more focused “zones” of work, and a much clearer sense of progress.
Organize your files before you touch the timeline
When you have hours of footage and feel stuck, it’s tempting to jump straight into the edit and “figure it out as you go.”
That’s usually how you end up wondering how to organize video files for editing at 1 a.m. while hunting for “that one clip” you swear you recorded.
A lightweight pre-edit organization step pays off fast:
• Create folders for the main camera, secondary angles, screen recordings, and audio.
• Rename key files with simple labels (e.g. “intro_take2”, “tutorial_step3_screen”).
• Group footage by segment or chapter if you’re working on a long tutorial or podcast.
You just need a system you can repeat. The goal is that, when you finally open your editor, you’re not wasting energy on basic file hunts.
For creators with limited time, this is one of the easiest video editing tips for beginners with long videos: spend 10–15 minutes organizing, save 30–60 minutes of chaos later.
A good organization also makes it easier to pause and resume. If you only have small windows to work in, knowing exactly where everything lives means you can jump back in without rewatching half the project “to remember where you were.”
How to turn one long recording into multiple videos
If you’re sitting on a long recording and don’t know how to turn it into something publishable, here’s the good news: long-form footage is one of the richest content assets you can create. Instead of producing a single video from it, you can extract multiple pieces of high-performing content across platforms.
Here’s how to break one recording into an entire content ecosystem.
1. Identify stand-alone moments that work as short clips
Every long recording contains natural “clip points”: strong takes, insights, reactions, jokes, mistakes, or transitions. These moments are perfect for YouTube Shorts, TikTok, Reels, or community posts.
Go through your transcript or selects and mark:
• clean sound bites
• step-by-step instructions
• emotional beats or funny moments
• visual changes (new angles, props, scenes)
These micro-segments often outperform the full video because they’re fast, focused, and instantly shareable.
2. Create themed compilations from recurring ideas
If your long recording includes several related ideas, tips, lessons, tools, questions, reactions, group them.
Examples: “5 Tips I Wish I Knew Before…”; “Best Moments from Today’s Shoot”; “3 Mistakes I Keep Making on Camera”
These compilations give you mid-length videos that feel structured without requiring new footage.
3. Build a “main narrative” video from your strongest beats
Turning long footage into a single polished upload is easier once you’ve identified the strongest sections. Use your shortlisted clips as anchors and shape the broader story around them.
This method helps you edit long videos faster because you already know which moments carry the most weight, there’s no guesswork.
4. Turn deleted or extra footage into behind-the-scenes content
Not everything fits the main storyline, but “offcuts” often make excellent personality-driven posts.
Think bloopers, setup time-lapses, gear walkthroughs: audiences love the process as much as the final product, and these clips require almost no editing.
5. Use recurring templates to speed up the process
Once you’ve identified your repeatable clip types, create simple editing templates.
This allows you to batch-export multiple videos from one session with consistent branding, pacing, and captions.
Ready to edit smarter, not longer? Try Podcastle.
If you’re working through hours of footage, Podcastle gives you the tools to cut that time down dramatically. Transcribe your recordings instantly, search your best moments, clean audio in one click, and create Shorts-ready clips without opening a complex timeline. It's the fastest way to turn long sessions into polished videos, and to stay consistent without burning out.