M4A files show up in all kinds of places. Maybe you’ve recorded a voice memo, pulled a track from Apple Music, or saved audio from a mobile app. The issue is that some platforms and software don’t play well with M4A. WAV files, on the other hand, are widely accepted (especially in audio editing programs and pro production tools.)
This guide walks you through converting M4A to WAV, whether you're using an online tool, a Mac, or a Windows computer.
Table of Contents
– What You Should Know about M4A and WAV
– How to Convert M4A to WAV Online
– How to Convert M4A to WAV on Mac
– How to Convert M4A to WAV on Windows
– How to Convert M4A to WAV with VLC
What You Should Know about M4A and WAV
What is M4A?
M4A is a compressed audio format commonly found on Apple devices. If you’ve ever recorded something in Voice Memos or downloaded music from Apple Music (previously known as iTunes), you’ve likely dealt with M4A. It uses AAC encoding, which means you get high-quality audio with smaller file sizes. It’s efficient and works well in most Apple ecosystems... But it’s not always compatible outside of that.
What is WAV?
WAV stands for Waveform Audio File Format. It’s an uncompressed audio format that delivers raw, high-fidelity audio. Because there’s no compression, WAV files tend to be large, but they’re also crystal-clear. This is why they’re so popular in professional environments like recording studios and video editing software. When you need clean audio without losing any detail, WAV is the way to go.
M4A vs WAV: Which One to Use?
To be honest, there's no one way of going about it. M4A files are smaller and better for everyday listening or streaming. WAV files are heavier but preserve every bit of sound data. If you’re editing audio, working with multiple tracks, or exporting to a platform that expects uncompressed files, WAV is the more reliable choice. It’s ideal for audio professionals, content creators, and anyone who needs high-quality sound.
Why Convert M4A to WAV?
Sometimes M4A doesn’t cut it, especially when you're dealing with editing programs that reject compressed files. WAV files are easier to handle in DAWs, audio editors, and media production tools. If you need your file to sound exactly the same every time without worrying about compression artifacts, converting to WAV makes your workflow smoother and more predictable.
How to Convert M4A to WAV Online (For Free!)
Online converters are great if you want something fast and simple. There’s nothing to install, and you can run them from any browser. These tools are especially handy if you’re in a hurry or just need one or two files converted. No need to learn software or dig through menus.
Compared to offline tools, online converters skip the learning curve. Everything happens in your browser, so it works the same on Mac, Windows, or Chromebook.
Podcastle’s free online converter makes this process super straightforward. Here’s how to use it:
Step 1: Open Podcastle's M4A to WAV Converter
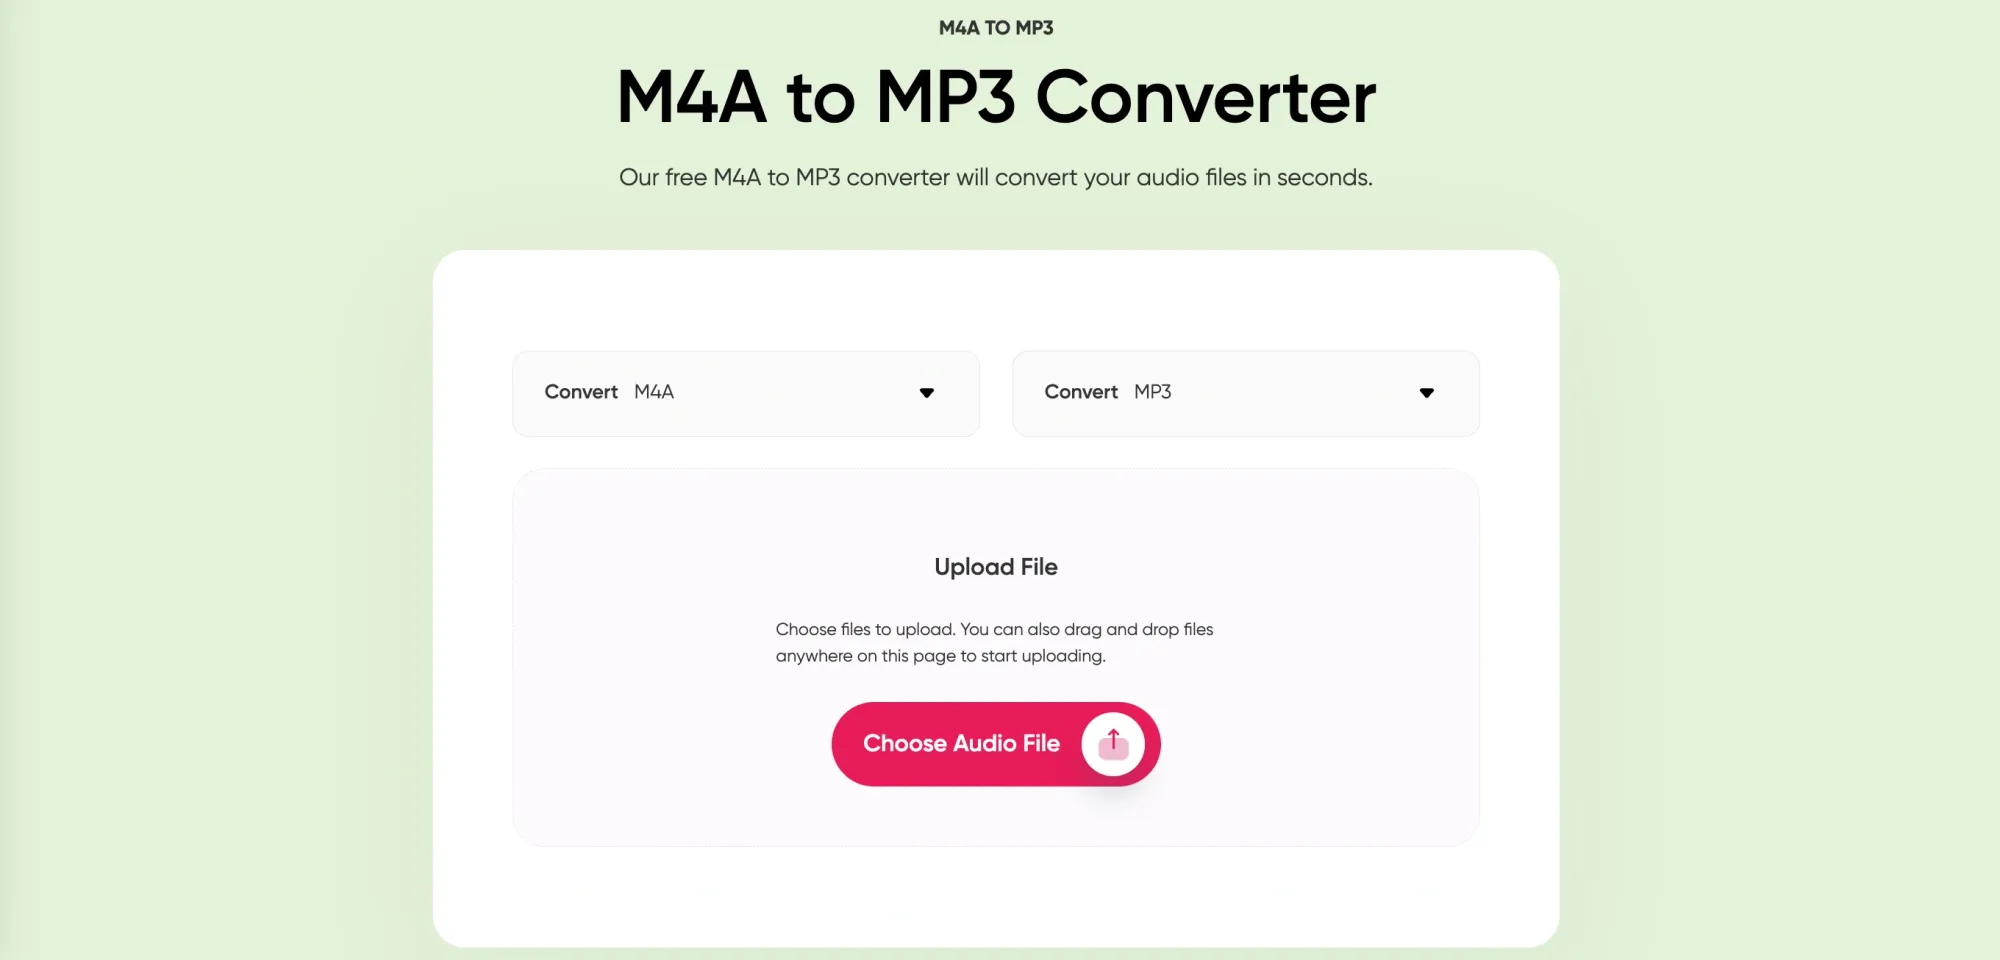
Head to Podcastle’s free M4A to WAV converter page. You’ll see dropdowns where you can pick the format you’re uploading and the format you want back.
Step 2: Choose Your Input Format (M4A)
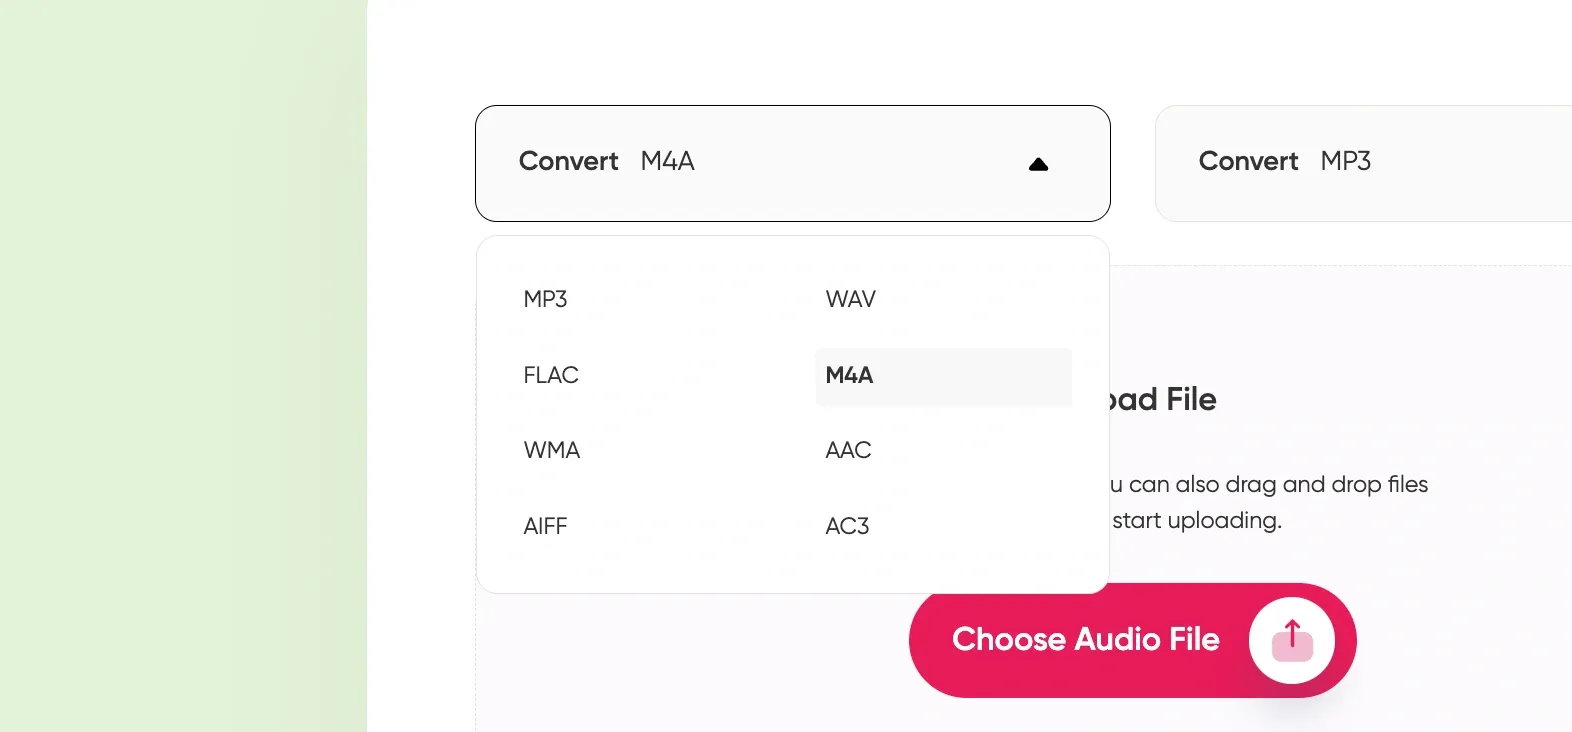
In the first dropdown menu, select “M4A.” This tells the converter what type of file you’re uploading.
Step 3: Choose Your Output Format (WAV)
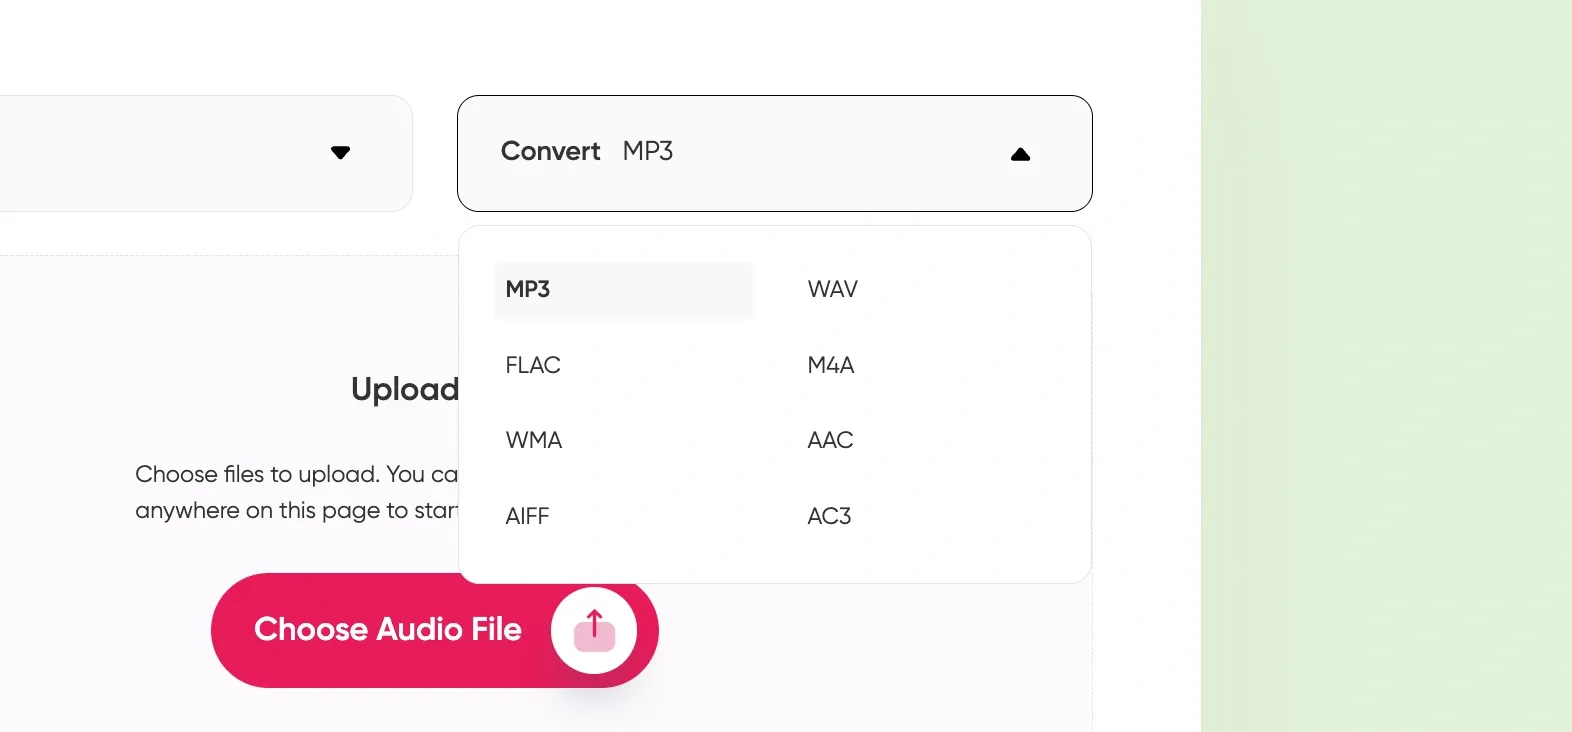
In the second dropdown, pick “WAV.” This ensures that your converted file will be in the right format.
Step 4: Upload Your M4A File and Click "Convert"
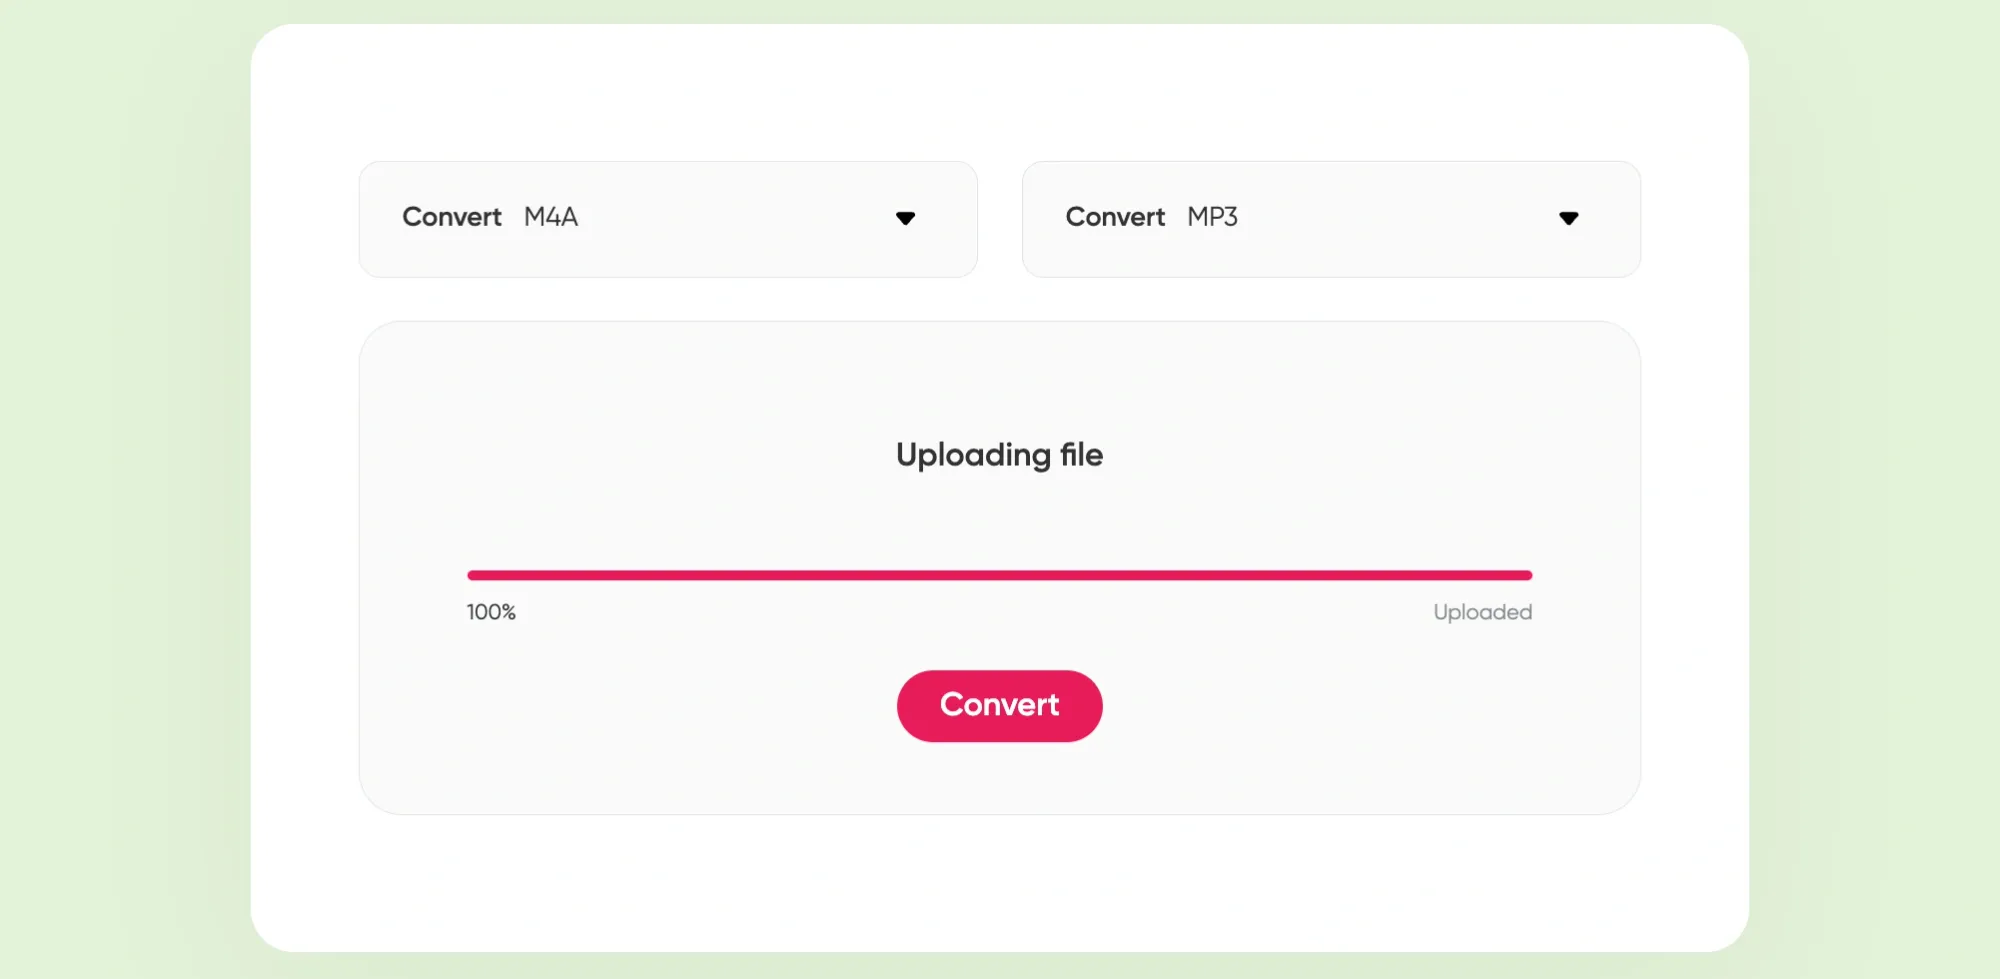
Click on the “Choose Audio File” button and find your M4A file. You can also drag and drop the file directly into the window. Once your file finishes uploading, click the “Convert” button. The tool will process the audio and give you a WAV file to download right away.
That’s all there is to it. If you want to clean up your file, you can use Podcastle’s Audio Editor to trim, fade, or adjust the volume. Once you’re happy with the result, you can export in WAV, MP3, or any other major format.
How to Convert M4A to WAV on Mac
Mac users can convert M4A to WAV directly inside Apple Music (formerly iTunes). Since M4A is already Apple’s default format, converting it to another type is pretty painless.
Here’s how to do it with Apple Music:
Step 1: Open Apple Music, Go to Settings
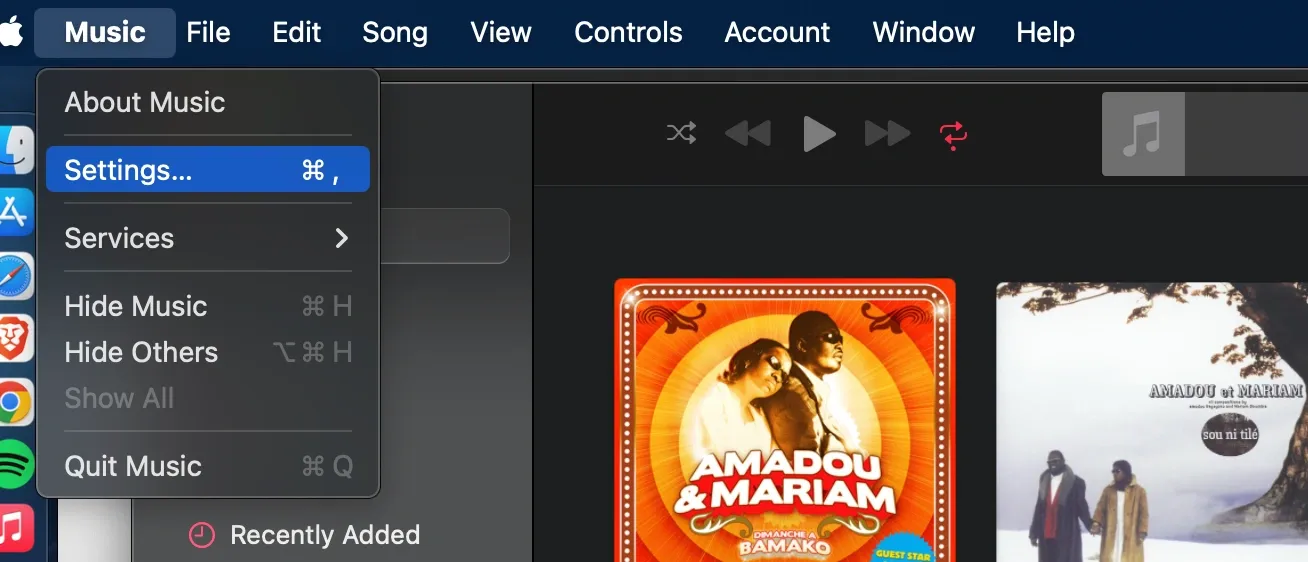
Launch the Apple Music app. In the top-left corner, click “Music” and then choose “Settings.” This will open the Preferences window.
Step 2: Open the Import Settings
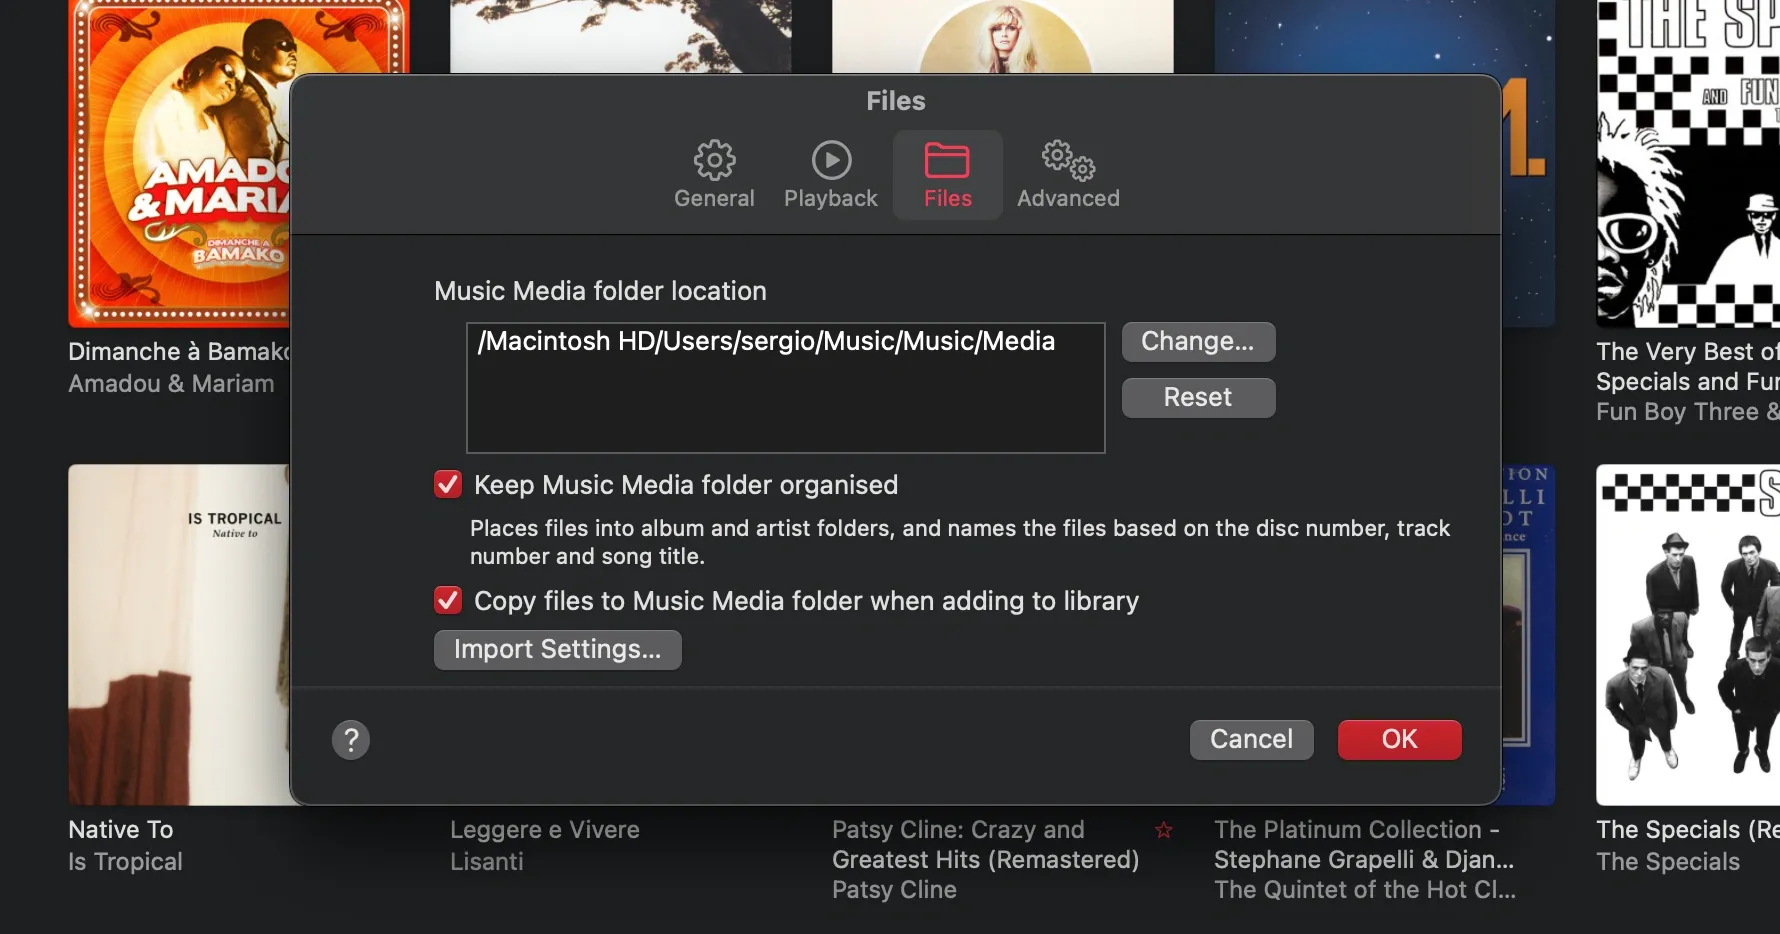
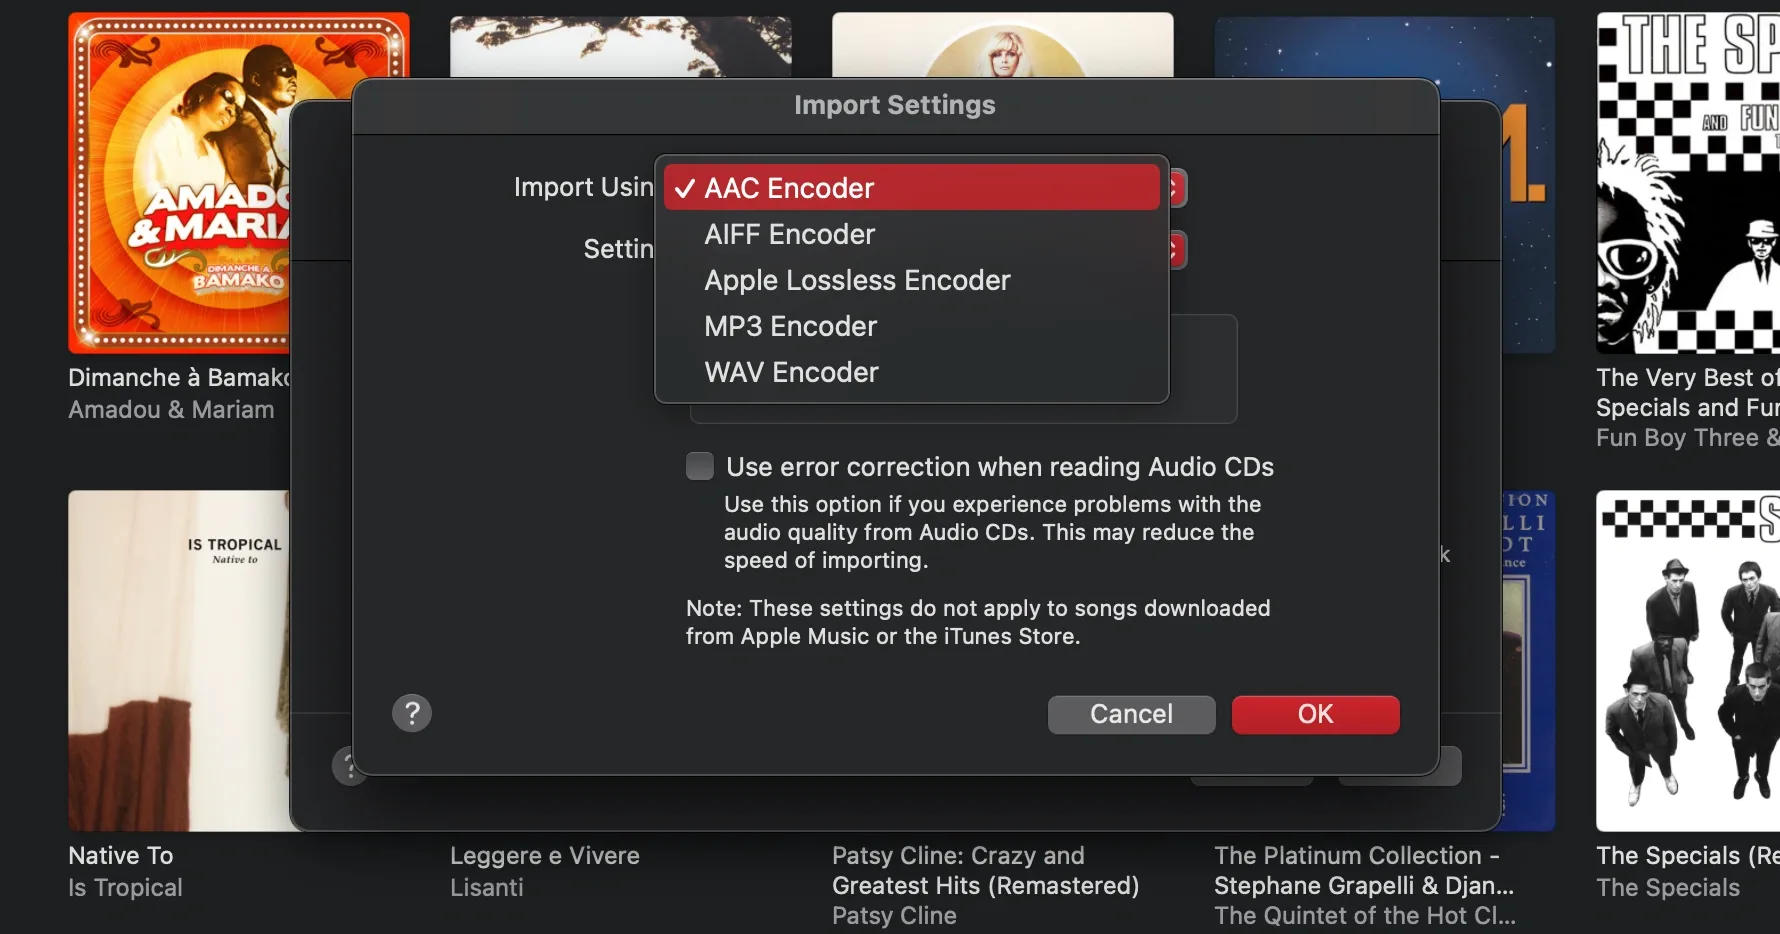
Inside Settings, head to the “Files” tab and click “Import Settings.” A small window will pop up. Look for the “Import Using” dropdown and choose “WAV Encoder.” Click OK to save your changes.
Step 3: Convert the File
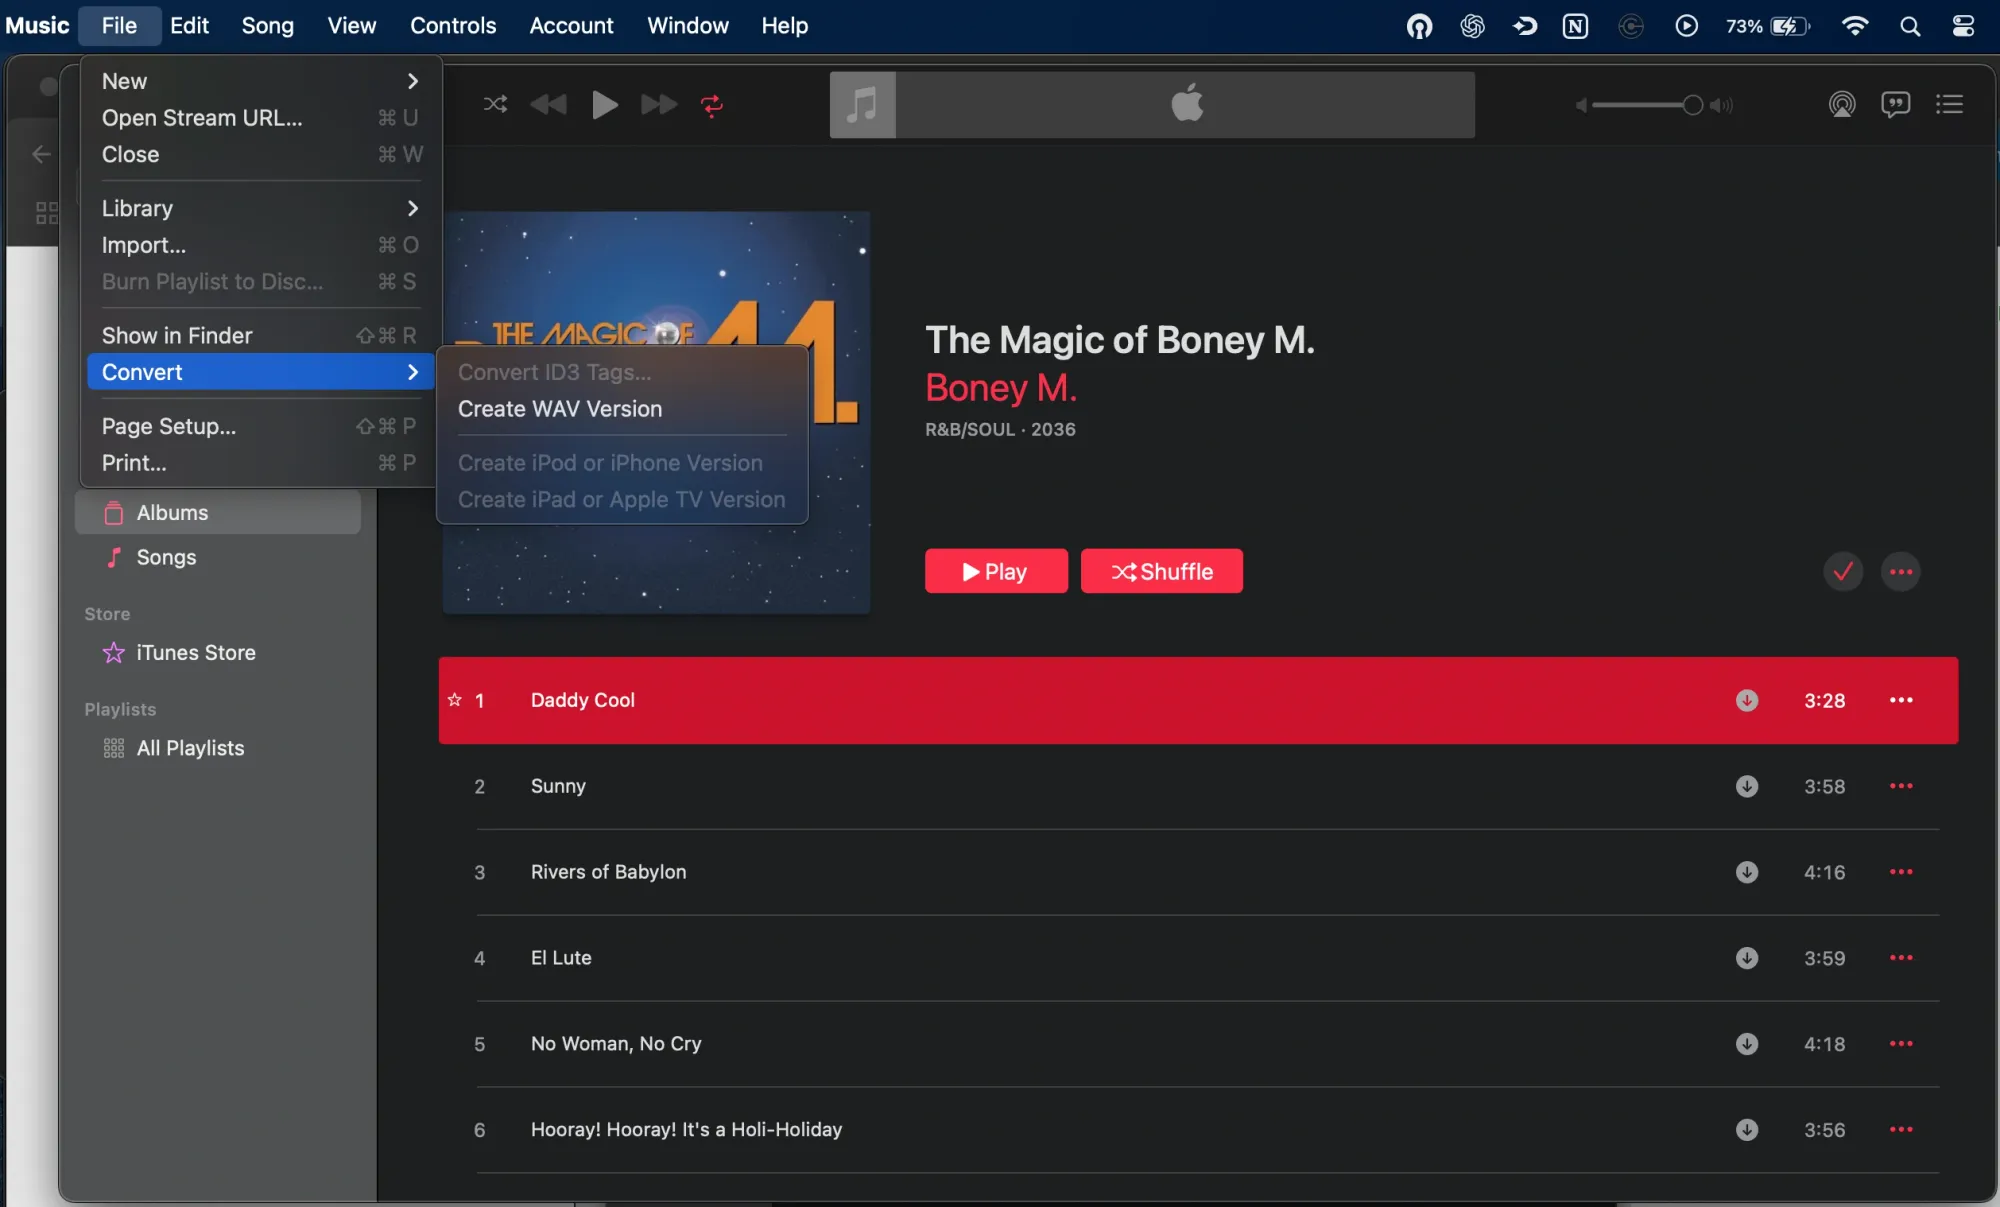
Now go back to your music library. Select the M4A file you want to convert. Click on “File,” then “Convert,” and finally select “Create WAV Version.” A new WAV version of the file will be saved right next to your original track.
PS: This works for any audio file you add to your Apple Music Library, not just songs!
That’s it. No extra downloads needed. You’ll now have a high-quality WAV version of your audio stored in your library.
How to Convert M4A to WAV on Windows
Windows users have several options, but one of the most convenient ways is using Windows Media Player. It’s already built into most PCs and works well for basic format conversions.
Here’s how to do it:
- Open Windows Media Player and switch to Library view.
- Enable the classic menu bar if it’s hidden.
- Find and add your M4A files to the library.
- Right-click the file, go to “Save As,” and choose the destination.
- Select WAV as the file format and hit save.
That’s the whole process. If Windows Media Player doesn’t give you the option to save directly as WAV, you might need to tweak your Rip settings under the Options menu.
How to Convert M4A to WAV with VLC
VLC Media Player is a versatile tool that handles nearly every media format. It’s free, open-source, and works on both Mac and Windows. If you’ve already got it installed, it’s a solid option for file conversion.
Here’s how to use VLC to convert M4A to WAV:
Step 1: Open the Convert/Stream Tool
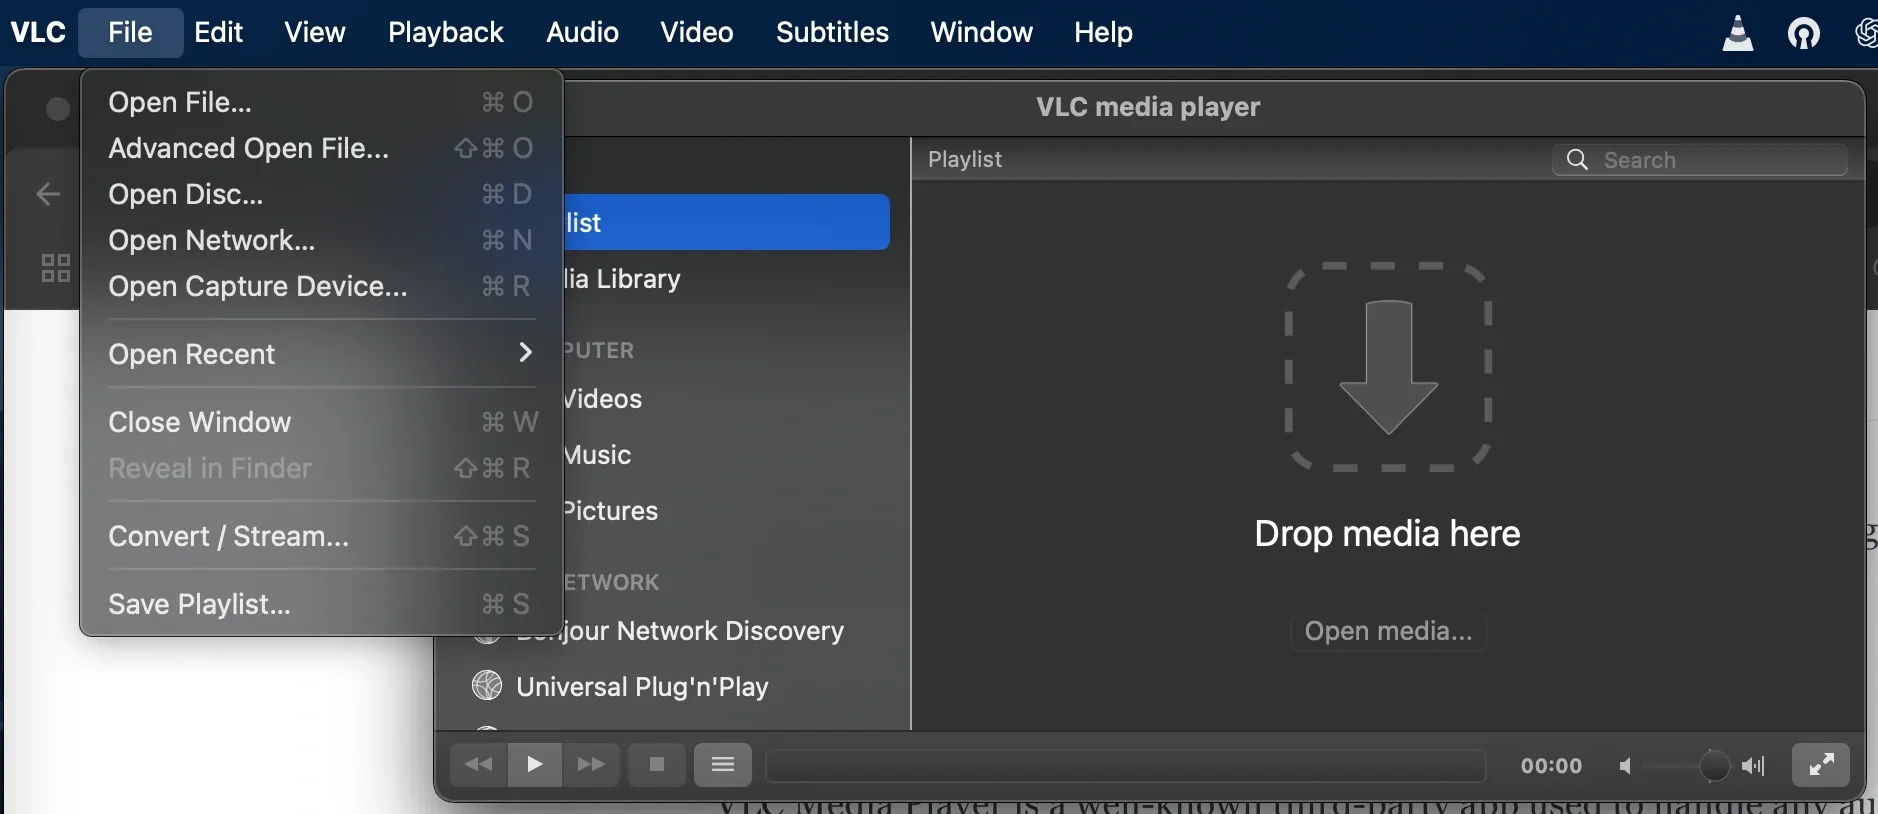
Launch VLC. Go to the top menu and click “File,” then select “Convert/Stream.” This will open a new window.
Step 2: Add Your M4A File and Convert to WAV Format
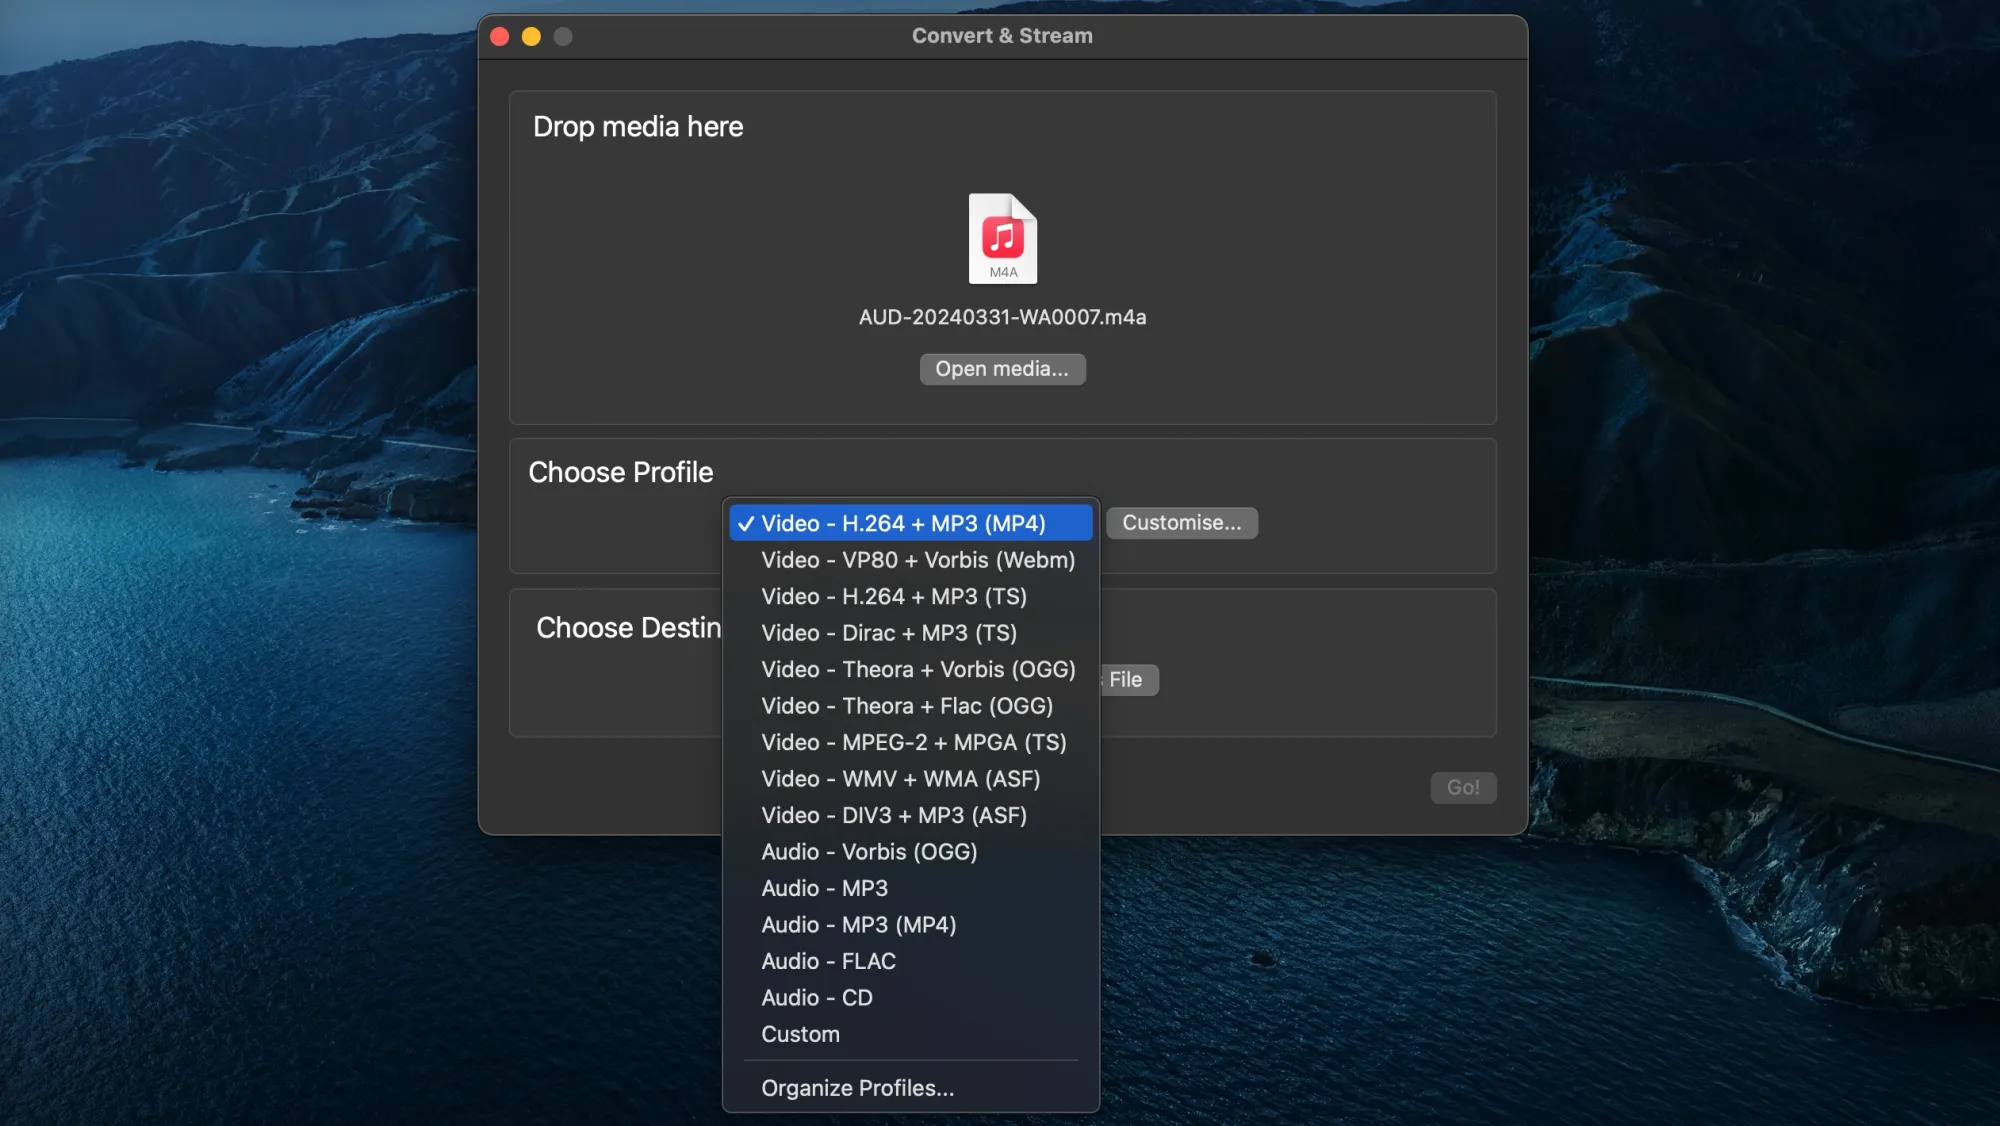
Click “Open Media” and choose the M4A file you want to convert. In the settings, pick WAV as your output format (if you can't find it, you can click "custom" and "organize profiles" to select what to show on the drop-down menu.) Double-check that the file name ends in .wav, then click “Save” or “Go” to begin the conversion.
Once it’s done, your new WAV file will be saved to the location you chose.
Final Thoughts
Converting M4A to WAV can help make your audio more flexible, especially if you’re working with professional editing tools or need uncompressed quality. Whether you’re using a browser-based tool, Apple Music, Windows Media Player, or VLC, the process is fast and straightforward.
For the easiest experience, try Podcastle’s free M4A to WAV converter. It’s fast, simple, and doesn’t require installing anything. Just upload, convert, and download.
We hope this guide helped you find the best way to convert your audio files. Give it a shot and see the difference for yourself.