Whether you're creating tutorials, product demos, or walkthroughs, screen recordings with sound are a powerful way to communicate clearly and effectively. But if you've ever hit “record” only to discover the audio didn’t capture, you know how frustrating it can be.
In this guide, we’ll walk you through exactly how to screen record with sound on all major devices, including Mac, Windows, iOS, and Android. Plus, we’ll show you how to do it the easy way using Podcastle, our all-in-one platform for creating professional-quality videos and screen recordings.
How to screen record with sound on all devices
Capturing both your screen and audio is essential for creating clear, engaging content, whether it’s a tutorial, meeting, or walkthrough. Below, we’ll guide you through the exact steps for recording your screen with sound on different platforms, including Mac, Windows, mobile devices, and Podcastle’s browser-based tool.
How to record your laptop screen with Podcastle
Want your screen recordings to sound just as good as they look? Podcastle makes it simple to add studio-quality audio, even if you’ve never touched audio editing software before.
With Podcastle, you can:
- Record your voiceover directly in the browser
- Upload existing audio and enhance it
- Clean up your sound with AI-powered tools
- Add background music or sound effects
All your projects are saved in the cloud, and the interface is beginner-friendly.
Pro Tip: To better sync Podcastle with your screen recording, record your voice at the same time as your screen. If you’re using QuickTime on Mac, go to Options and set Microphone to None before recording to avoid audio conflicts.
Here is the step-by-step guide on how to screen record with Podcastle:
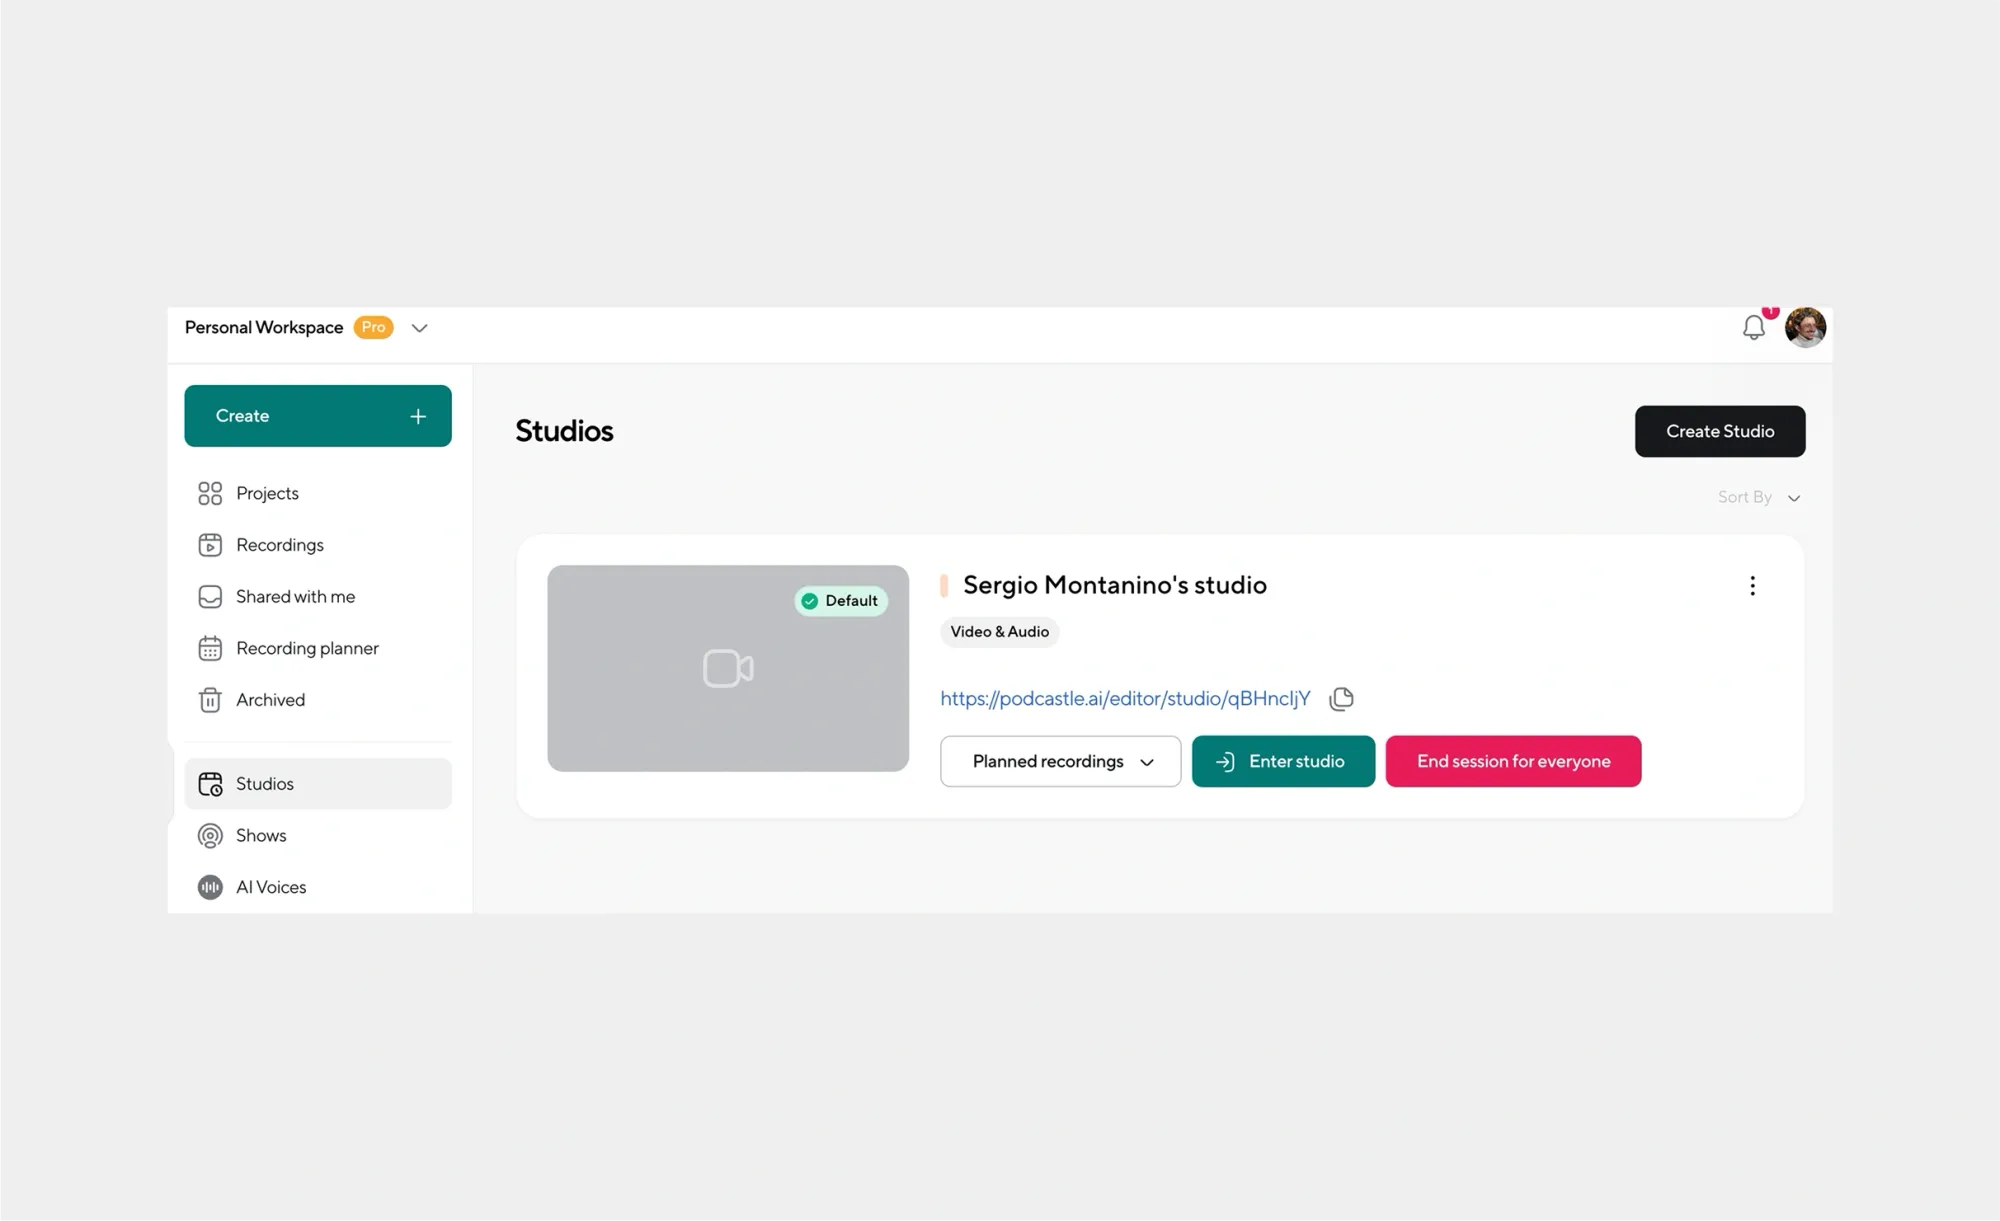
Step 1: Create a new project
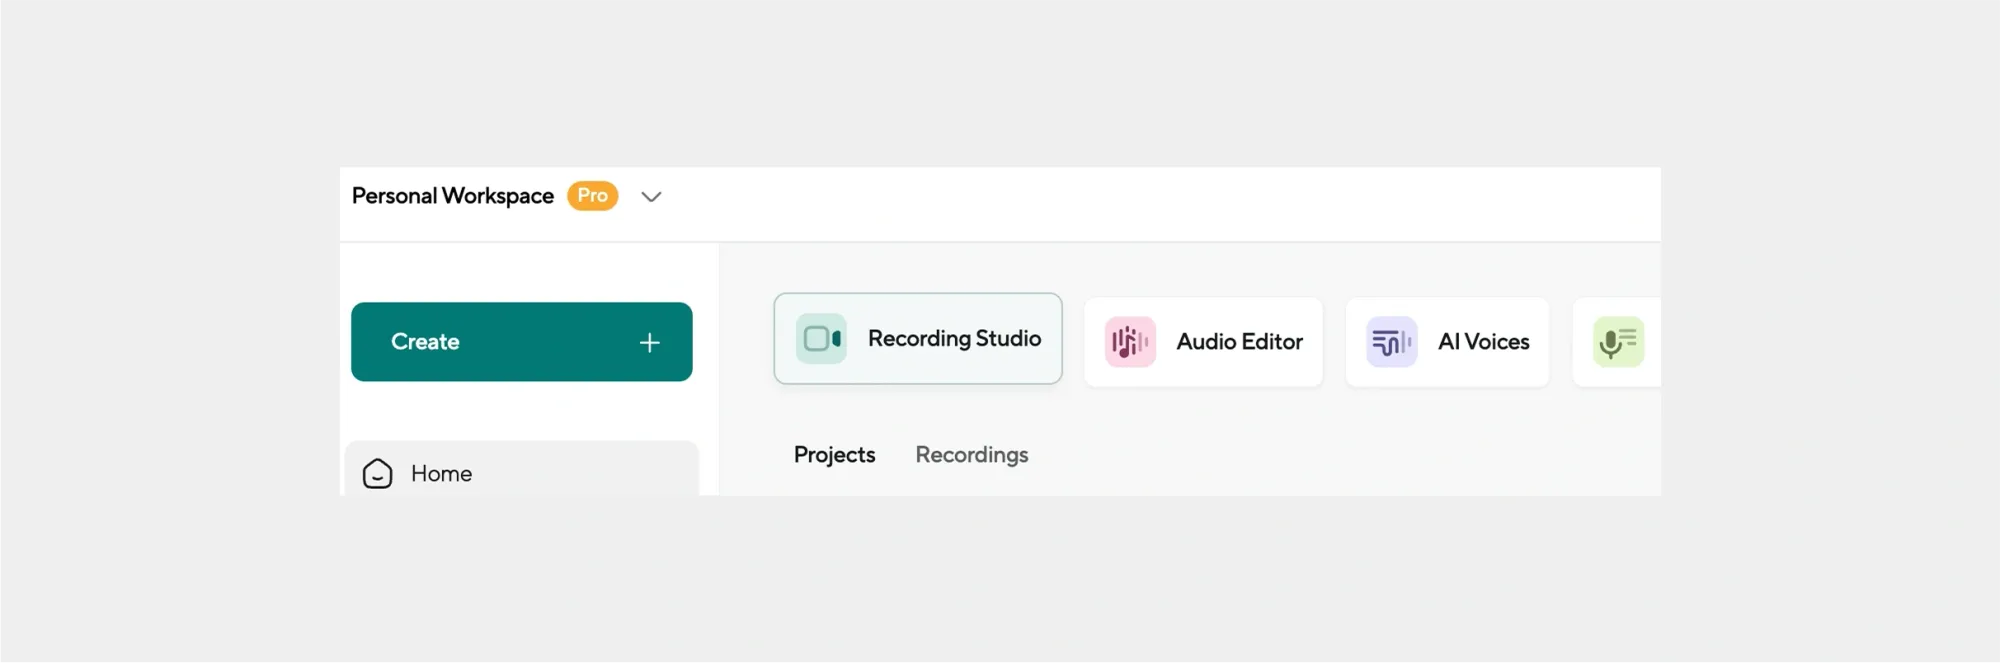
Sign in at Podcastle.ai and from the main dashboard, click "New Project" or "Recording Studio". You’ll land on the project dashboard, where you can upload your screen recording and work on your audio.
Step 2: record your screen
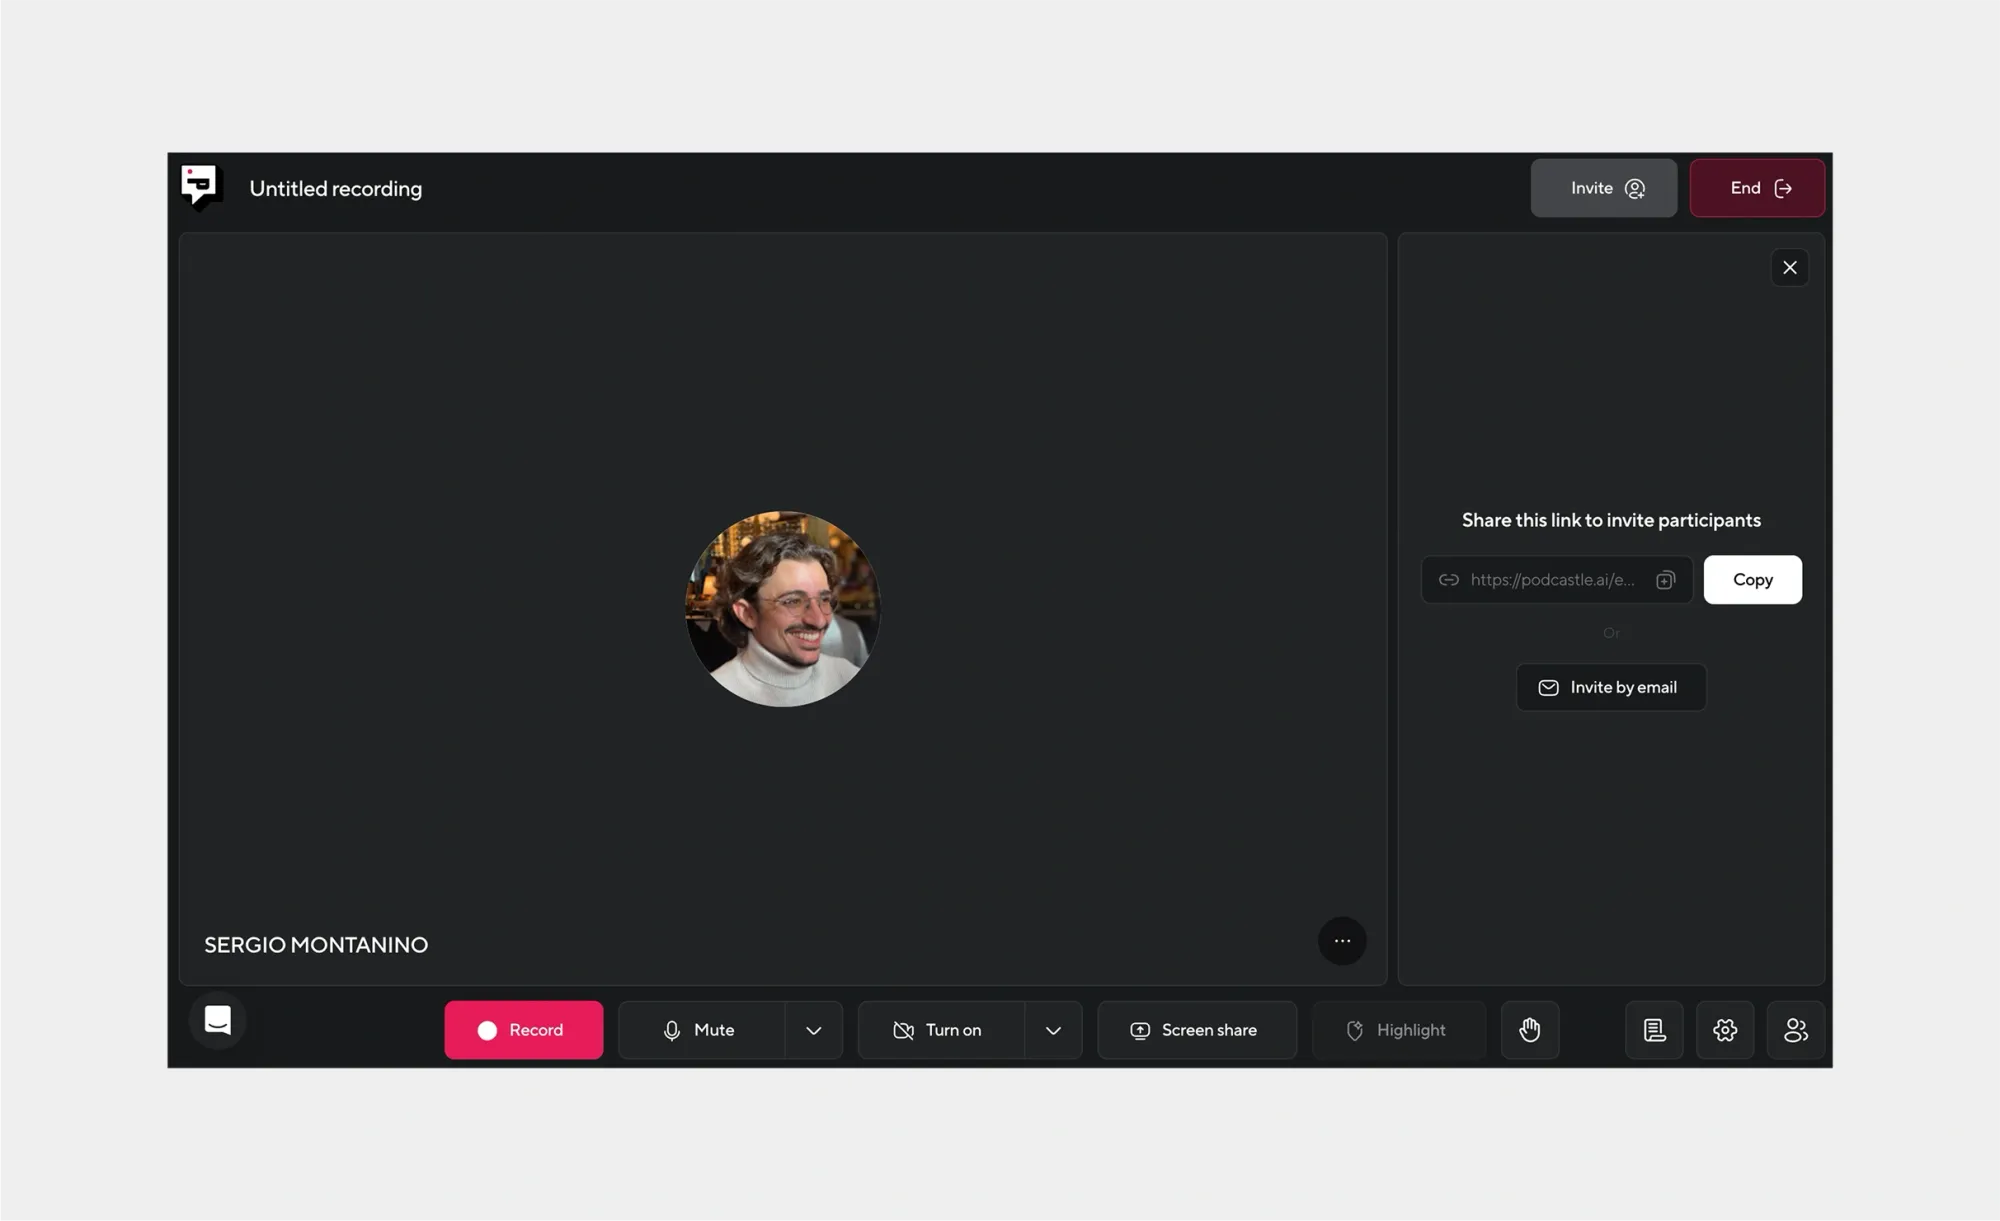
Click the Record icon or press Shift+R. Select your input source and test your mic to ensure it’s picking up sound. Then hit Record when ready, and "Screen Share".
Step 3: stop, end session and edit
When you’re done, click Stop. Your audio will appear as a track in the timeline; you can now trim, rearrange, or re-record as needed
Step 4: clean up with magic dust
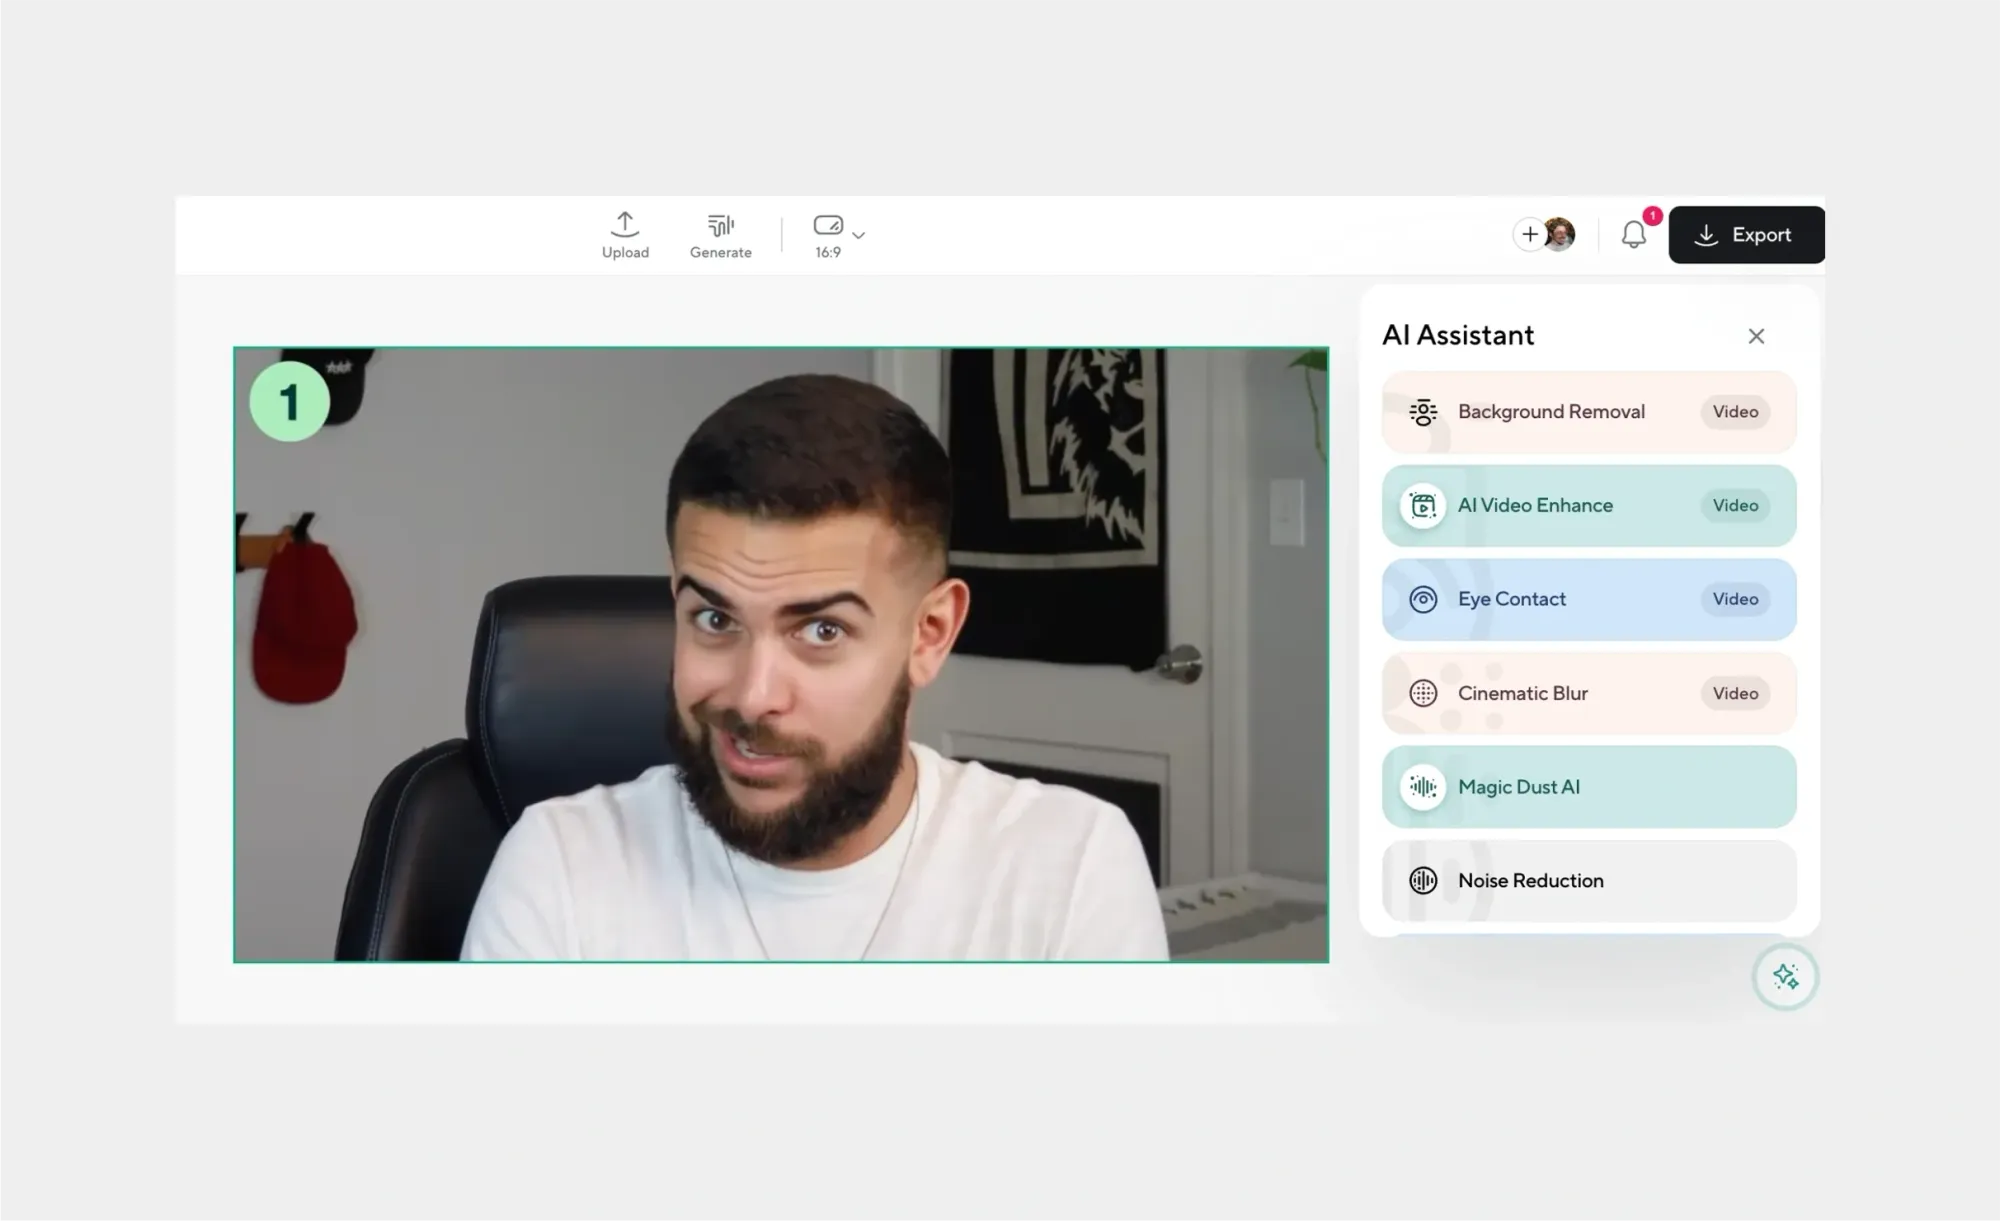
Right-click your audio track and select Add Magic Dust. This AI tool isolates your voice, removes background noise, balances volume, and boosts clarity instantly
Step 5: add music and sound effects
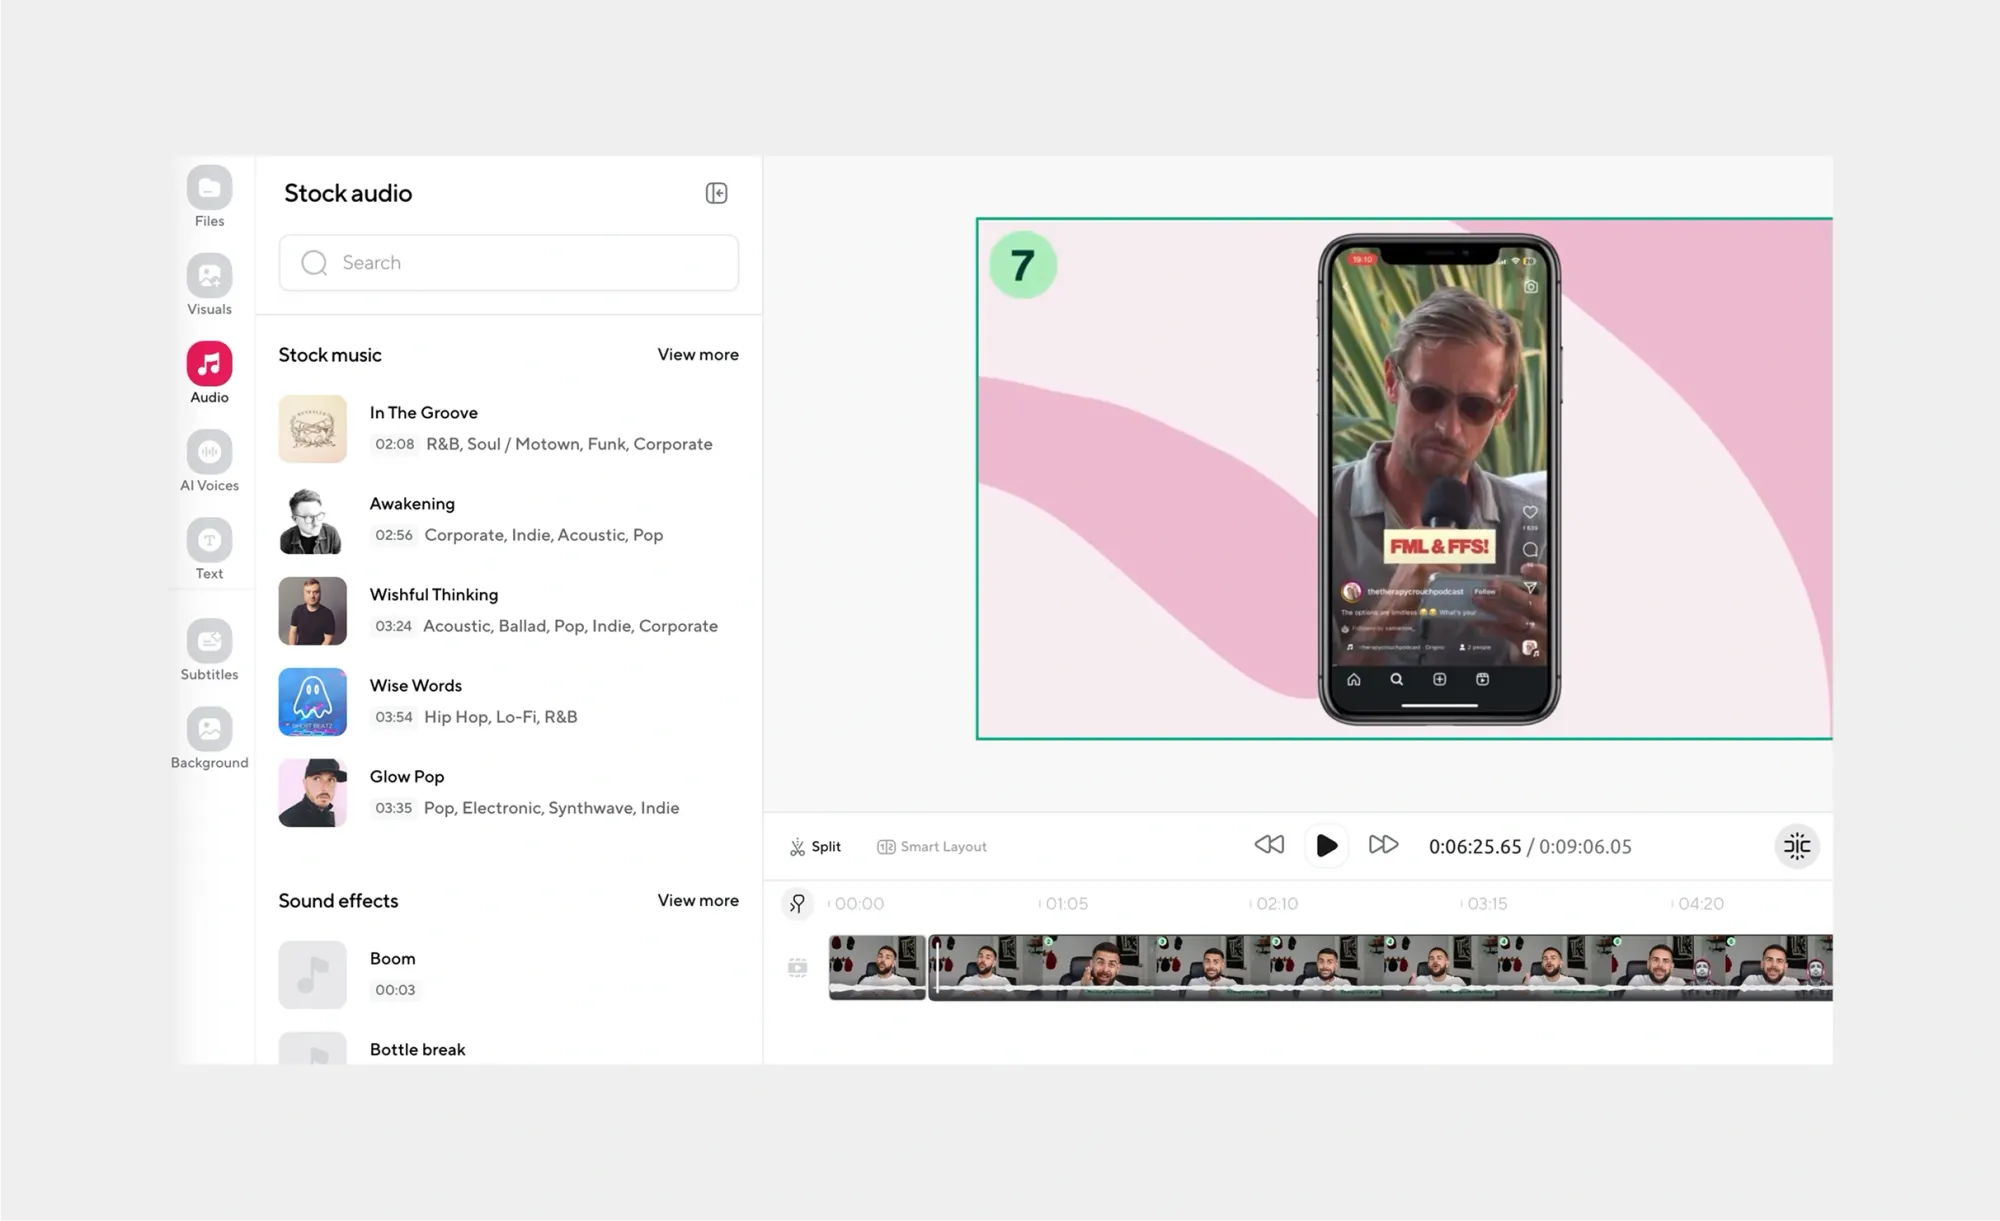
Click the Music or SFX icons on the left to browse copyright-free tracks. Preview with the play button, then drag them into your project. You can also upload your own audio files directly into the timeline
Step 6: export your video
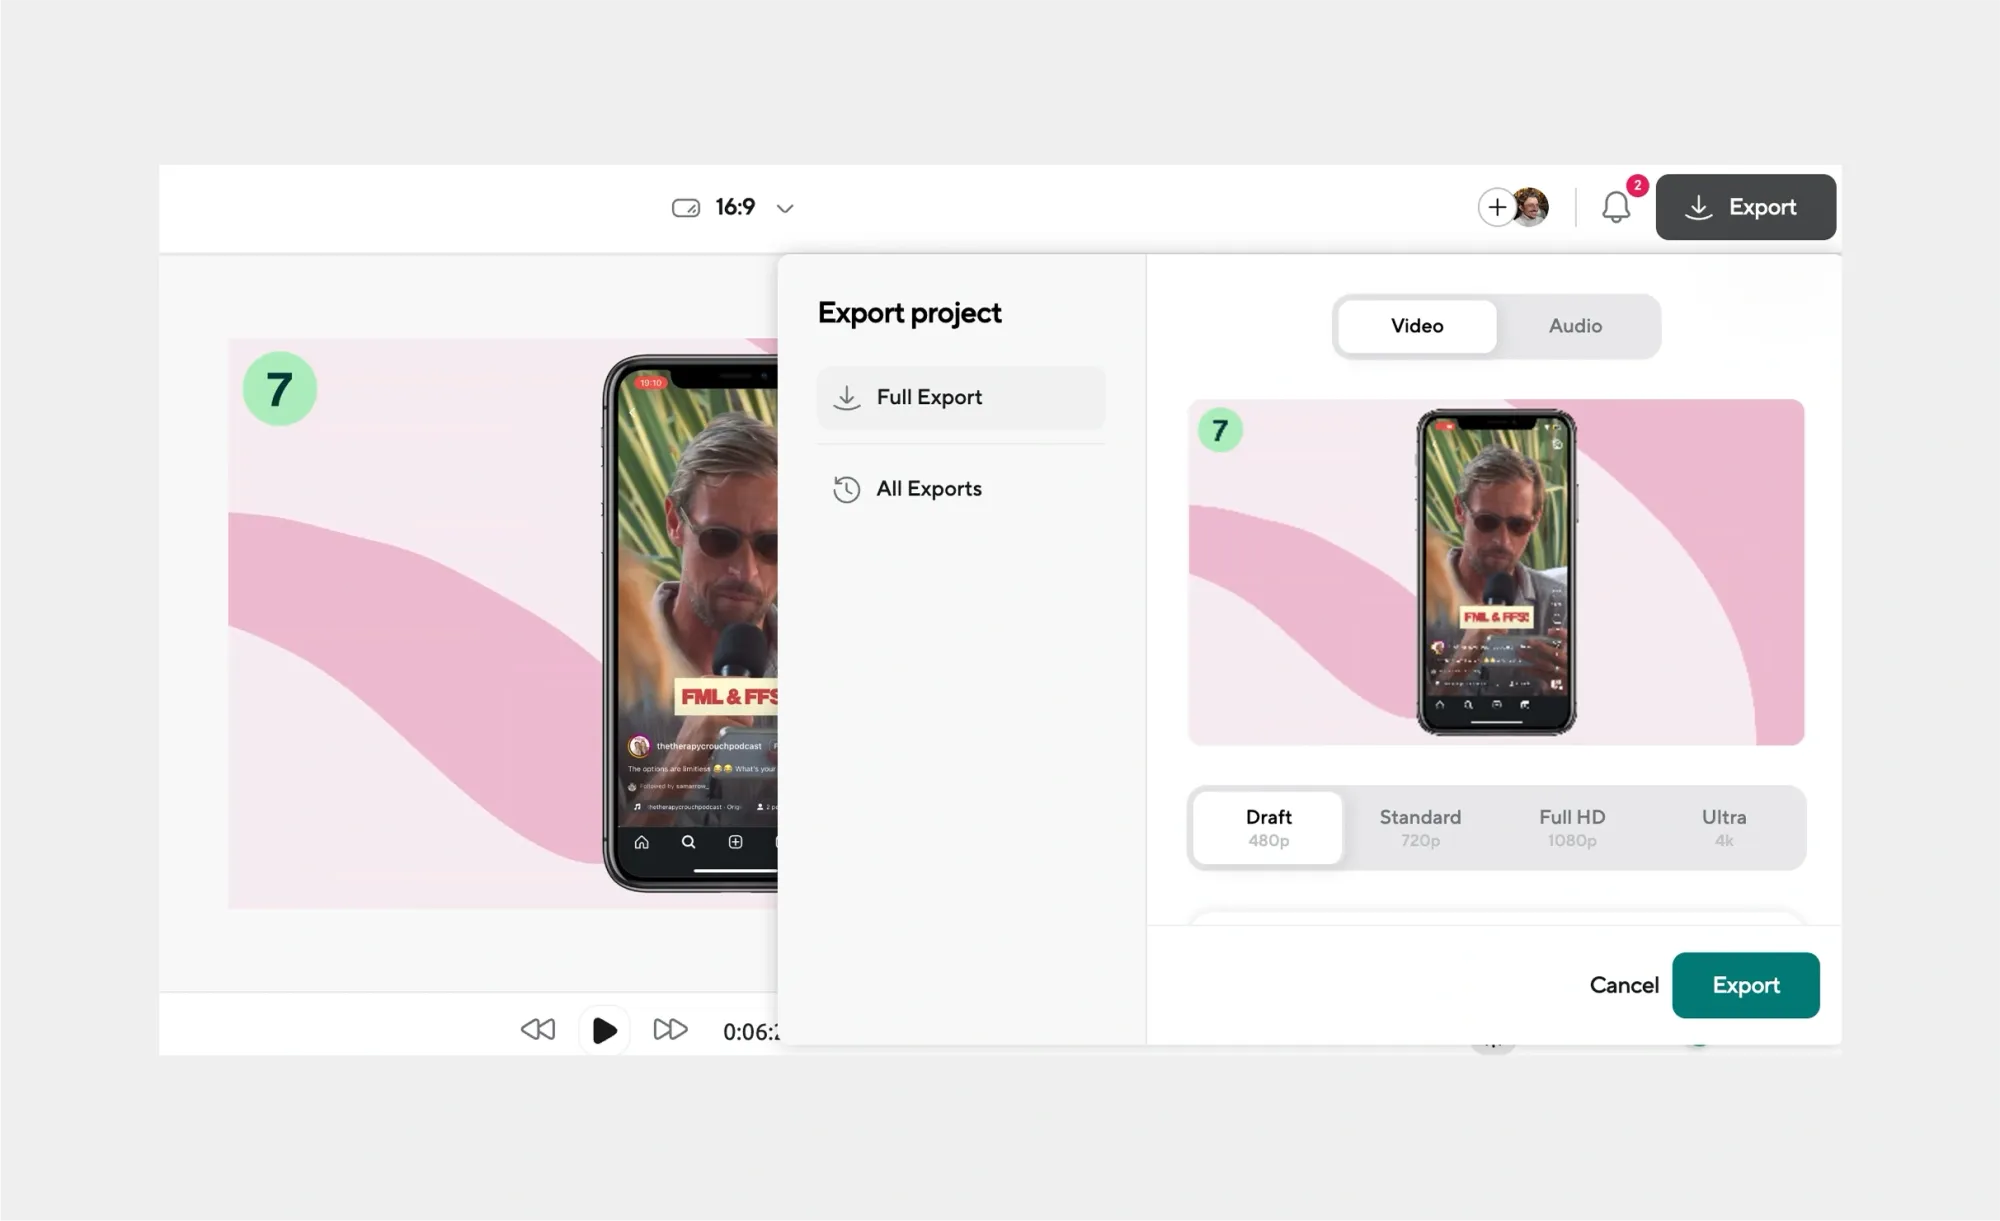
Click the Export button at the top right. Choose your preferred file format (MP3, WAV, etc.). Toggle Download Transcript if you’d like a text version of your audio. Then hit Export and you’re done!
How to screen record on Mac (with sound)
Apple’s built-in screen recording tool makes it easy to capture high-quality video of your screen, but recording sound (whether from your microphone or the system itself) takes a few extra steps. Whether you're narrating a tutorial or capturing in-app audio, here’s how to make sure your screen recording includes the sound you need.
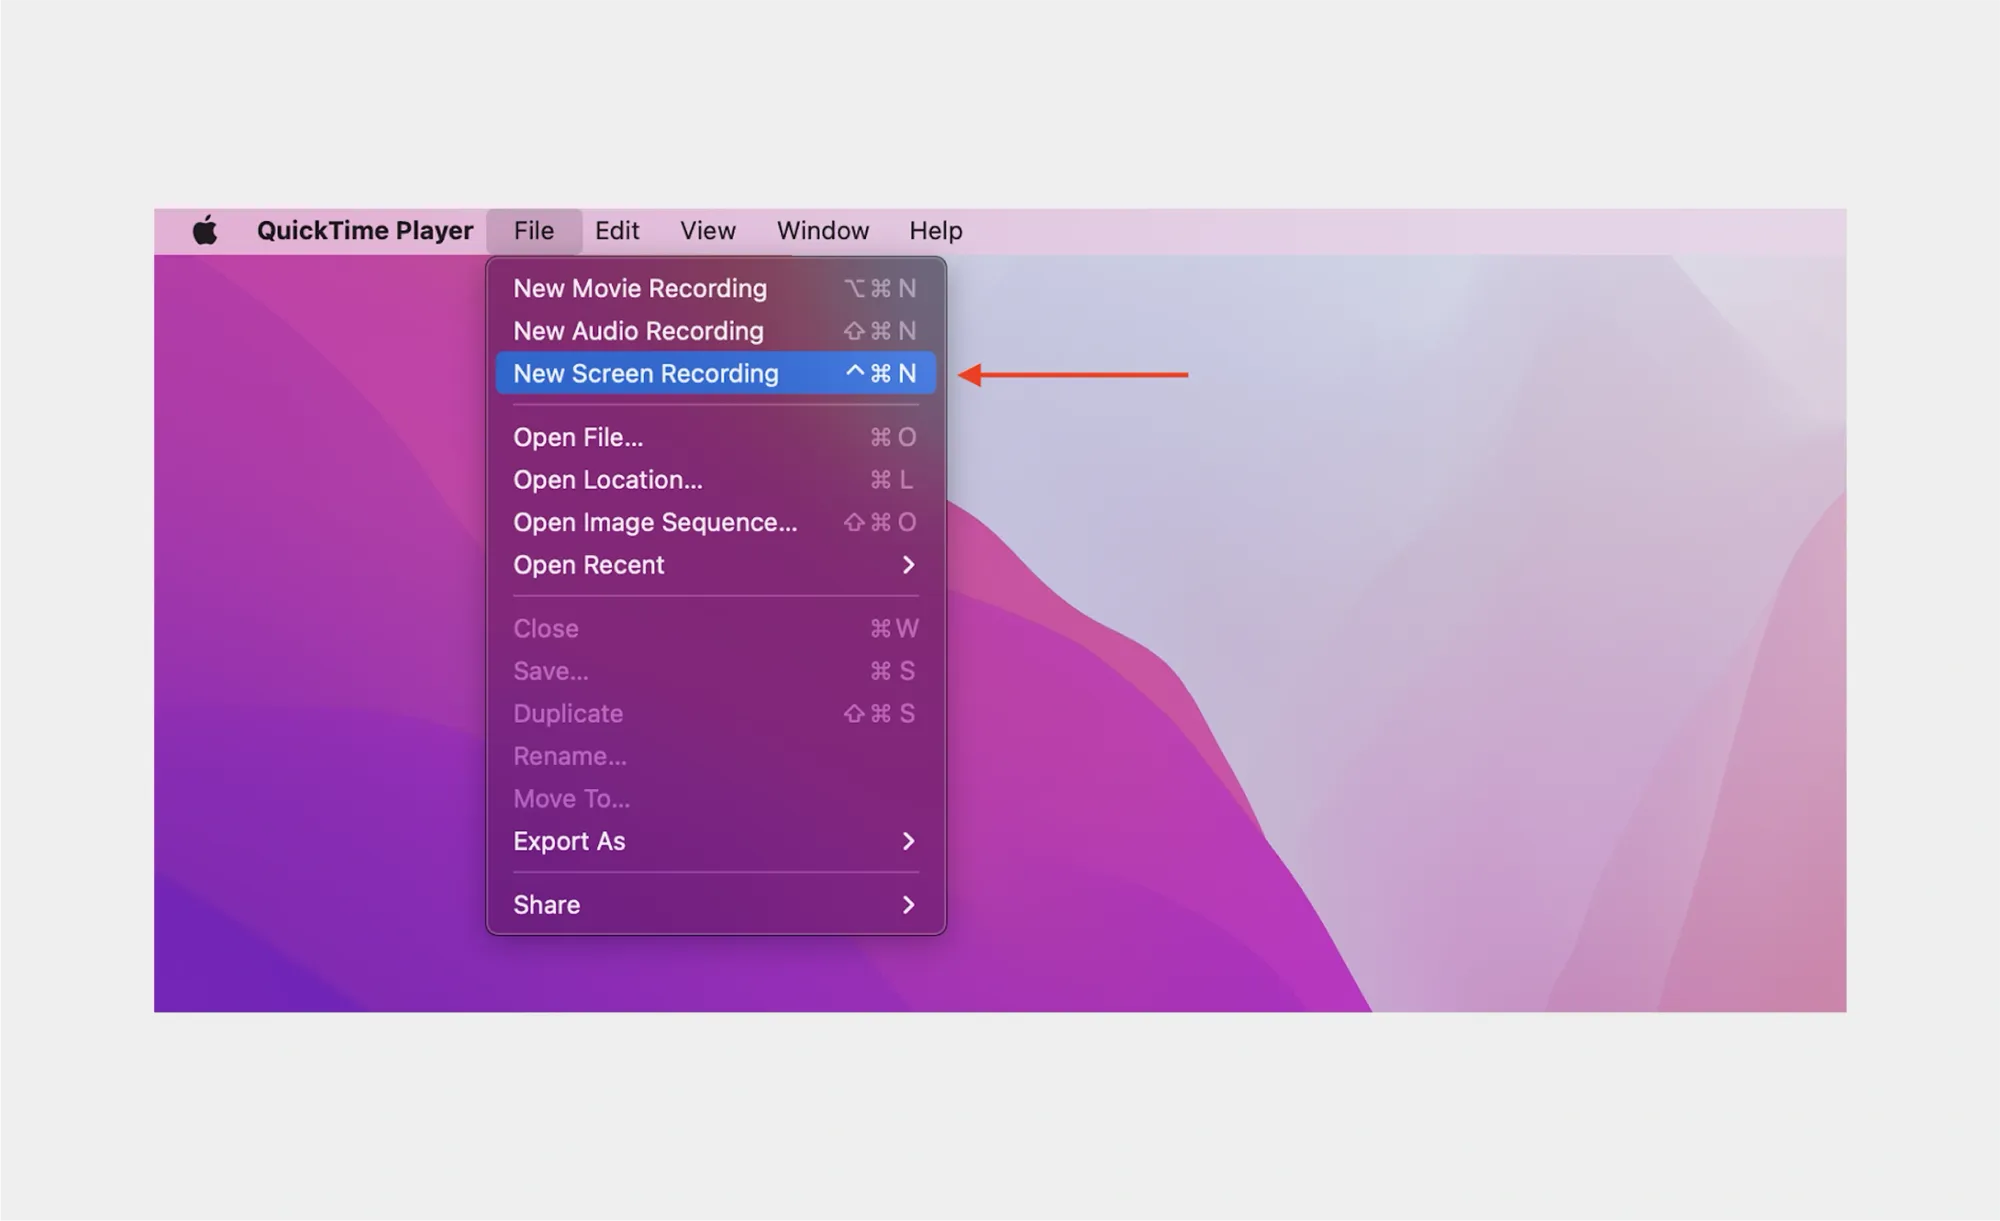
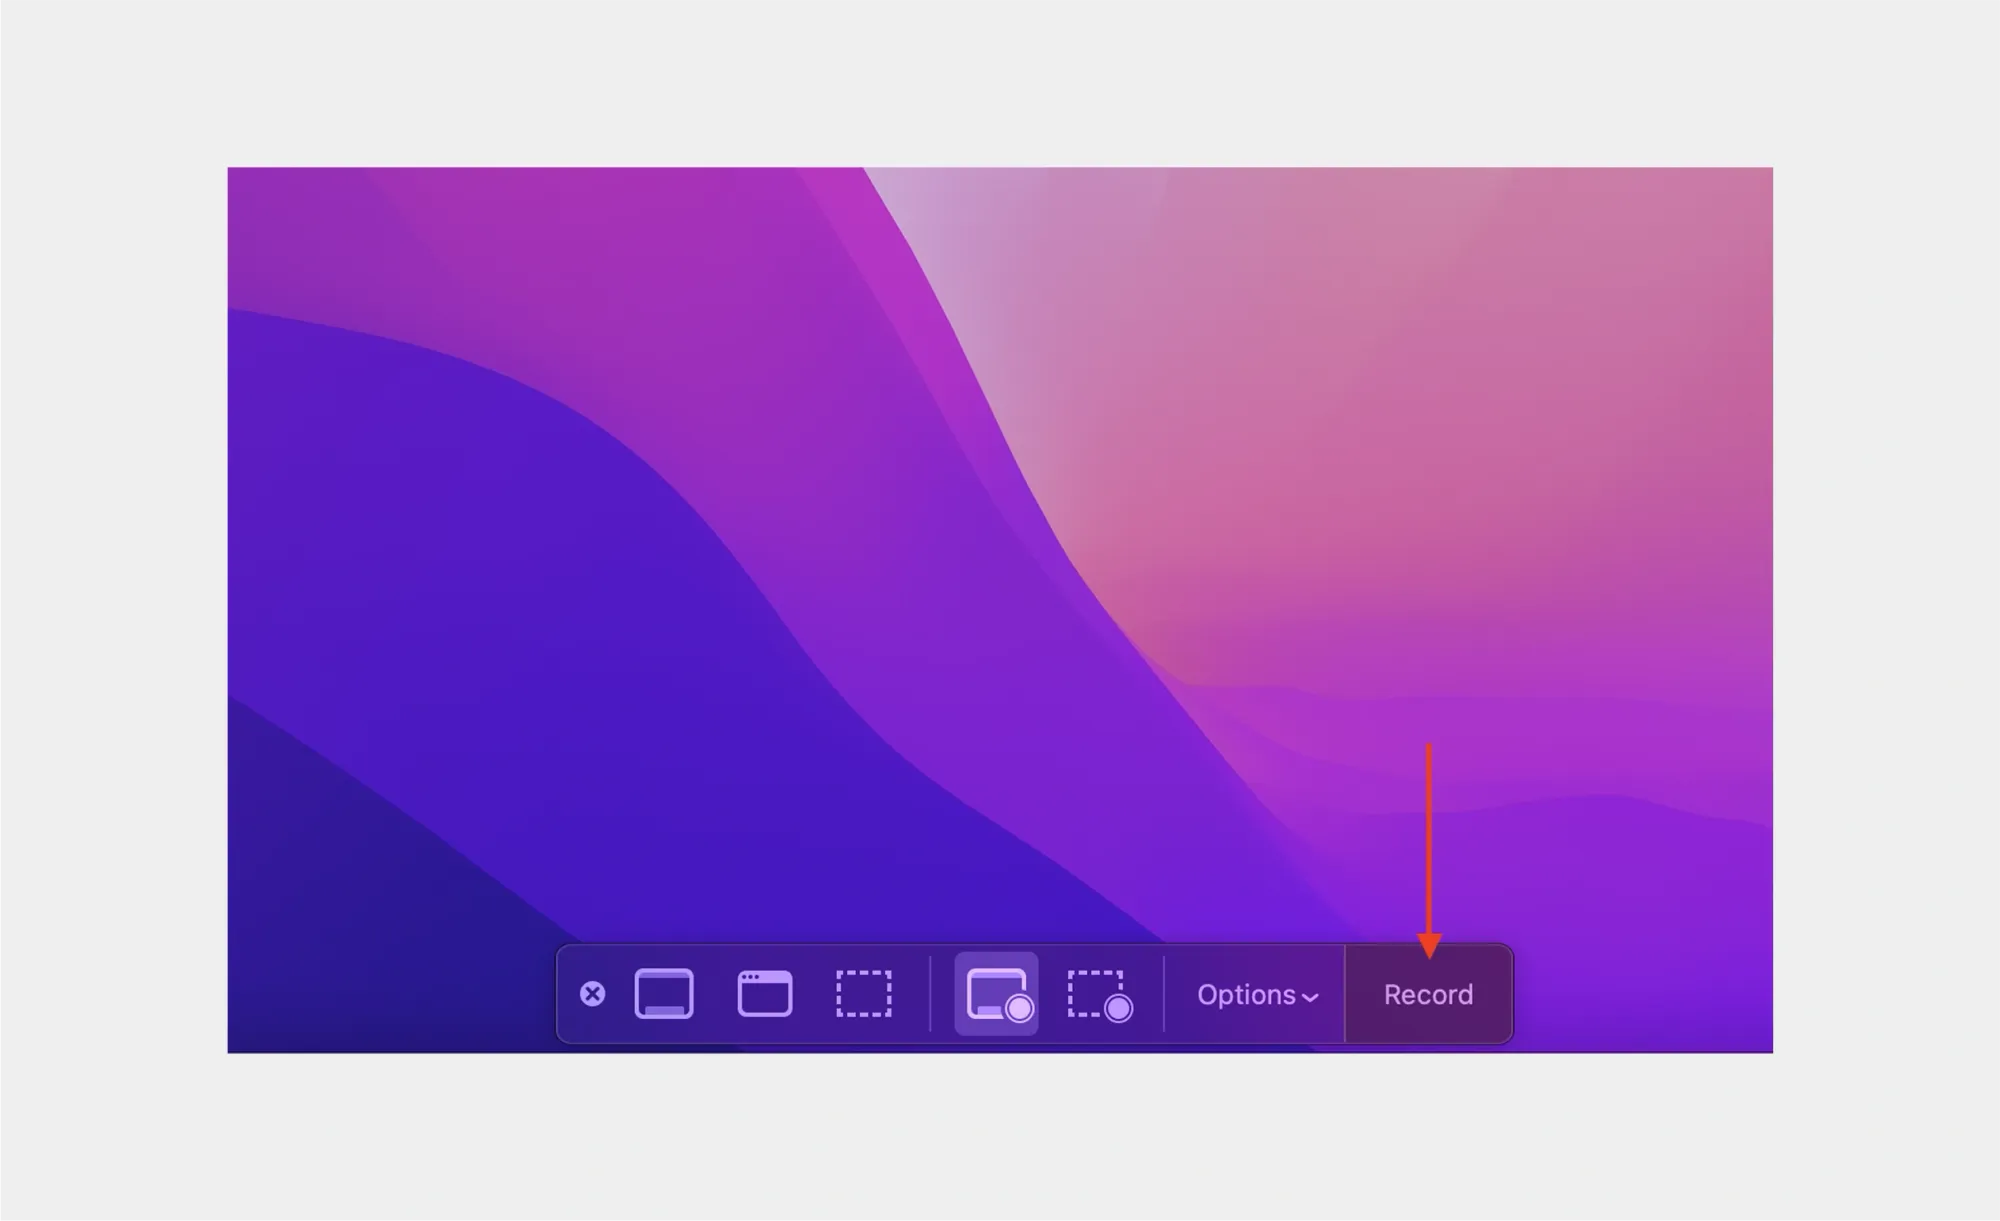
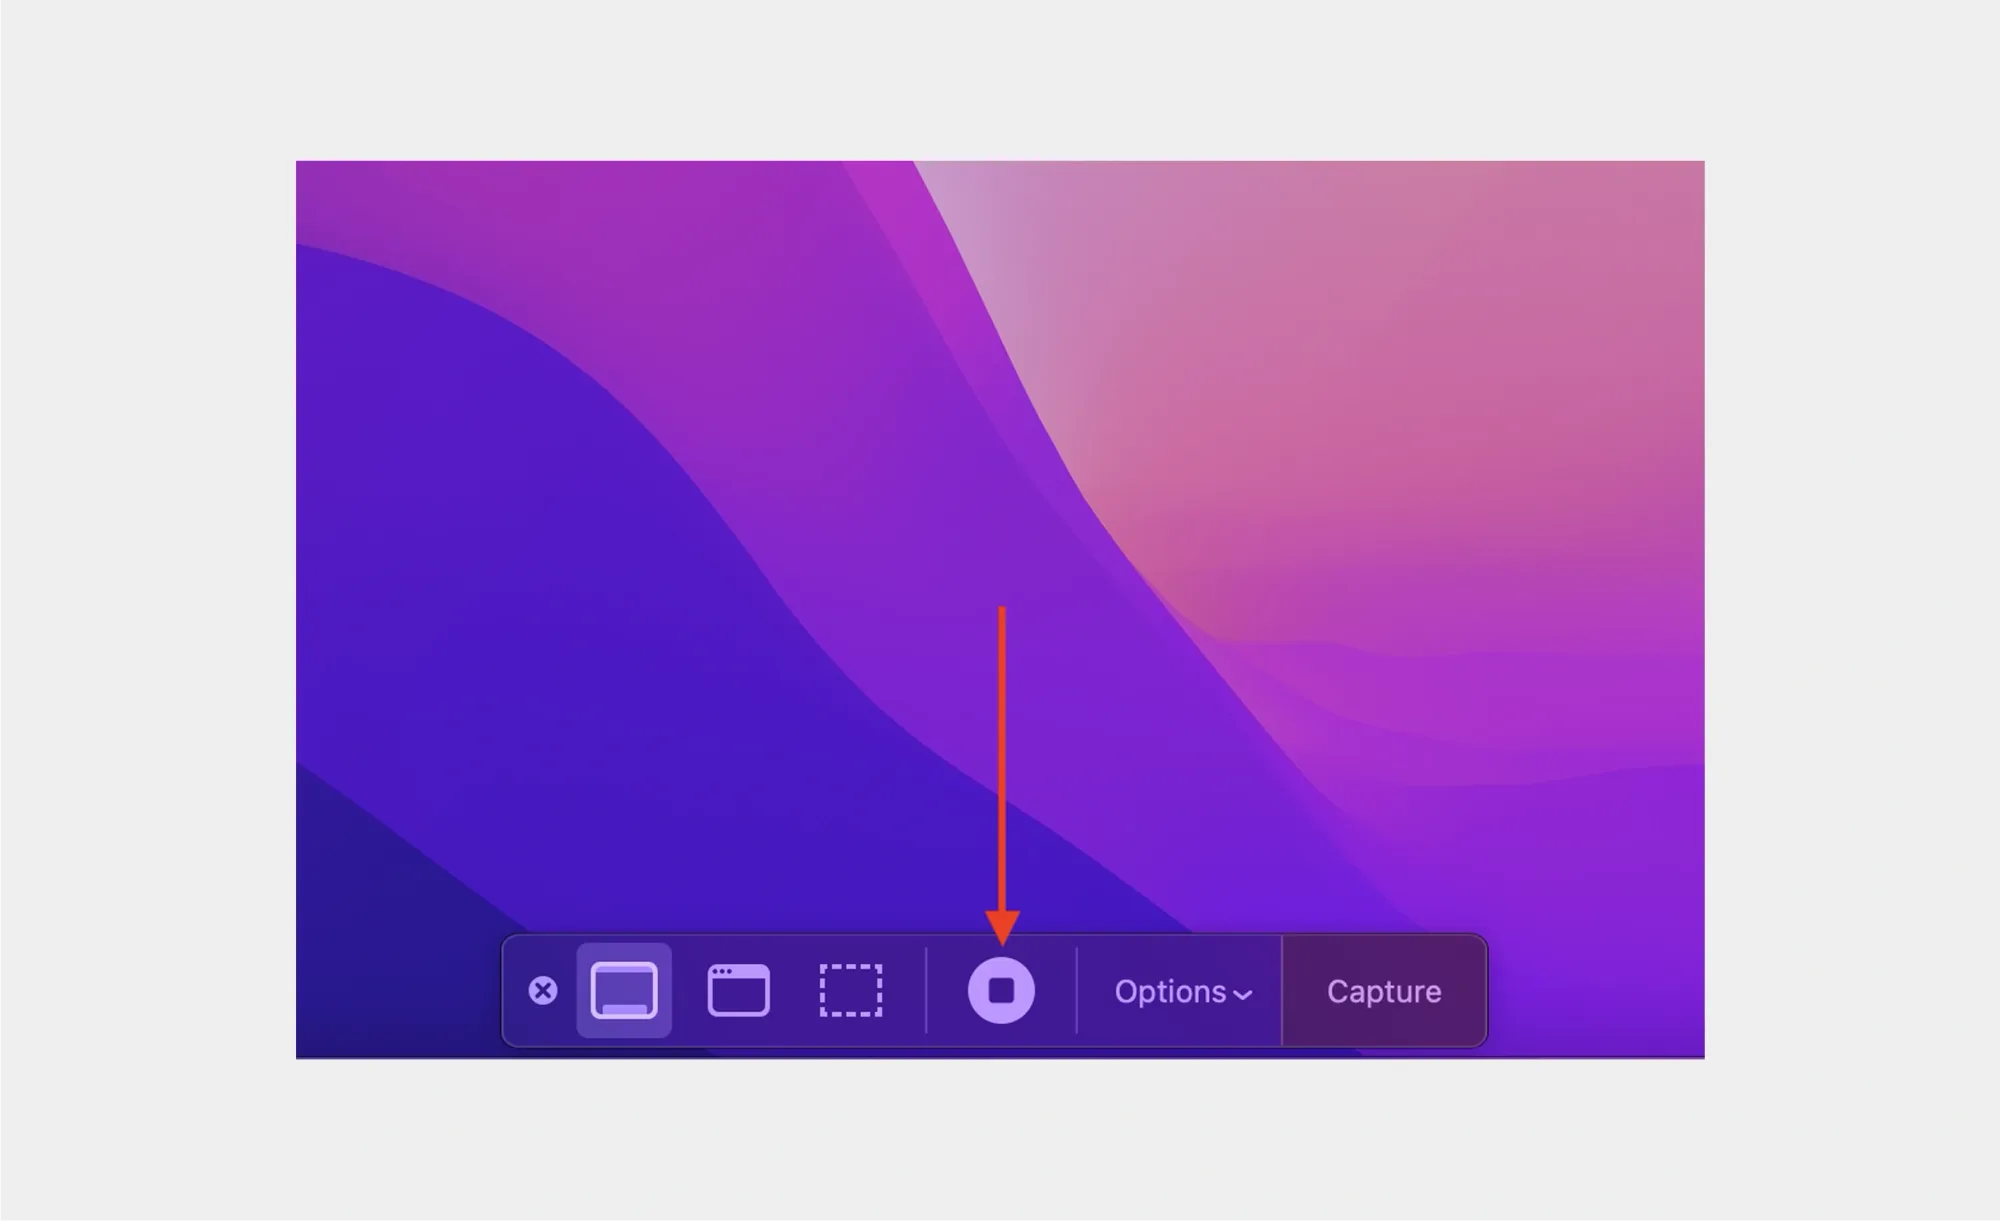
Here’s how to screen record with sound on a Mac:
- Press Command + Shift + 5 to open the screenshot toolbar.
- Click the “Record Entire Screen” or “Record Selected Portion” button.
- Before recording, click “Options.”
- Under "Microphone," select “Built-in Microphone” or any external mic.
- Click “Record” to begin.
- When done, click the stop icon in the menu bar.
Note: If you want to record internal system audio (like music or Zoom calls), you’ll need a third-party tool like BlackHole or Loopback Audio.
How to screen record on Windows
Windows 10 and 11 come with the Xbox Game Bar, which is useful for recording apps and games, but not the desktop or File Explorer. For full-screen recording, we recommend using Podcastle
To record with Xbox Game Bar:
- Open the app you want to record.
- Press Windows + G to launch Xbox Game Bar.
- Click the “Capture” widget (camera icon).
- Make sure your microphone is toggled on.
- Click the “Record” button to start recording.
- Press Windows + Alt + R to stop.
Tip: To ensure your voice is recorded, click the microphone icon in the capture menu.
How to screen record on iOS (iPhone/iPad)
Recording your screen on an iPhone or iPad is quick and convenient thanks to Apple’s built-in screen recording feature. However, if you want to capture sound, whether it’s your voice through the microphone or audio from within an app, you’ll need to adjust a couple of settings before hitting record. Here's how to make sure your iOS screen recordings include the audio you want.
Here’s how to do it:
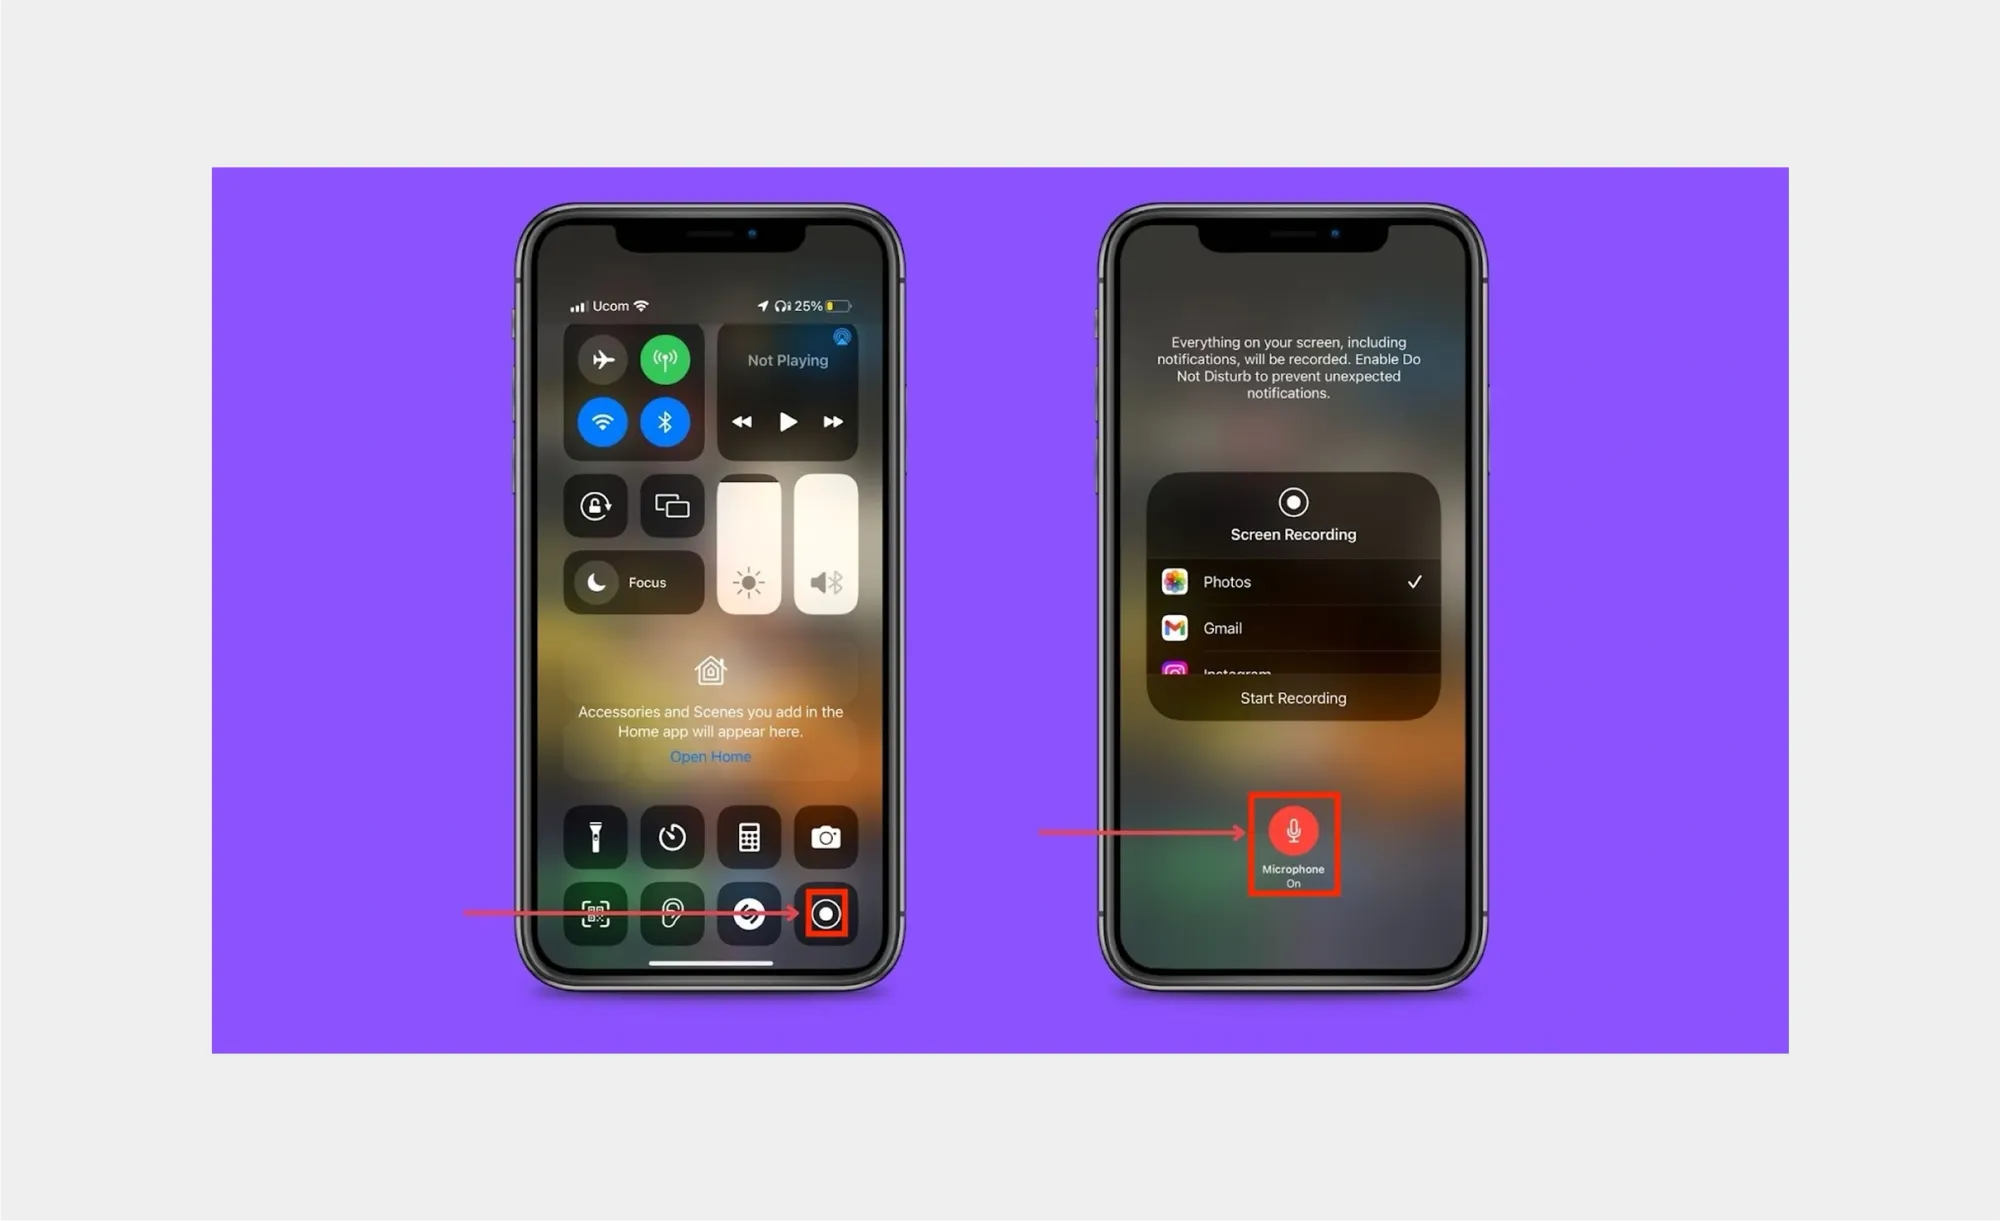
- Open Settings > Control Center and add “Screen Recording” if it’s not already there.
- Swipe down to access Control Center.
- Long-press the “Record” button.
- Tap the microphone icon to turn on external audio.
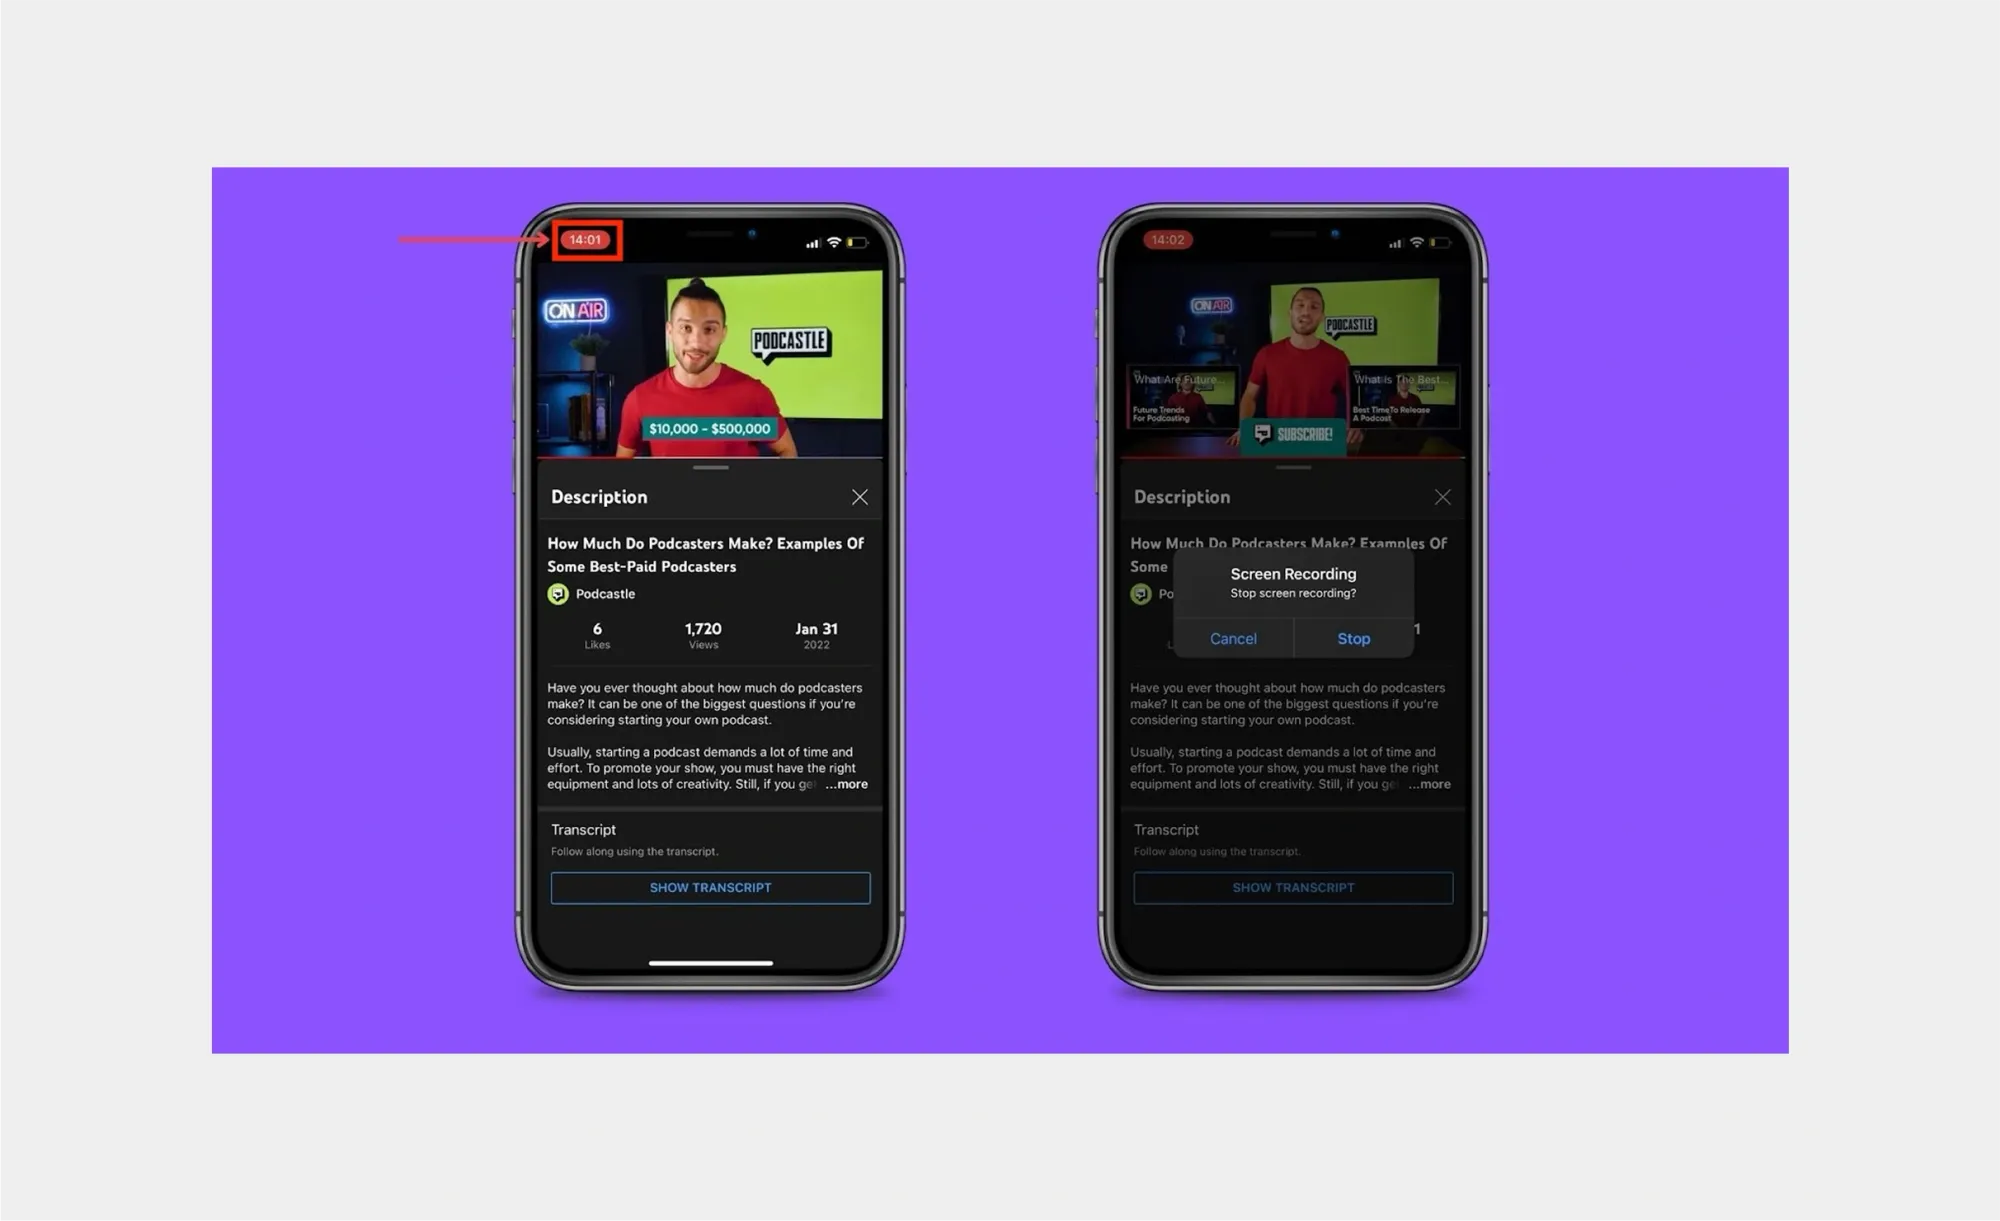
- Tap “Start Recording.” You’ll see a 3-second countdown.
- To stop, tap the red status bar and confirm.
You can record internal sounds (like in-app audio) and external sounds (like your voice) simultaneously.
How to screen record on Android
Android makes it easy to capture your screen, and most devices running Android 11 or later come with a built-in screen recorder, no extra apps required. While the exact steps can vary slightly depending on your phone’s brand (like Samsung, Pixel, or OnePlus), the overall process is simple and straightforward. You can even choose whether to include audio from your microphone, device, or both. Here’s how to get started with screen recording on Android.
Steps for most Android devices:
- Swipe down to access the Quick Settings panel.
- Tap “Screen Record.”
- Choose whether to record audio from the mic, media, or both.
- Tap “Start recording” to begin.
- To stop, press the “Pause” or “Stop” button in the top right corner.
On Samsung devices: Go to Settings > Advanced Features > Screenshots and Screen Recorder to customize your preferences.
How to add audio to video with iMovie
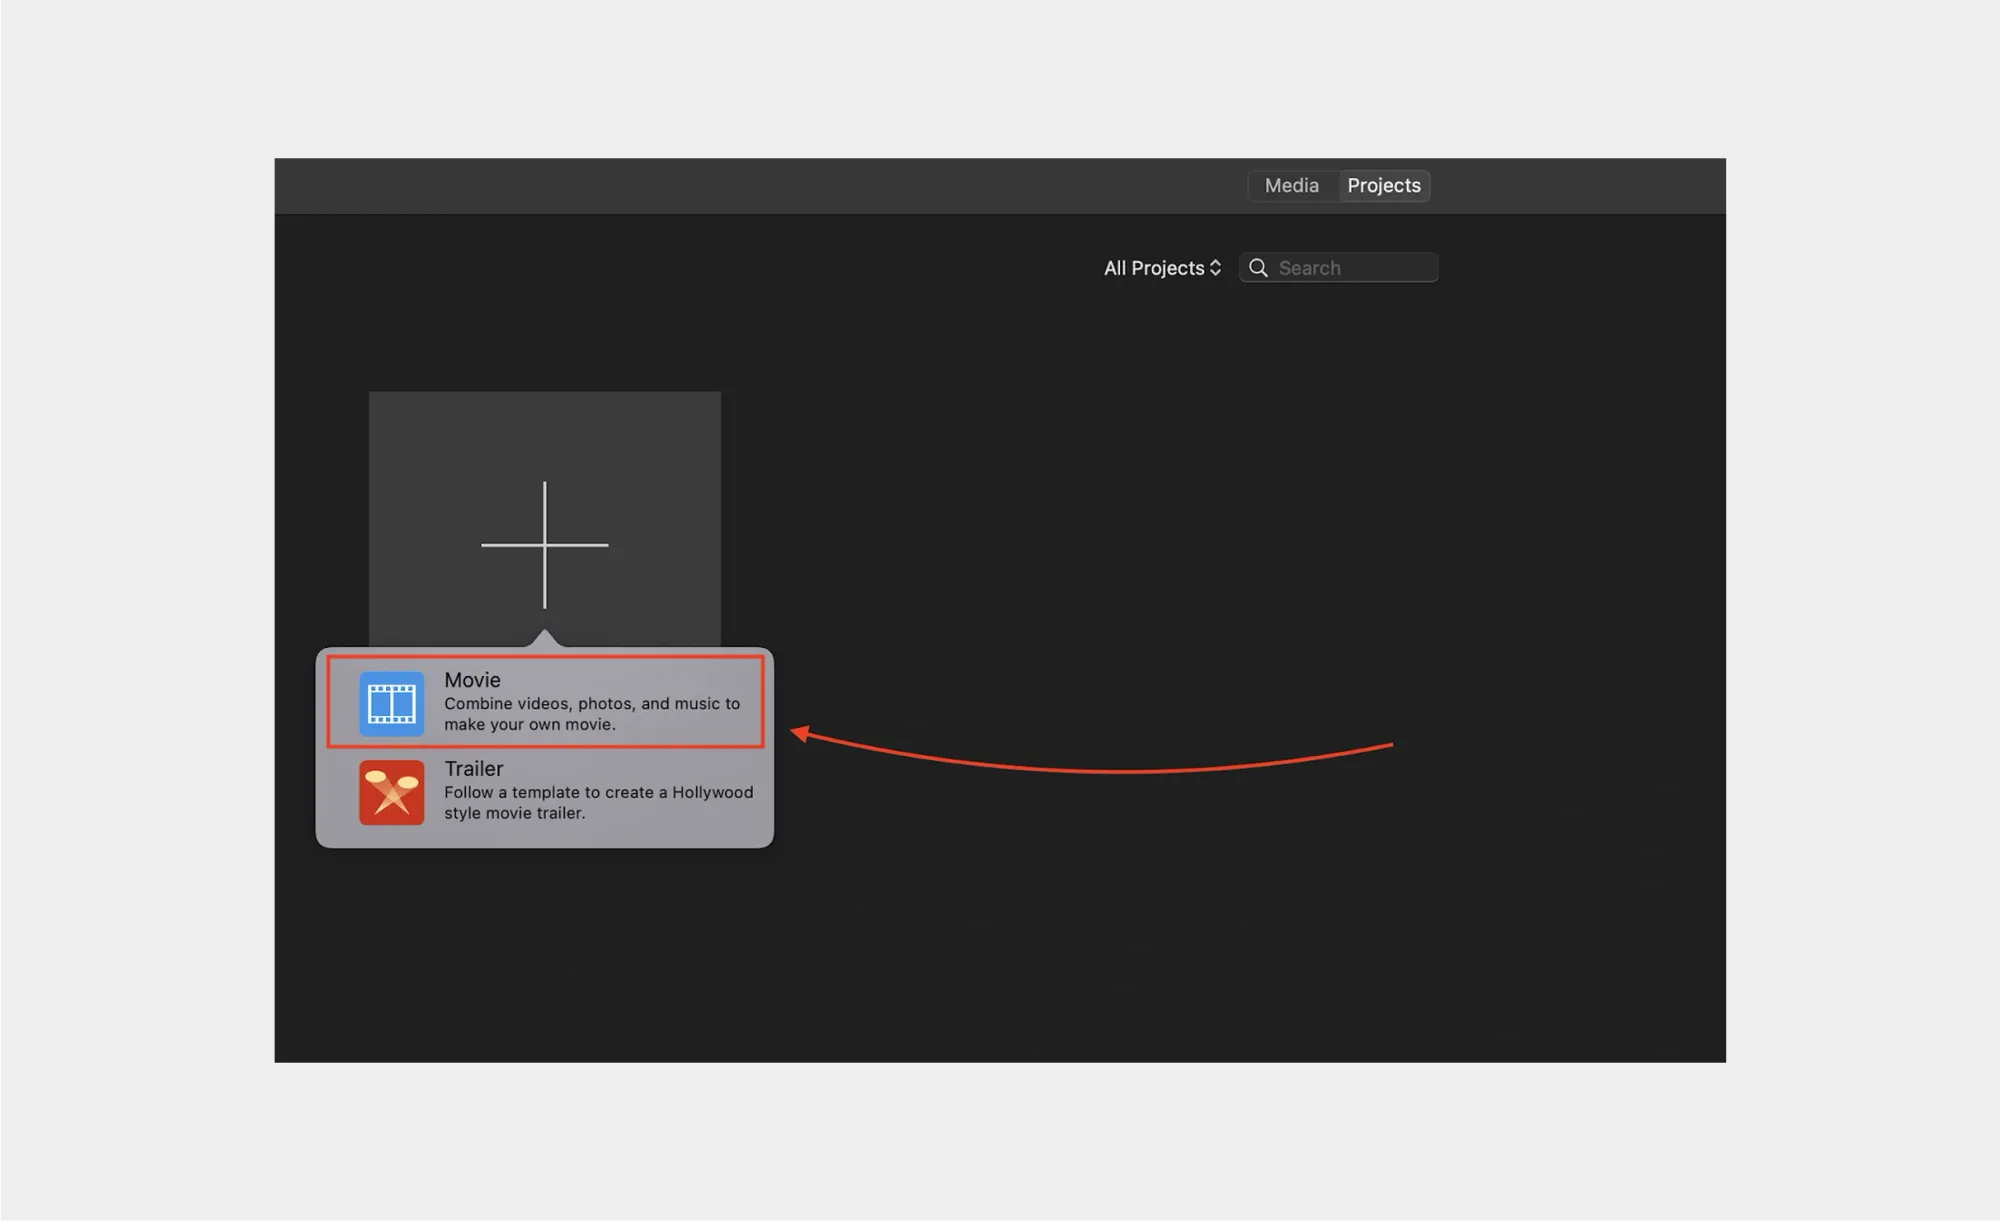
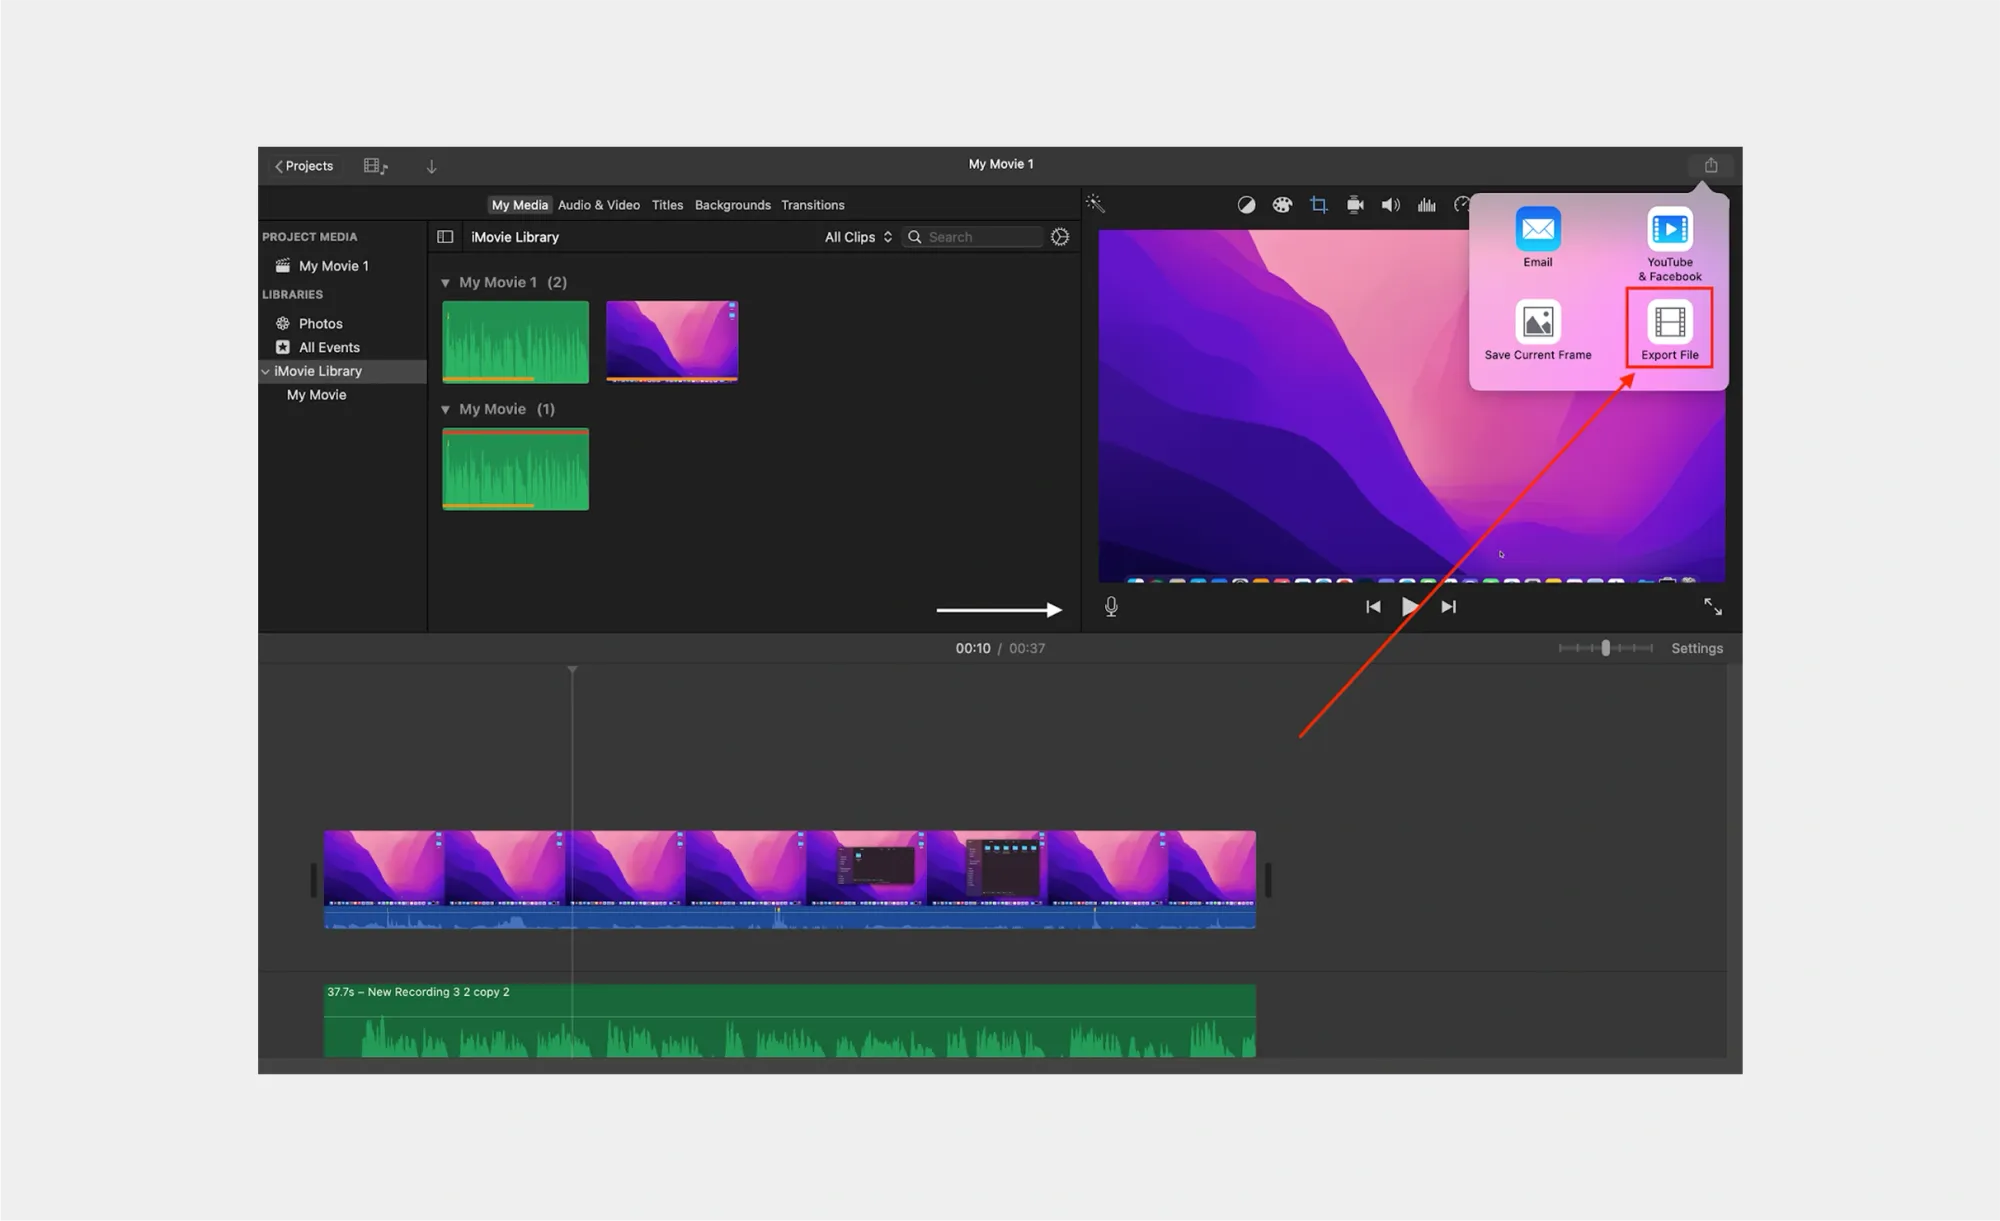
If you're on Mac, one more way you can add audio to video is via iMovie. You can also do this with other paid and free video editing software if you wish, but iMovie comes natively with your Mac, so you don’t have to download additional software.
- Airdrop the video from your device to your Mac and open the iMovie app. If you deleted the software previously, you can download it from the App Store. Click on “Create New” and select “Movie” in iMovie.
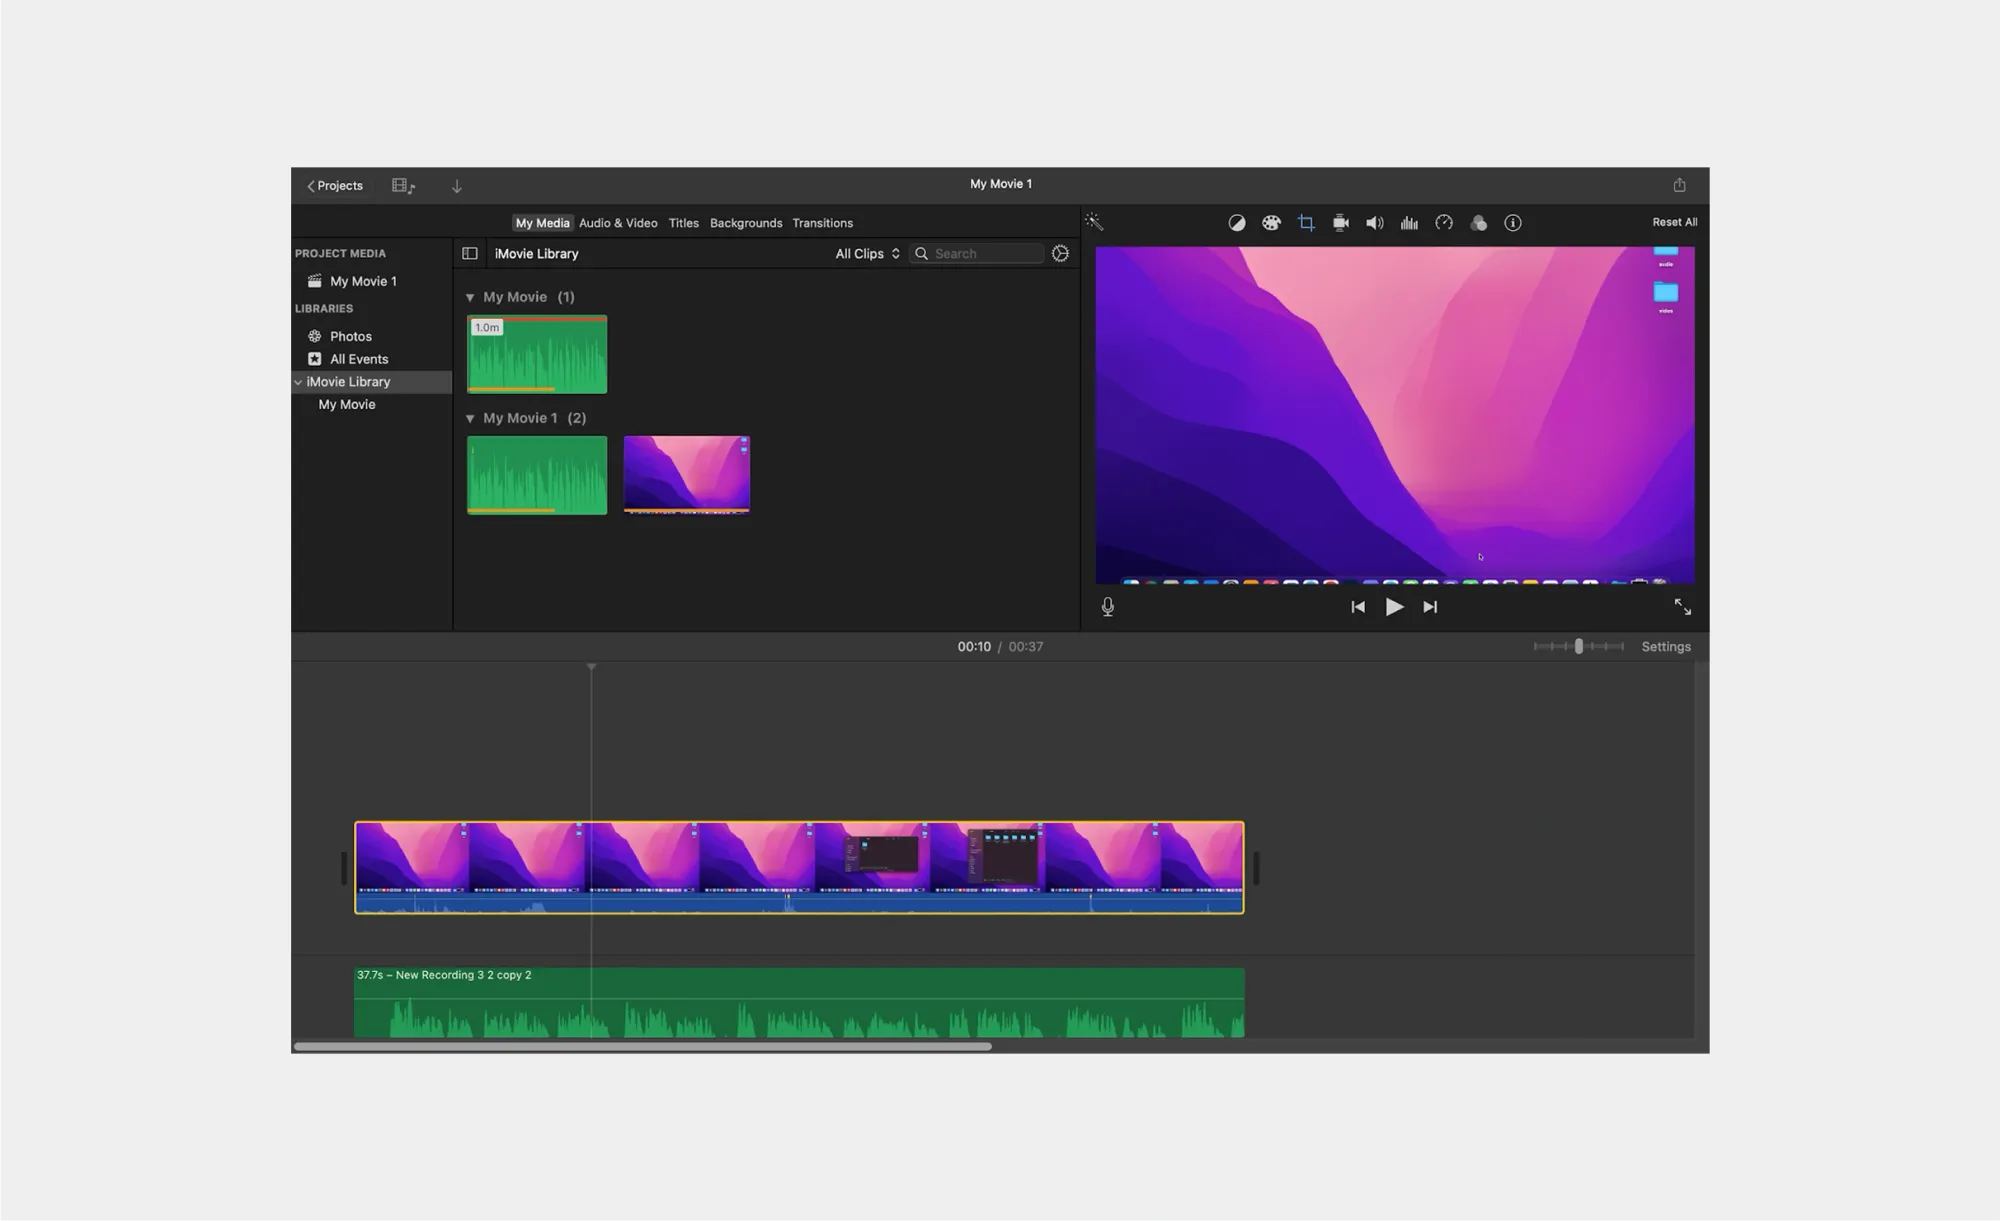
- Drag and drop the video and audio to iMovie on separate tracks and synchronize them. You can also make additional changes to your video.
- Click on the icon at the top-right of the app and select "Export File." Configure the export settings and click “Next.”
What is a screen recording?
A screen recording is a video capture of everything happening on your device’s screen, whether it’s your desktop, an app, or a browser window. Along with the visuals, you can also record audio, which might include your voice via a microphone, system sounds from your device, or both. This combination of visuals and sound makes screen recordings an incredibly useful way to explain, demonstrate, or document something.
Think of it as showing someone exactly what you’re doing on your screen, in real time. Instead of writing out a long explanation, a quick screen recording can walk your audience through a process step by step, making it easier for them to follow and understand.
You can use screen recordings for all kinds of purposes, including:
- Product tutorials – Show users how to use your software or app in action.
- Presentations – Add visuals and narration to slides or reports.
- Online courses – Record lessons, walkthroughs, or how-tos for students.
- Bug reports – Capture issues as they happen to help developers fix them faster.
- Livestream replays – Save and share past streams for your audience to watch later.
- Social media content – Create engaging, behind-the-scenes, or educational posts.
Why make screen recording videos?
Screen recordings have become a go-to format for creators, educators, marketers, and remote teams, and for good reason. They’re one of the most efficient and effective ways to share information, explain processes, and connect with your audience visually.
Here’s why screen recording videos are so powerful:
1. Clear communication
Sometimes words just aren’t enough. Screen recordings let you show exactly what you’re doing on your screen, which is especially helpful for tutorials, walkthroughs, or product demos. No more back-and-forth explanations, just press record and demonstrate.
2. Time-saving
Instead of repeating the same instructions multiple times, a single recording can be shared, reused, or embedded wherever it’s needed. It's a major time-saver for onboarding, customer support, training, and content creation.
3. Professional and personal
Add voiceovers to guide viewers or include webcam footage to make your video feel more human and engaging. It’s a great way to build trust and deliver a message that feels both polished and personal.
4. Easy to create
You don’t need fancy gear or advanced skills to make a high-quality screen recording. With just your device, a mic, and the right tool (like Podcastle), you can record and edit professional videos in minutes, right from your browser.
Screen recording tips
Want to make screen recordings that look polished and professional? Just a few small tweaks can make a big difference in quality. Follow these simple tips to get the most out of every recording:
- Plan before you record. Take down your key talking points or steps so you don’t miss anything important.
- Clean up your screen. Close extra tabs, apps, and desktop clutter to keep the focus on your content.
- Use a quality microphone. Clear audio makes your video more professional and easier to follow; skip the built-in mic if you can.
- Record in a quiet environment. Background noise can be distracting. Try to find a quiet space or use noise reduction tools if needed.
- Turn off notifications. Pause Slack, email, or phone notifications to avoid interruptions during recording.
- Highlight actions. Use your tool’s built-in cursor highlights or keystroke displays to make your movements easier to follow.
- Record separate tracks. Tools like Podcastle give you separate video tracks for your screen and webcam, making editing and repurposing content much easier.
Final thoughts
Screen recordings are one of the most powerful tools for modern communication, especially when combined with sound. Whether you’re creating content for work, education, or fun, adding audio makes your message clearer and more engaging.
If you’re looking for a seamless way to record your screen and voice together, try Podcastle’s Recording Studio. It’s fast, easy, and made for creators like you.
FAQ
Where can I find screen recording on Mac?
Press Command + Shift + 5 to open the screen recording toolbar on macOS. You can also access it via Launchpad > Other > Screenshot.
Can I screen record a phone call?
Technically, yes, but it depends on your device and local laws. iPhones block internal call recording for privacy reasons. Some Android phones allow it with third-party apps. Always get consent from the other party.
Why can’t I use screen recording?
Here are a few reasons screen recording might not work:
- Permissions not granted
- Outdated software
- Storage is full
- App restrictions (some apps block screen recording)
Check your device’s settings or try using a third-party tool like Podcastle.